
Last year at MongoDB World 2019, Eliot announced that MongoDB Atlas Data Lake was a new tool available in beta in the MongoDB Cloud Platform.
During this last year, MongoDB has been working closely with many customers to test this new tool and gathered much feedback to make it even better.
Today, after a year of refinement and improvement, MongoDB is proud to announce that MongoDB Atlas Data Lake is now generally available and can be used with confidence in your production environment.
In this tutorial, I will show you a new feature of MongoDB Atlas Data Lake called Federated Query that allows you to access your archived documents in S3 AND your documents in your MongoDB Atlas cluster with a SINGLE MQL query.
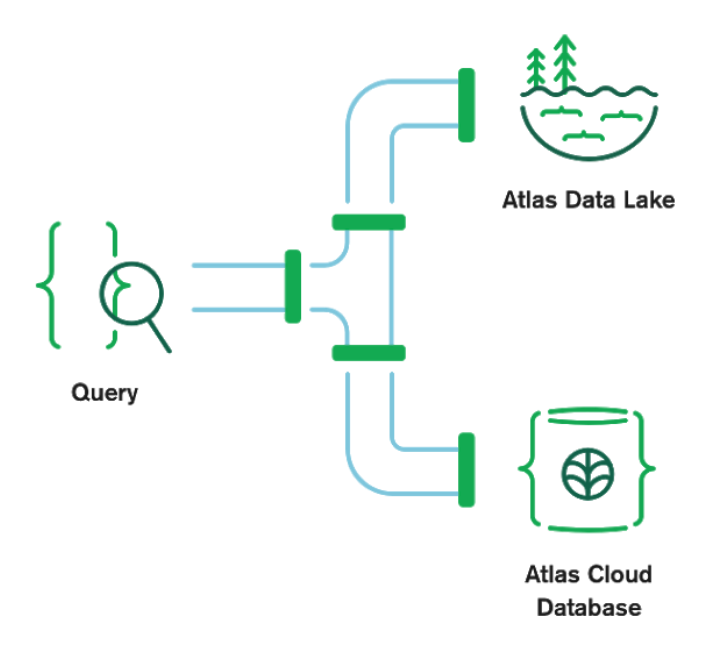
This feature is really amazing because it allows you to have easy access to your archived data in S3 along with your "hot" data in your Atlas cluster. This feature could help you prevent your Atlas clusters from growing in size indefinitely and reduce your costs drastically. It also makes it easier to gain new insights by easily querying data residing in S3 and exposing it to your real-time app.
Finally, I will show you how to use the new version of the $out aggregation pipeline stage to write documents from a MongoDB Atlas cluster into an AWS S3 bucket.
#Prerequisistes
In order to follow along this tutorial, you need to:
- create at least an M10 cluster in MongoDB Atlas,
- create a user in the Database Access menu,
- add your IP address in the IP whitelist in the Network Access menu,
- have python 3 with
pymongoanddnspythonlibs installed, - you will also need to have a Mongo Shell installed or maybe the new Mongosh.
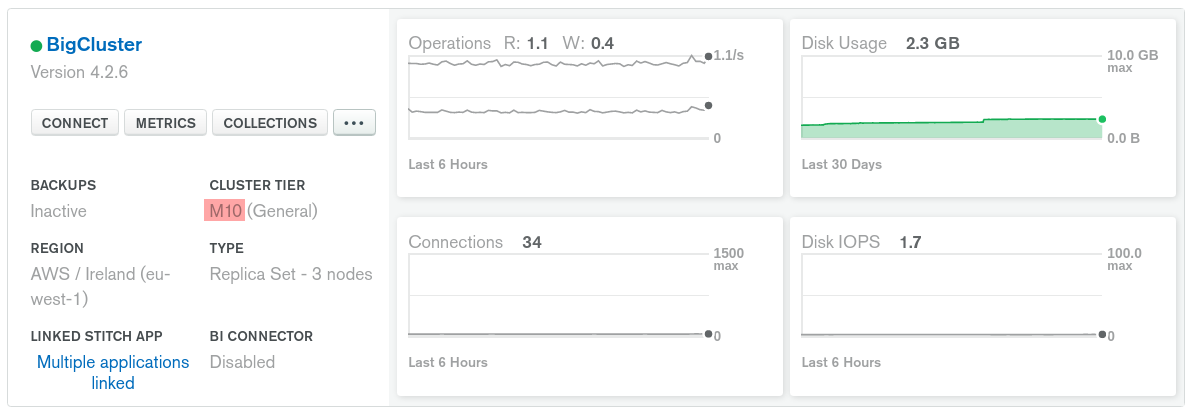
If you did these actions correctly, you should have an M10 (or bigger) cluster running in your MongoDB Atlas project.
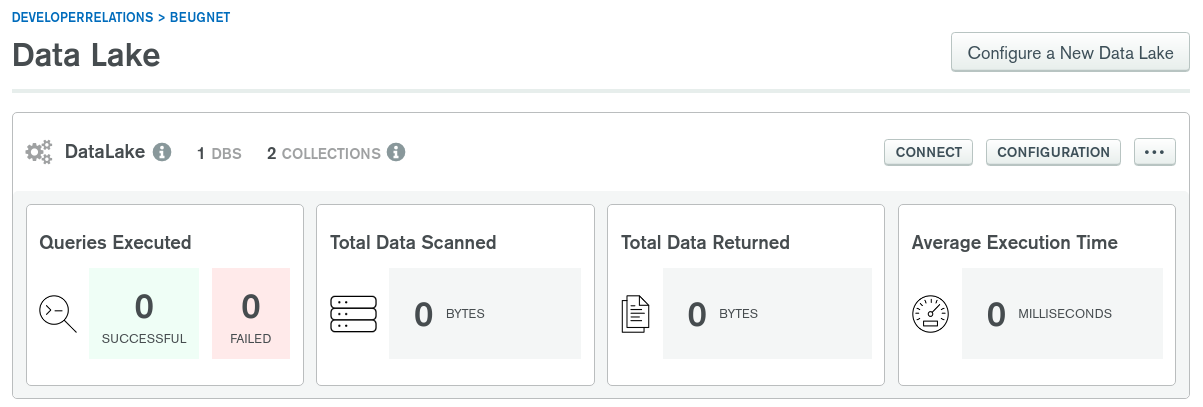
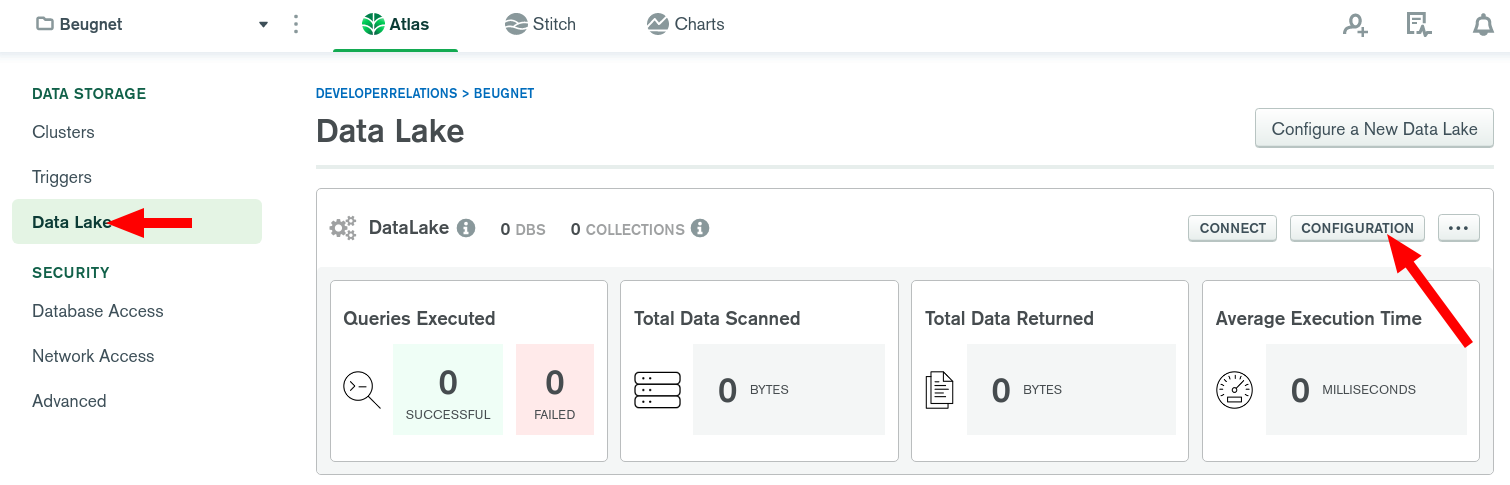
And your Data Lake page should look like this:
You should also have an AWS S3 bucket linked to your Atlas Data Lake setup. Mine is called cold-data-mongodb in this tutorial.
A MongoDB Atlas M10 or bigger cluster is required here because MongoDB Atlas Data Lake uses X.509 certificates which are not supported on MongoDB Atlas shared tier at this time.
#We need some data
To illustrate how $out and federated queries work, I will use an overly simple dataset to keep things as easy as possible to understand.
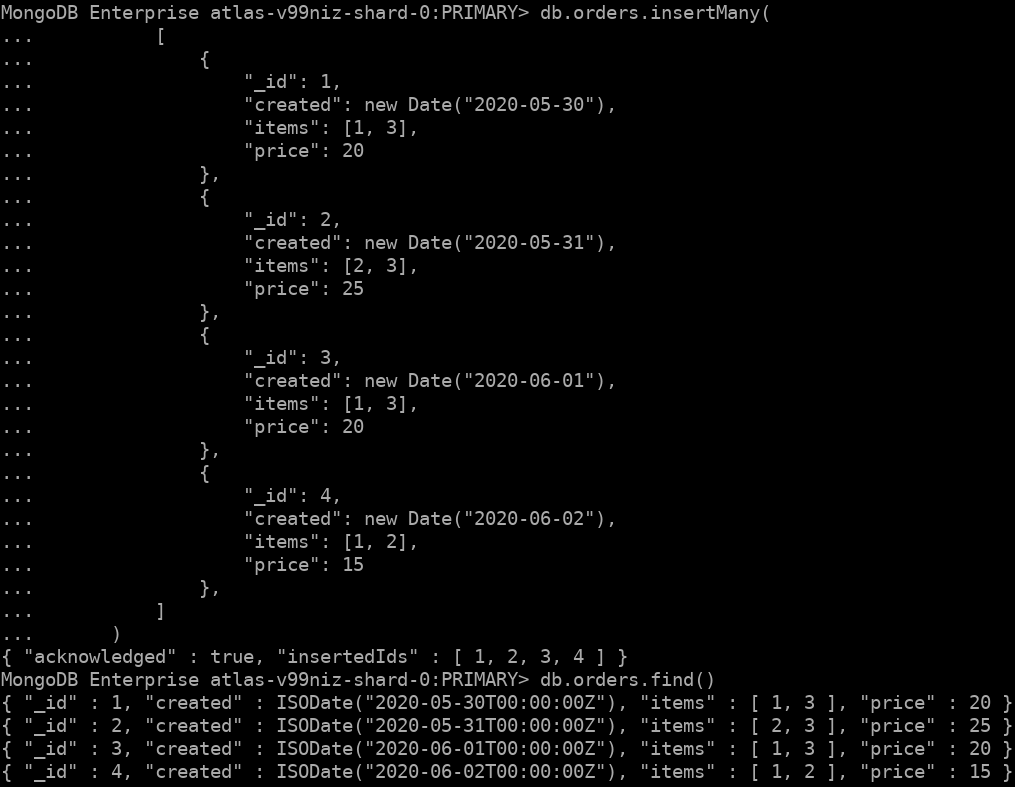
Connect to your M10 cluster using the CONNECT button using the Mongo Shell and let's insert these 4 documents in the test database:
1 db.orders.insertMany( 2 [ 3 { 4 "_id": 1, 5 "created": new Date("2020-05-30"), 6 "items": [1, 3], 7 "price": 20 8 }, 9 { 10 "_id": 2, 11 "created": new Date("2020-05-31"), 12 "items": [2, 3], 13 "price": 25 14 }, 15 { 16 "_id": 3, 17 "created": new Date("2020-06-01"), 18 "items": [1, 3], 19 "price": 20 20 }, 21 { 22 "_id": 4, 23 "created": new Date("2020-06-02"), 24 "items": [1, 2], 25 "price": 15 26 }, 27 ] 28 )
This is the result you should see in your terminal:
#Archive Data to S3 with $out
Now that we have a "massive" collection of orders, we can consider archiving the oldest orders to an S3 bucket. Let's imagine that once a month is over, I can archive all the orders from the previous month. I will create one JSON file in S3 for all the orders created during the previous month.
Let's transfer these orders to S3 using the aggregation pipeline stage $out.
But first, we need to configure Atlas Data Lake correctly.
#Data Lake Configuration
The first thing we need to do is to make sure we can write to our S3 bucket and read the archived orders as well as the current orders in my M10 cluster.
This new feature in MongoDB Atlas Data Lake is called Federated Queries.
Now head to your Data Lake configuration:
And let's use the following configuration:
1 { 2 "databases": [ 3 { 4 "name": "test", 5 "collections": [ 6 { 7 "name": "orders", 8 "dataSources": [ 9 { 10 "path": "/{min(created) isodate}-{max(created) isodate}*", 11 "storeName": "cold-data-mongodb" 12 }, 13 { 14 "collection": "orders", 15 "database": "test", 16 "storeName": "BigCluster" 17 } 18 ] 19 } 20 ], 21 "views": [] 22 } 23 ], 24 "stores": [ 25 { 26 "provider": "s3", 27 "bucket": "cold-data-mongodb", 28 "delimiter": "/", 29 "includeTags": false, 30 "name": "cold-data-mongodb", 31 "region": "eu-west-1" 32 }, 33 { 34 "provider": "atlas", 35 "clusterName": "BigCluster", 36 "name": "BigCluster", 37 "projectId": "5e78e83fc61ce37535921257" 38 } 39 ] 40 }
In this configuration, you can see that we have configured:
- an S3
store: this is my S3 bucket that I named "cold-data-mongodb", - an Atlas
store: this is my M10 cluster, - a database
testwith a collectionordersthat contains the data from this S3 store AND the data from my collectiontest.ordersfrom my M10 cluster.
Feel free to replace
cold-data-mongodbwith your own bucket name. The very same one that you used during the Atlas Data Lake setup.
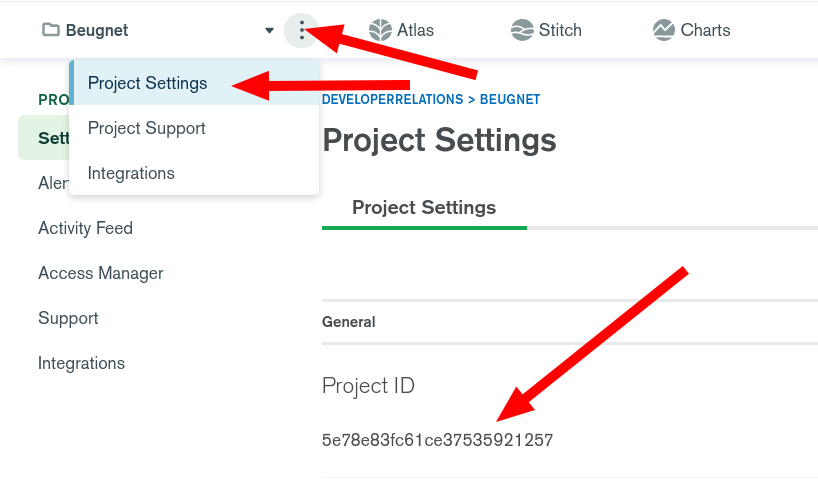
You can find your MongoDB Atlas project ID in your project settings:
In the path, I also told Atlas Data Lake that the JSON filename contains the min and max created dates of the orders it contains. This is useful for performance purposes: Atlas Data Lake won't have to scan all the files if I'm looking for an order on a given date. You can read more about data partitioning in the Data Lake documentation.
#$out to S3
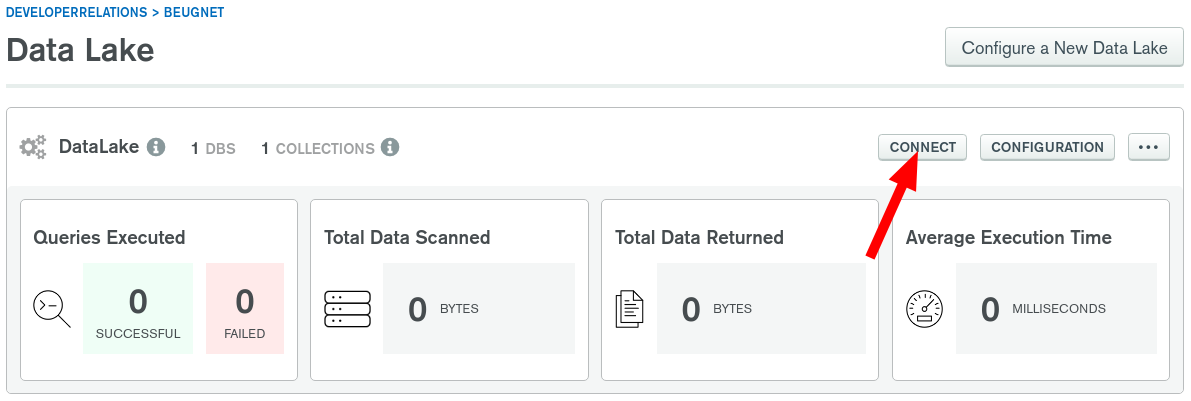
Let's now collect the URI we are going to use to connect to Atlas Data Lake.
Click on the connect button:
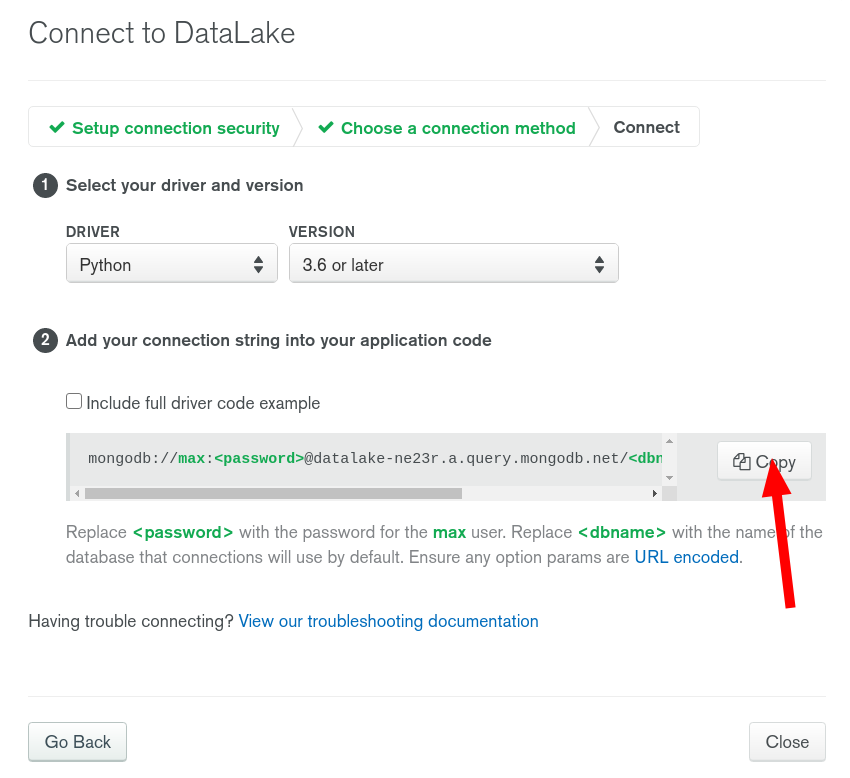
Click on "Connect your application" and collect your URI:
Now let's use Python to execute our aggregation pipeline and archive the 2 orders from May 2020 in our S3 bucket.
1 from datetime import datetime 2 3 from pymongo import MongoClient 4 5 client = MongoClient('<YOUR_ATLAS_DATA_LAKE_URI>') 6 db = client.get_database("test") 7 coll = db.get_collection("orders") 8 9 start_date = datetime(2020, 5, 1, 0, 0, 0) # May 1st 10 end_date = datetime(2020, 6, 1, 0, 0, 0) # June 1st 11 12 pipeline = [ 13 { 14 '$match': { 15 'created': { 16 '$gte': start_date, 17 '$lt': end_date 18 } 19 } 20 }, 21 { 22 '$out': { 23 's3': { 24 'bucket': 'cold-data-mongodb', 25 'region': 'eu-west-1', 26 'filename': start_date.isoformat('T', 'milliseconds') + 'Z-' + end_date.isoformat('T', 'milliseconds') + 'Z', 27 'format': {'name': 'json', 'maxFileSize': "200MiB"} 28 } 29 } 30 } 31 ] 32 33 coll.aggregate(pipeline) 34 print('Archive created!')
To execute this code, make sure you have Python 3 and the dependencies:
1 $ python3 --version 2 Python 3.8.3 3 $ pip3 install pymongo dnspython 4 Requirement already satisfied: pymongo in /home/polux/.local/lib/python3.8/site-packages (3.10.1) 5 Requirement already satisfied: dnspython in /home/polux/.local/lib/python3.8/site-packages (1.16.0) 6 $ python3 archive.py 7 Archive created!
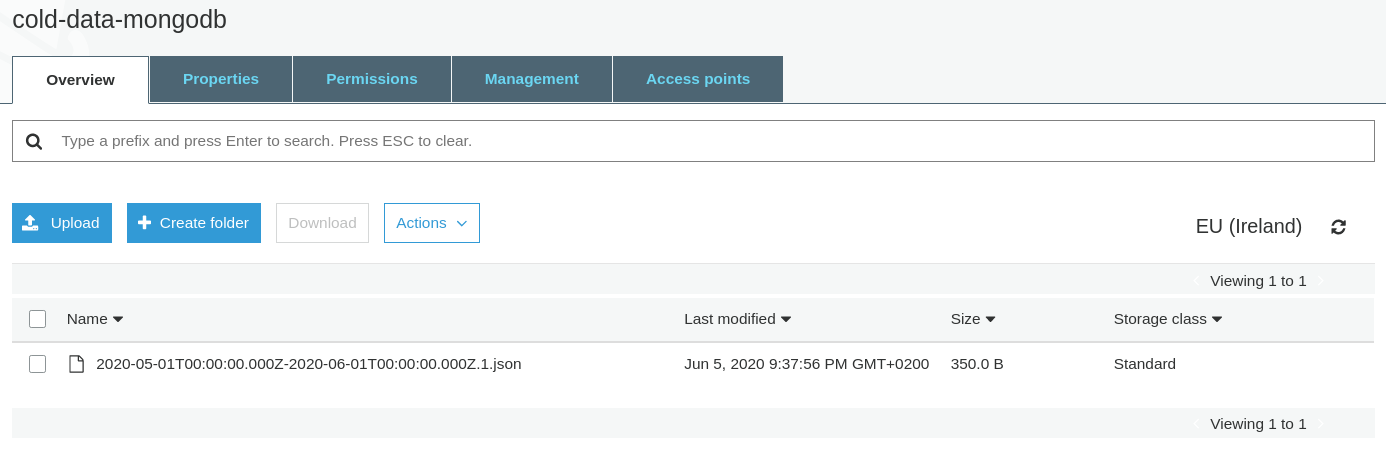
And now we can confirm that our archive was created correctly in our S3 bucket:
#Finish the Work
Now that our orders are safe in S3, I can delete these 2 orders from my Atlas cluster. Let's use Python again but this time, we need to use the URI from our Atlas cluster. The Atlas Data Lake URI doesn't allow this kind of operation.
1 from datetime import datetime 2 3 from pymongo import MongoClient 4 5 client = MongoClient('<YOUR-ATLAS-URI>') 6 db = client.get_database("test") 7 coll = db.get_collection("orders") 8 9 start_date = datetime(2020, 5, 1, 0, 0, 0) # May 1st 10 end_date = datetime(2020, 6, 1, 0, 0, 0) # June 1st 11 query = { 12 'created': { 13 '$gte': start_date, 14 '$lt': end_date 15 } 16 } 17 18 result = coll.delete_many(query) 19 print('Deleted', result.deleted_count, 'orders.')
Let's run this code:
1 $ python3 remove.py 2 Deleted 2 orders.
Now let's double check what we have in S3. Here is the content of the S3 file I downloaded:
1 {"_id":{"$numberDouble":"1.0"},"created":{"$date":{"$numberLong":"1590796800000"}},"items":[{"$numberDouble":"1.0"},{"$numberDouble":"3.0"}],"price":{"$numberDouble":"20.0"}} 2 {"_id":{"$numberDouble":"2.0"},"created":{"$date":{"$numberLong":"1590883200000"}},"items":[{"$numberDouble":"2.0"},{"$numberDouble":"3.0"}],"price":{"$numberDouble":"25.0"}}
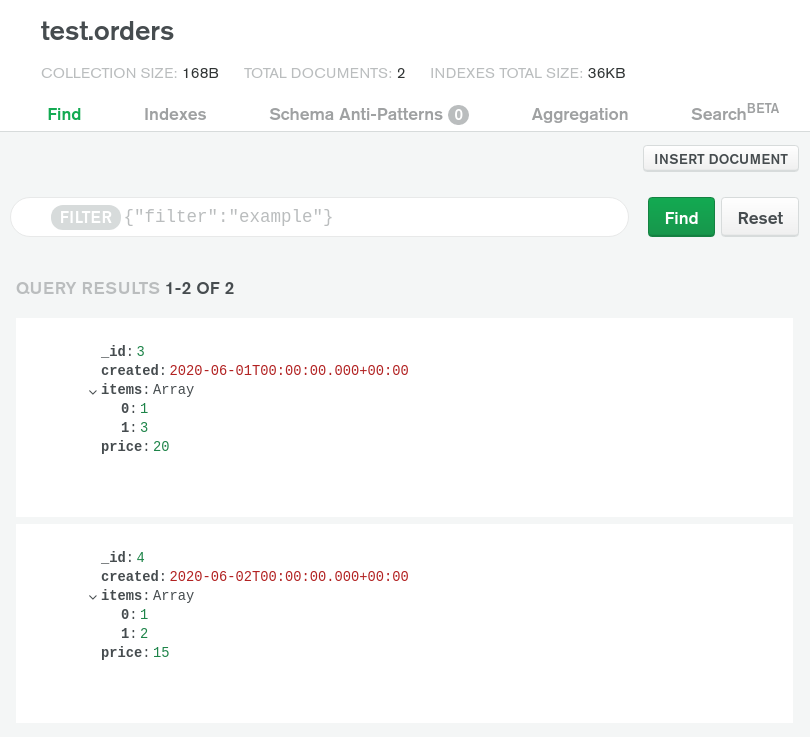
And here is what's left in my MongoDB Atlas cluster.
#Federated Queries
As mentioned above already, federated queries in MongoDB Atlas Data Lake allow me to retain easy access to 100% of my data. I actually already used this feature when I ran the aggregation pipeline with the $out stage.
Let's verify this one last time with Python:
1 from pymongo import MongoClient 2 3 client = MongoClient('<YOUR_ATLAS_DATA_LAKE_URI>') 4 db = client.get_database("test") 5 coll = db.get_collection("orders") 6 7 print("All the docs from S3 + Atlas:") 8 docs = coll.find() 9 for d in docs: 10 print(d) 11 12 pipeline = [ 13 { 14 '$group': { 15 '_id': None, 16 'total_price': { 17 '$sum': '$price' 18 } 19 } 20 }, { 21 '$project': { 22 '_id': 0 23 } 24 } 25 ] 26 27 print('\nI can also run an aggregation.') 28 print(coll.aggregate(pipeline).next())
Here is the output:
1 All the docs from S3 + Atlas: 2 {'_id': 1.0, 'created': datetime.datetime(2020, 5, 30, 0, 0), 'items': [1.0, 3.0], 'price': 20.0} 3 {'_id': 2.0, 'created': datetime.datetime(2020, 5, 31, 0, 0), 'items': [2.0, 3.0], 'price': 25.0} 4 {'_id': 3.0, 'created': datetime.datetime(2020, 6, 1, 0, 0), 'items': [1.0, 3.0], 'price': 20.0} 5 {'_id': 4.0, 'created': datetime.datetime(2020, 6, 2, 0, 0), 'items': [1.0, 2.0], 'price': 15.0} 6 7 I can also run an aggregation: 8 {'total_price': 80.0}
#Wrap Up
MongoDB Atlas Data Lake is now production-ready and generally available starting today.
If you have a lot of infrequently access data in your Atlas cluster but you still need to be able to query it and access it easily once you've archived it to S3, Atlas Data Lake and the new Federated Query feature will help you save tons of money. If you're looking for an automated way to archive your data from Atlas Clusters to fully-managed S3 storage, then check out our new Atlas Online Archive feature!
Storage on S3 is a lot cheaper than scaling up your MongoDB Atlas cluster because your cluster is full of cold data and needs more RAM & storage size to operate correctly.
All the python code is available in this Github Repository.
Please let me know on Twitter if you liked my blog post: @MBeugnet.
If you have questions, please head to our developer community website where the MongoDB engineers and the MongoDB community will give you a hand.