The real power of a cloud-hosted, fully managed service like MongoDB Atlas is that you can create whole new database deployment architectures automatically, using the services API. Getting to the MongoDB Atlas API is relatively simple and, once unlocked, it opens up a massive opportunity to integrate and automate the management of database deployments from creation to deletion. The API itself is an extensive REST API, there's role-based access control and you can have user or app-specific credentials to access it.
There is one tiny thing that can trip people up though. The credentials have to be passed over using the digest authentication mechanism, not the more common basic authentication or using an issued token. Digest authentication, at its simplest, waits to get an HTTP 401 (not authorized) from the web endpoint. That response comes with data and the client then sends an encrypted form of the username and password as a digest and the server works with that.
And that's why we are here today, to show you how to do that with the least fuss in Python, Node, and Ruby. In each example, we'll try and access the base URL of the Atlas API which returns a JSON document about the underlying applications name, build and other facts.
#Python
We start with the simplest and most self-contained example, Python.
1234567891011import os
import requests
from requests.auth import HTTPDigestAuth
import pprint

baseurl = "https://cloud.mongodb.com/api/atlas/v1.0/"

response=requests.get(baseurl, auth=HTTPDigestAuth(
   os.environ["ATLAS_USER"], os.environ["ATLAS_USER_KEY"]))

pprint.pprint(response.json())
In the Python version, we lean on the requests library for most of
the heavy lifting. As well as importing requests we also bring in
HTTPDigestAuth from requests' auth module to handle digest
authentication. The os import is just there so we can get the
environment variables ATLAS_USER and ATLAS_USER_KEY as
credentials and the pprint import is just to format our results.
The critical part is the addition of auth=HTTPDigestAuth(...) to the
requests.get() call. This installs the code needed to respond to the
server when it asks for the digest.
If we now run this program…

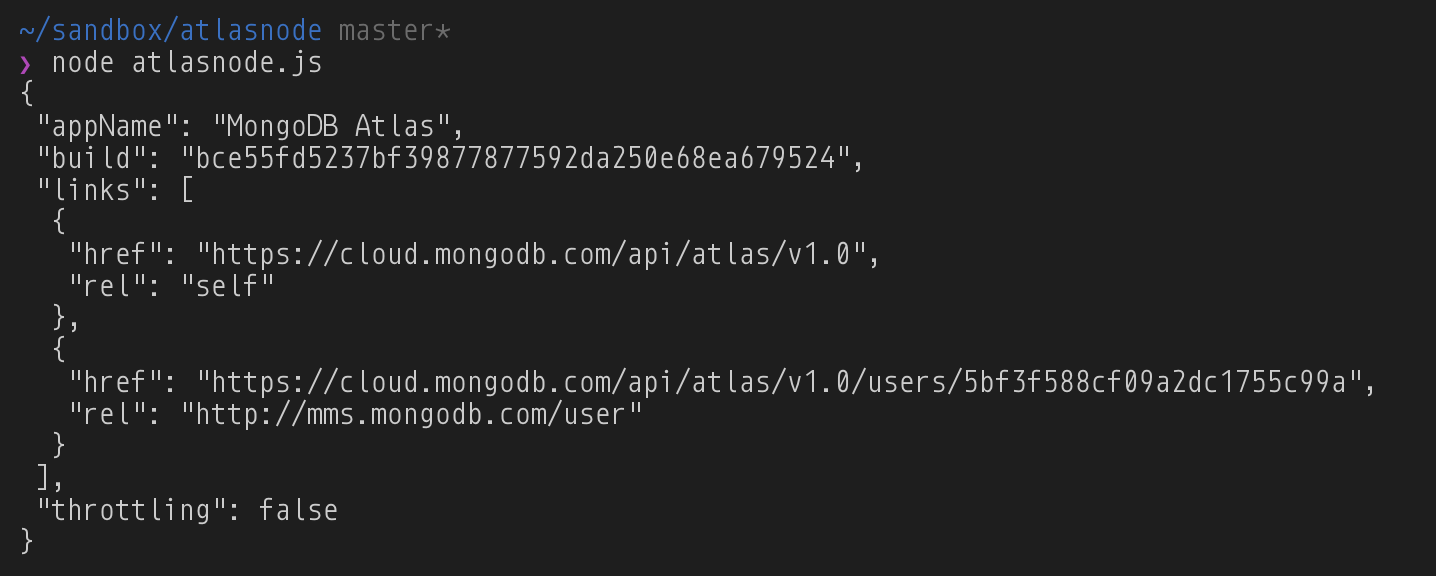
We have our API response.
#Node.js
For Node.js, it is a matter of finding a package which does HTTP fetching with digest authentication. There's a whole ecosystem of packages out there and one that we found that worked was digest-fetch which wraps the very popular node-fetch library with what it needs to do HTTP Digest authentication. After installing the required libraries
1npm install digest-fetch crypto-js node-fetch --save
We can now create our code:
1234567891011121314const DigestFetch = require("digest-fetch");

const client = new DigestFetch(
process.env.ATLAS_USER,
process.env.ATLAS_USER_KEY,
{ }
);

const urlbase = "https://cloud.mongodb.com/api/atlas/v1.0/";

client
.fetch(urlbase,{})
.then(res => res.json())
.then(json => console.log(JSON.stringify(json,null," ")));
Taking it from the top… We first require and import the digest-fetch
package. It'll pull in the other needed packages. Then we create our
DigestFetch client, giving it the user and key values from the
environment and an empty set of options. After setting the API's URL
base value we then processed to client.fetch() from it. We're using
promises and so the next two thens see the data converted to JSON
and then pretty-printed on the console. And we're ready to run:
On to our final language…
#Ruby
HTTParty is a widely used Gem which is used by the Ruby and Rails
community to perform HTTP operations. It also, luckily, supports digest
authentication so, first up, gem install httparty to get the party
started. There are two ways to use HTTParty, one is creating an object
which abstracts the calls away while the other is just directly calling
methods on HTTParty itself. For brevity, we'll do the latter. Here's the
code:
123456789require 'httparty'
require 'json'

auth={:username=>ENV['ATLAS_USER'],:password=>ENV['ATLAS_USER_KEY']}
baseurl='https://cloud.mongodb.com/api/atlas/v1.0/'

result=HTTParty.get(baseurl,  { :digest_auth => auth } )

pp JSON.parse(result.body())
We require in the HTTParty and json gems first. We then create a
dictionary with our username and key, mapped for HTTParty's
authentication and set a variable to hold the base URL. We're ready to
do our get now, and in the options - the second parameter of the get -
we pass :digest_auth=>auth to switch on the digest support. We wrap
up by JSON parsing the resulting body and pretty printing that. Put it
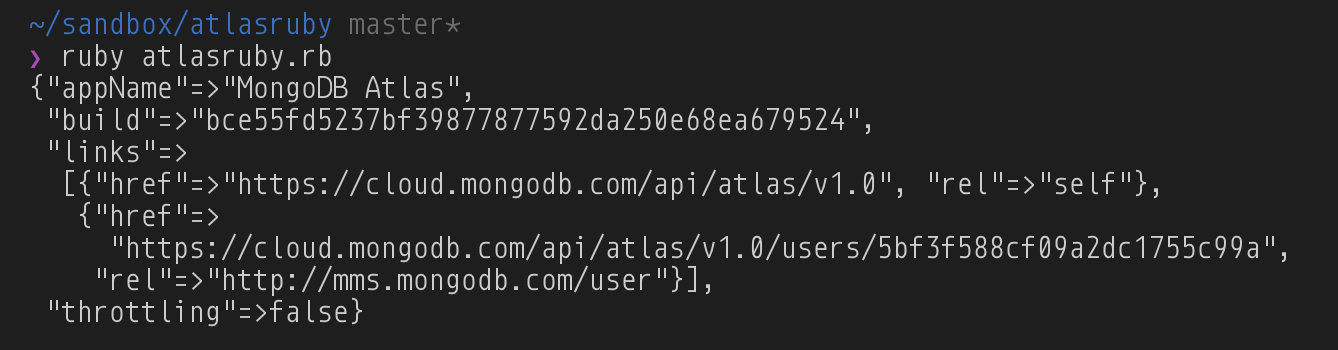
all together and run it and we get:
#Next Stop - The API
With the authentication taken care of - just remember to be fastidious with your API key security and make sure you revoke unused keys - you can now move on to explore the API itself. Start in the documentation and see what you can automate today.