
Are you building your next amazing application with Next.js? Do you wish you could integrate MongoDB into your Next.js app effortlessly? Do you need this done before your coffee is done brewing? If you answered yes to these three questions, I have some good news for you. We have created an official Next.js<>MongoDB integration that will have you up and running in minutes, and you can consider this tutorial your official guide on how to use it.
In this tutorial, we'll take a look at how we can use the with-mongodb example to create a new Next.js application that follows MongoDB best practices for connectivity, connection pool monitoring, and querying. We'll also take a look at how to use MongoDB in our Next.js app with things like serverSideProps and APIs. Finally, we'll take a look at how we can easily deploy and host our application on Vercel, the official hosting platform for Next.js applications. If you already have an existing Next.js app, not to worry, simply drop in the MongoDB utility file into your existing project and you are good to go. We have a lot of exciting stuff to cover, so let's dive right in!
#Prerequisites
For this tutorial you'll need:
- NodeJS 12+.
- npm and npx.
React and Next.js familiarity is expected to get the most out of this tutorial, but I will try to cover unique features with enough depth to still be valuable to a newcomer.
#What is Next.js
If you're not already familiar, Next.js is a React based framework for building modern web applications. The framework adds a lot of powerful features such as server side rendering, automatic code splitting, incremental static regeneration and much more that make it easy to build scalable and production ready apps.
#Getting Started with-mongodb
Next.js has an extensive examples library that shows how you can integrate the framework with various features like GraphQL servers, authentication libraries, or CSS frameworks. The example we'll use for this post is called with-mongodb and as you might expect it'll come with everything needed to connect to a MongoDB database.
To create a new Next.js app with MongoDB integration built-in, execute the following command in your terminal:
1 npx create-next-app --example with-mongodb mflix
We are using the npx create-next-app command and are passing the --example with-mongodb parameter which will tell create-next-app to bootstrap our app with the MongoDB integration example. Finally mflix is the name of our application. You can name your application something else if you'd prefer. Executing this command will take a couple of seconds to download and install all the npm dependencies, but once they're downloaded and installed, navigate to your project directory by running:
1 cd mflix
In this directory, let's start up our application and see what happens. To start our Next.js app, in the mflix directory execute:
1 npm run dev
Once the app is built, let's see our app in action by navigating to localhost:3000. Uh-oh. We got an error.
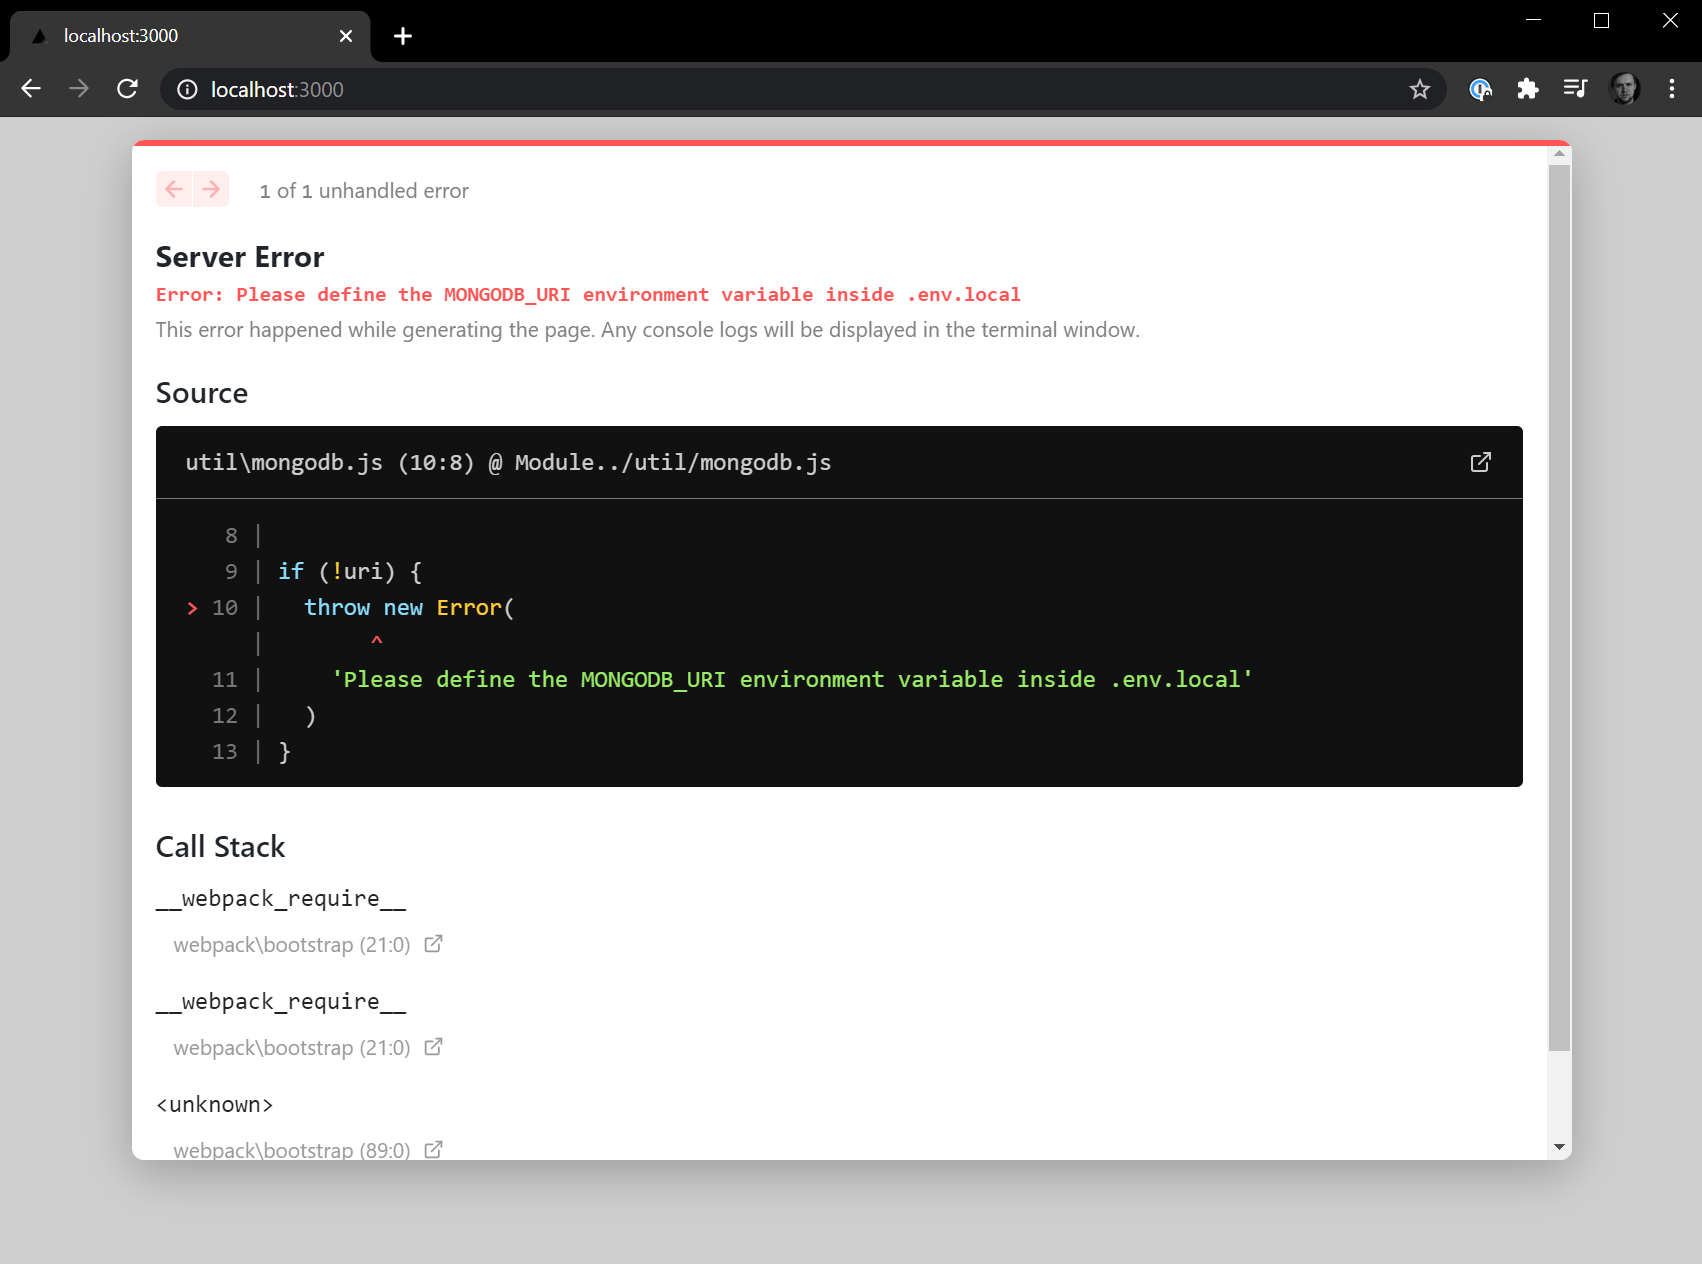
The good news is that the error is fairly descriptive. The reason for this error is that we haven't provided our MongoDB connection string to the Next.js app. Let's do that next.
#Connecting MongoDB to Next.js
If we look at our Next.js application directory, we'll find a env.local.example file. Let's rename this file to env.local and open it. This file will contain two properties that we'll need to fill out: MONGODB_URI and MONGODB_DB.
We'll get this information from our MongoDB Atlas Cluster. You can use a local MongoDB installation if you have one, but if you're just getting started, MongoDB Atlas is a great way to get up and running without having to install or manage your MongoDB instance. MongoDB Atlas has a forever free tier that you can sign up for as well as get the sample data that we'll be using for the rest of this tutorial.
To get our MongoDB URI, in our MongoDB Atlas dashboard, hit the Connect button. Then the Connect to your application button, and here you'll see a string that contains your URI that will look like this:
1 mongodb+srv://<USERNAME>:<PASSWORD>@cluster0.tdm0q.mongodb.net/<DBNAME>?retryWrites=true&w=majority
If you are new to MongoDB Atlas, you'll need to go to Database Access section and create a username and password, as well as the Network Access tab to ensure your IP is allowed to connect to the database. However but if you already have a database user and network access enabled, you'll just need to replace the <USERNAME> and <PASSWORD> fields with your information.
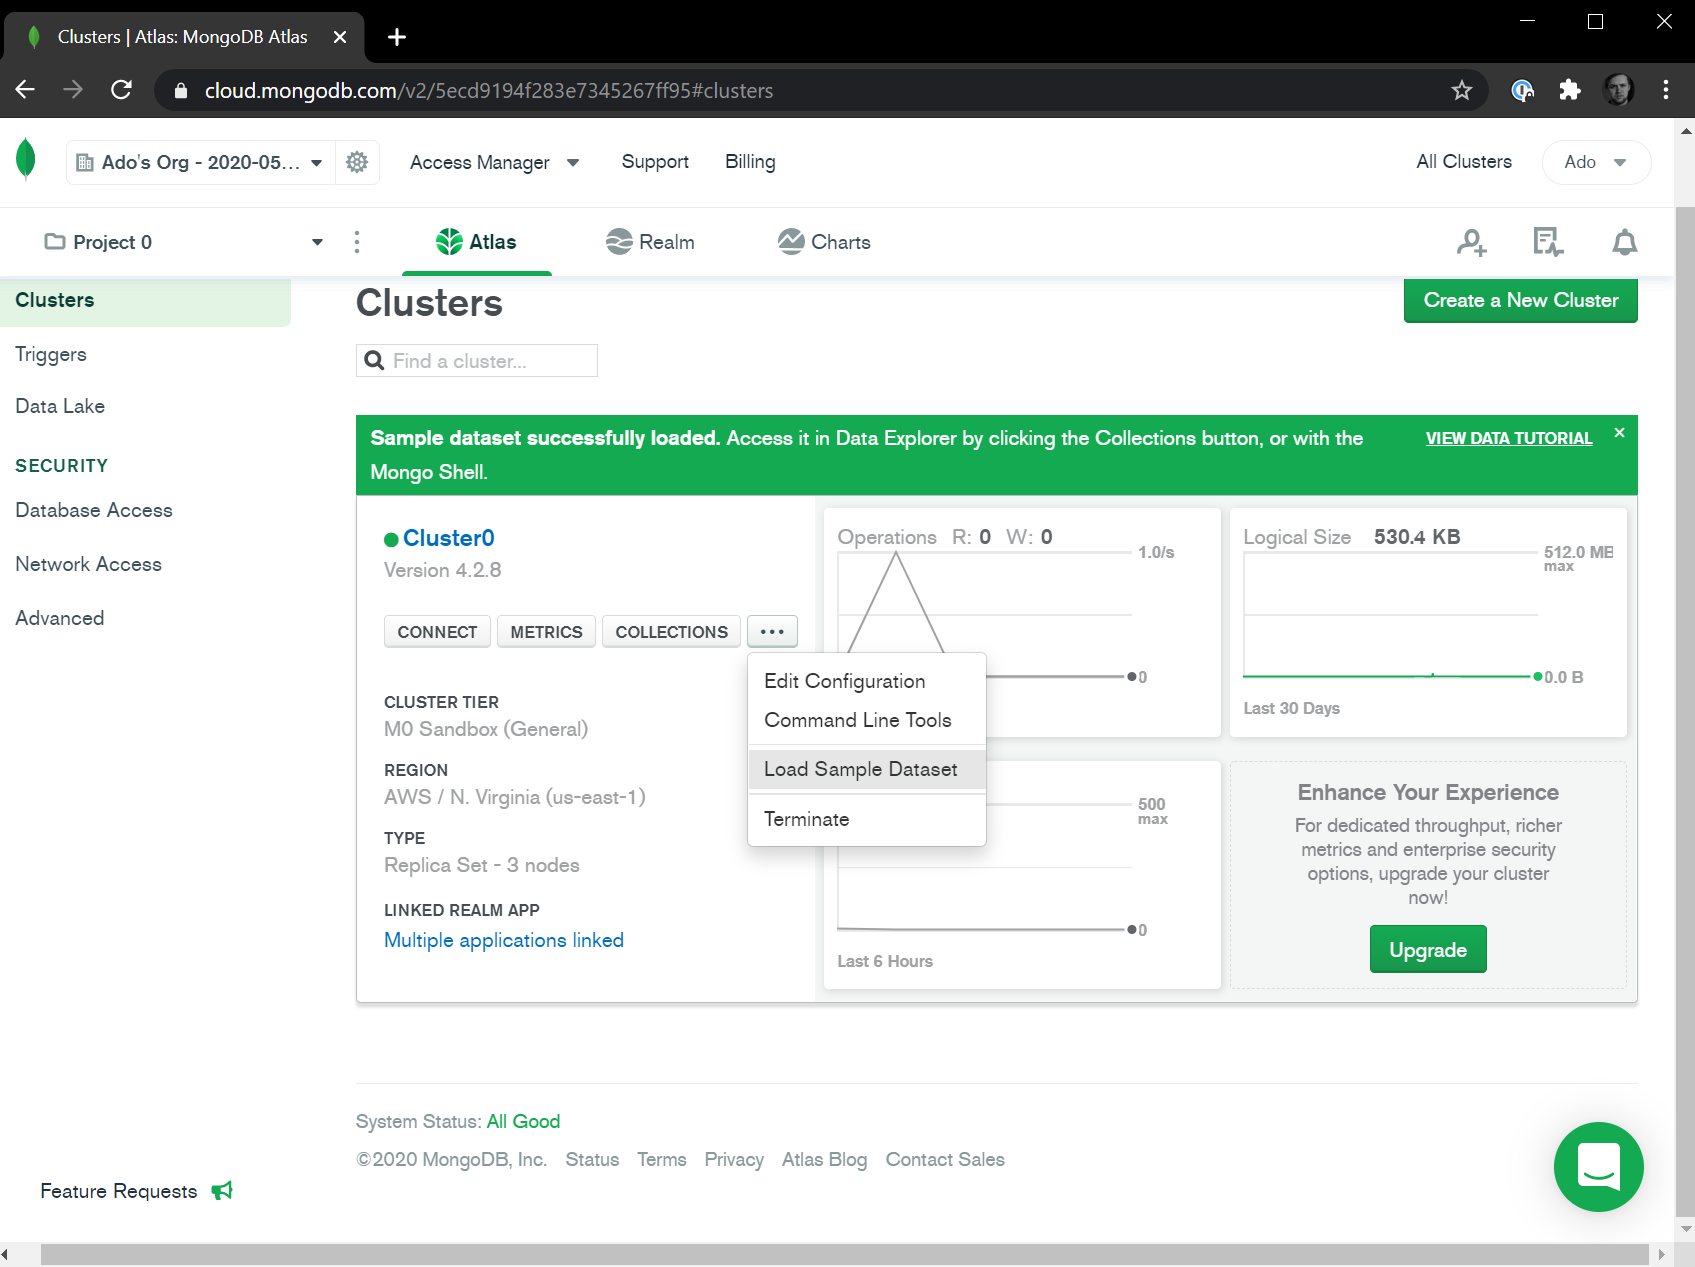
For the <DBNAME>, we'll load the MongoDB Atlas sample datasets and use one of those databases. To load the sample datasets, in your MongoDB Atlas dashboard under your chosen Cluster, click the ... button and hit Load Sample Dataset option. This will take a few minutes to load the data and create the various databases. The one we'll use for this tutorial is called sample_mflix, so you'll set your <DBNAME> value to that.
To close out this section, our env.local file should look like this:
1 MONGODB_URI=mongodb+srv://<USERNAME>:<PASSWORD>@cluster0.tdm0q.mongodb.net/sample_mflix?retryWrites=true&w=majority 2 MONGODB_DB=sample_mflix
To make sure our configuration is correct, let's restart our Next.js app by going to the terminal and building the application again. Execute the following command in your terminal:
1 npm run dev
When the application is built, navigate to localhost:3000 in your browser and you should see the following:
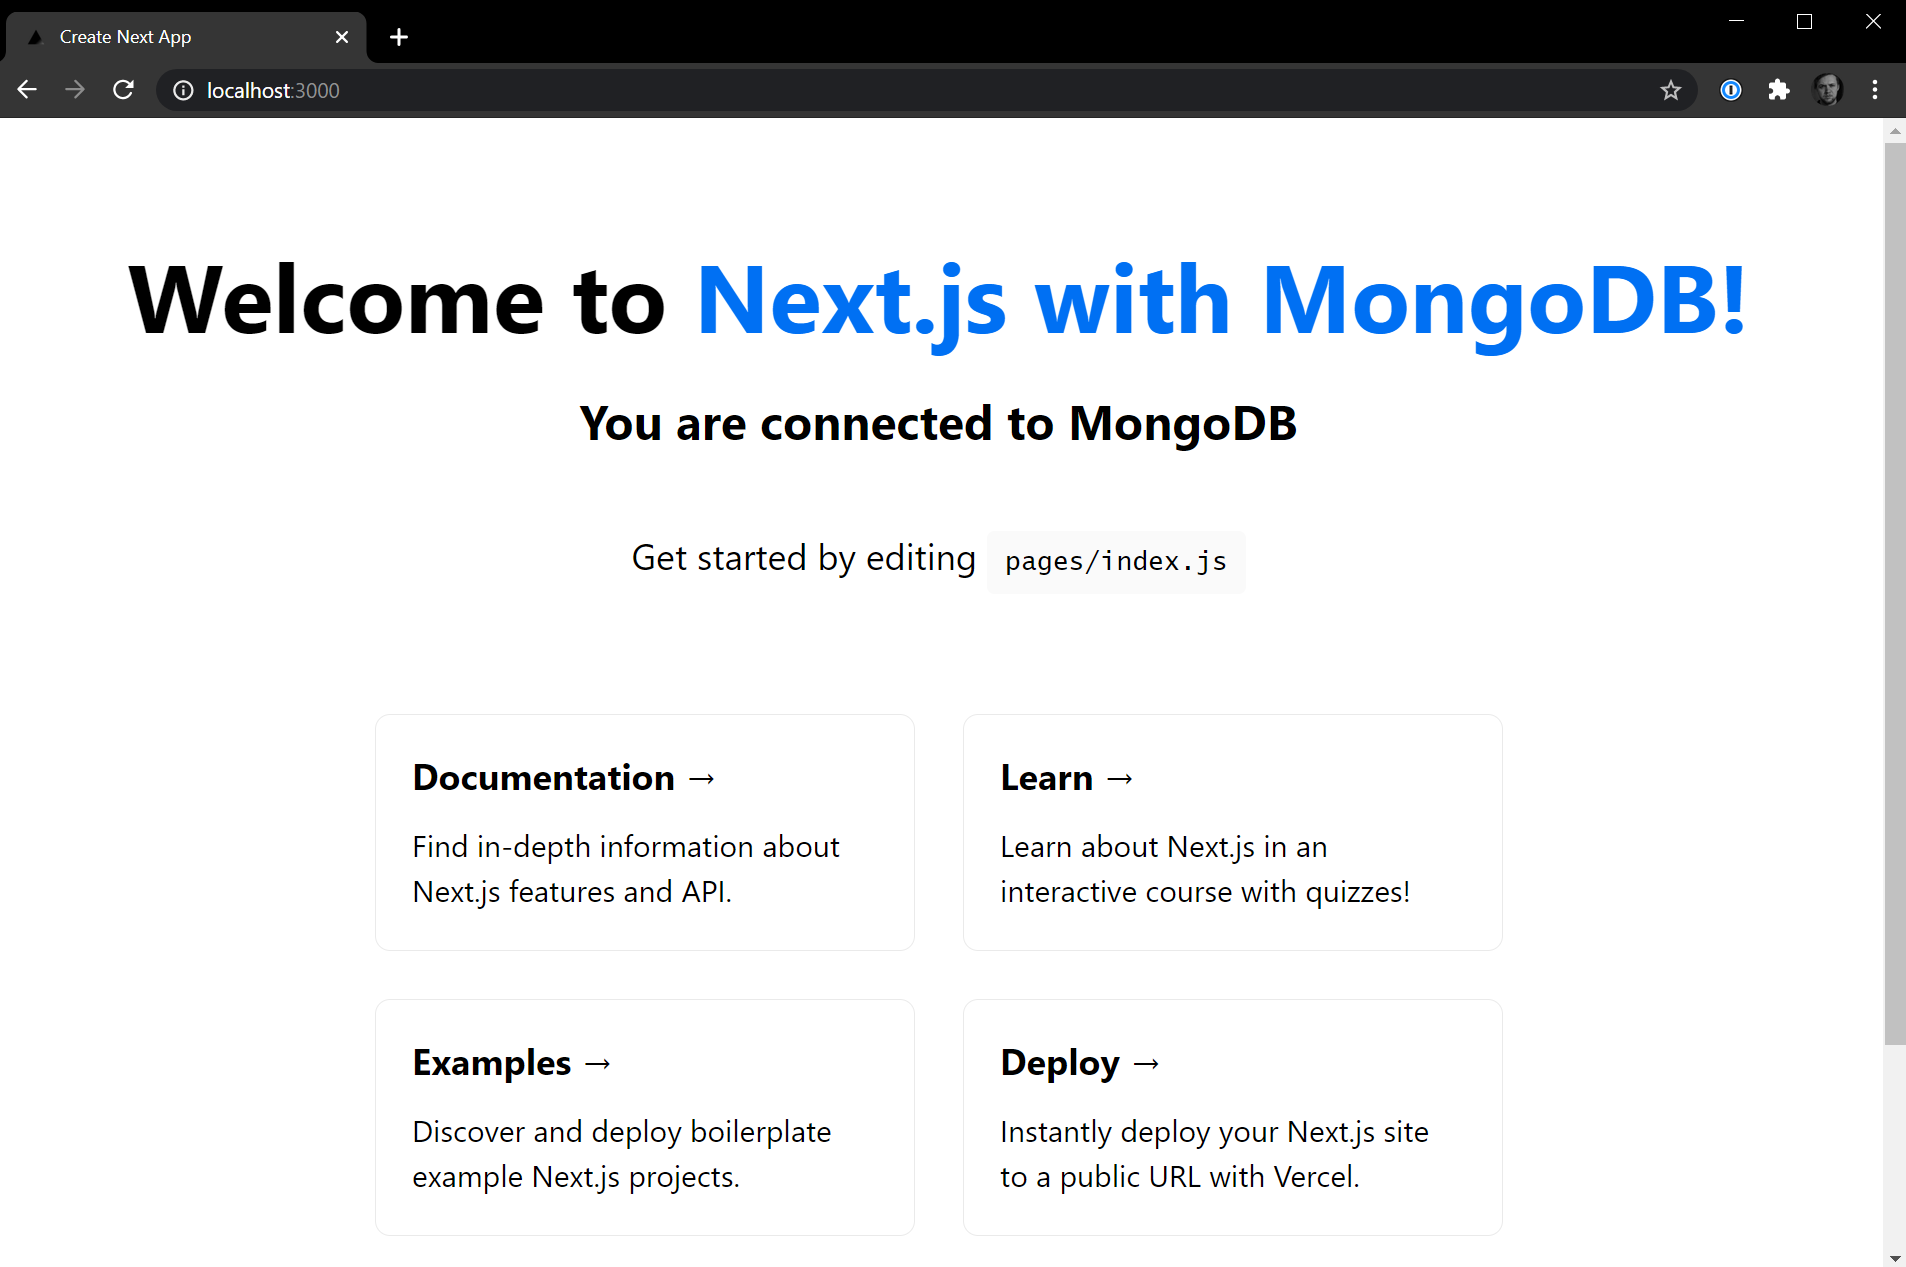
This is the with-mongodb Next.js app welcome page. If you see the message "You are connected to MongoDB", you are good to go. If you see the message "You are NOT connected to MongoDB", then verify your connection string and make sure that the database user as well as network connection is properly set. If you run into any issues, head over to the MongoDB community, and we'll help troubleshoot.
#Querying MongoDB with Next.js
Now that we are connected to MongoDB, let's discuss how we can query our MongoDB data and bring it into our Next.js application. Next.js supports multiple different ways to get data. We can create API endpoints, get data by running server-side rendered functions for a particular page, or even generate static pages by getting our data at build-time. We'll look at all three examples.
#Example 1: Next.js API Endpoint with MongoDB
The first example we'll look at is building and exposing an API endpoint in our Next.js application. To create a new API endpoint route we will first need to create an api directory in our pages directory, and then every file we create in this api directory will be treated as an individual API endpoint.
Let's go ahead and create the api directory and a new file in this directory called movies.js. This endpoint will return a list of 20 movies from our MongoDB database. The implementation for this route is as follows:
1 import { connectToDatabase } from "../../util/mongodb"; 2 3 export default async (req, res) => { 4 const { db } = await connectToDatabase(); 5 6 const movies = await db 7 .collection("movies") 8 .find({}) 9 .sort({ metacritic: -1 }) 10 .limit(20) 11 .toArray(); 12 13 res.json(movies); 14 };
To explain what is going on here we'll start with the import statement. We are importing our connectToDatabase method from the util/mongodb file. This file contains all the instructions on how to connect to our MongoDB Atlas cluster. Additionally, within this file we cache the instance of our connection so that subsequent requests do not have to reconnect to the cluster. They can use the existing connection. All of this is handled for you!
Next our API route handler has the signature of export default async (req, res). If you're familiar with Express.js, this should look very familiar. This is the function that gets executed when the localhost:3000/api/movies route is called. We capture the request via req and return the response via the res object.
Our handler function implementation calls the connectToDatabase() function to get the instance of our MongoDB database. Next, we execute a MongoDB query using the MongoDB Node.js Driver to get the top twenty movies out of our movies collection based on their metacritic rating sorted in descending order.
Finally, we call the res.json method and pass in our array of movies. This serves our movies in JSON format to our browser. If we navigate to localhost:3000/api/movies, we'll see a result that looks like this:

We can add additional API routes by creating additional files in the api directory. As a homework exercise, why don't you create an API route that returns a single movie based on a user provided id?
To give you some pointers, you'll use Next.js Dynamic API Routes to capture the id. So if a user calls http://localhost:3000/api/movies/573a1394f29313caabcdfa3e the movie that should be returned is Seven Samurai. Another tip, the _id property for the sample_mflix database in MongoDB is stored as an ObjectID, so you'll have to convert the string to an ObjectID. If you get stuck, create a thread on the MongoDB Community forums and we'll solve it together! Next, we'll take a look at how to access our MongoDB data within our Next.js pages.
#Example 2: Next.js Pages with MongoDB
In the last section, we saw how we can create an API endpoint and connect to MongoDB with it. In this section, we'll get our data directly into our Next.js pages. We'll do this using the getServerSideProps() method that is available to Next.js pages.
The getServerSideProps() method forces a Next.js page to load with server-side rendering. What this means is that every time this page is loaded, the getServerSideProps() method runs on the backend, gets data, and sends it into the React component via props. The code within getServerSideProps() is never sent to the client. This makes it a great place to implement our MongoDB queries.
Let's see how this works in practice. Let's create a new file in the pages directory, and we'll call it movies.js. In this file, we'll add the following code:
1 import { connectToDatabase } from "../util/mongodb"; 2 3 export default function Movies({ movies }) { 4 return ( 5 <div>
<h1>Top 20 Movies of All Time</h1>
<p>
<small>(According to Metacritic)</small>
</p>
<ul>
{movies.map((movie) => (
<li>
<h2>{movie.title}</h2>
<h3>{movie.metacritic}</h3>
<p>{movie.plot}</p>
</li>
))}
</ul>
</div> 6 ); 7 } 8 9 export async function getServerSideProps() { 10 const { db } = await connectToDatabase(); 11 12 const movies = await db 13 .collection("movies") 14 .find({}) 15 .sort({ metacritic: -1 }) 16 .limit(20) 17 .toArray(); 18 19 return { 20 props: { 21 movies: JSON.parse(JSON.stringify(movies)), 22 }, 23 }; 24 }
As you can see from the example above, we are importing the same connectToDatabase utility class, and our MongoDB query is exactly the same within the getServerSideProps() method. The only thing we really needed to change in our implementation is how we parse the response. The getServerSideProps() return method has some trouble serializing our data. There is a GitHub issue open to address this, but the current workaround is to stringify and then parse the data manually.
Our page component called Movies gets the props from our getServerSideProps() method, and we use that data to render the page showing the top movie title, metacritic rating, and plot. Your result should look something like this:
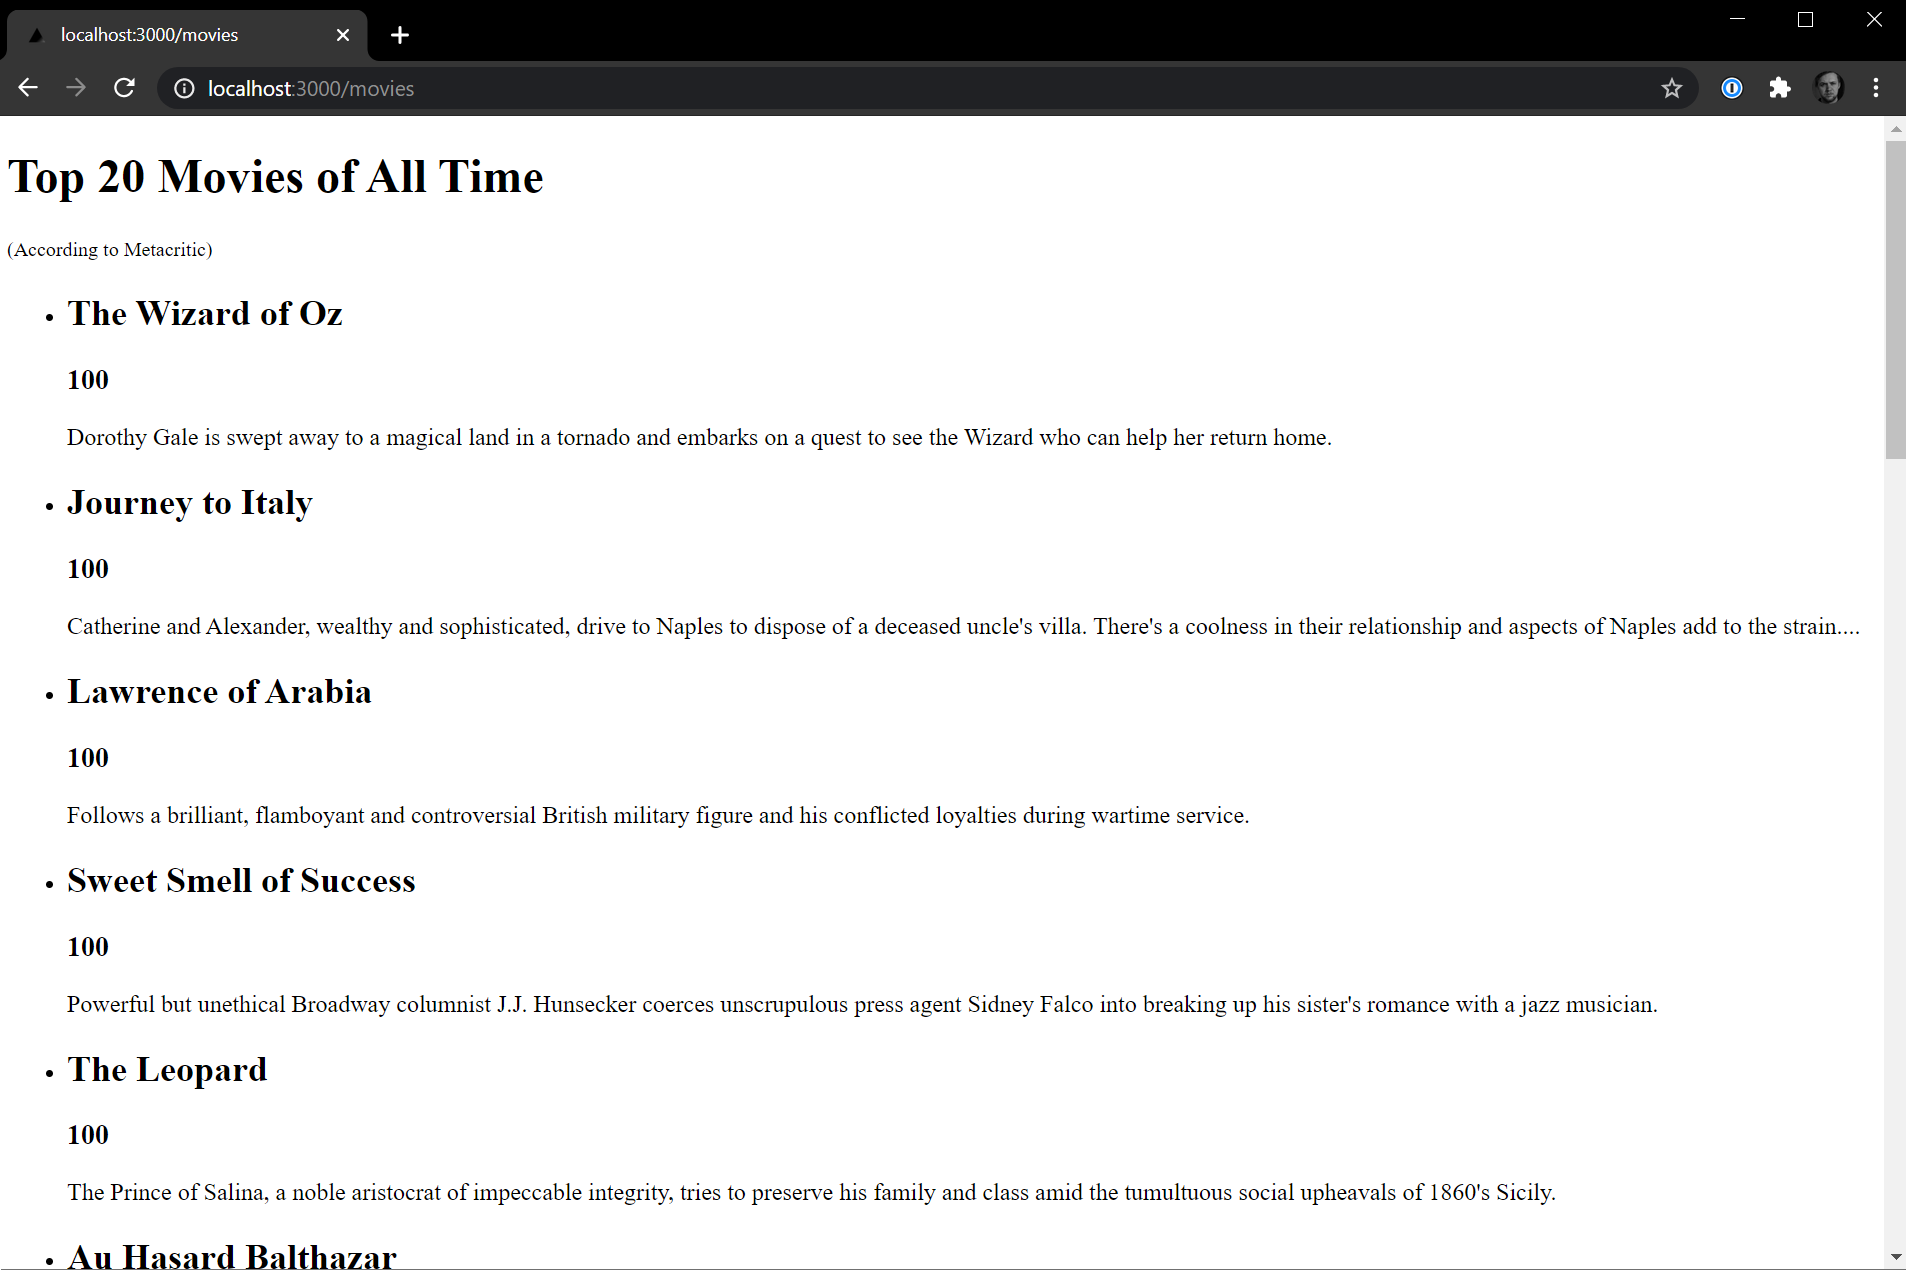
This is great. We can directly query our MongoDB database and get all the data we need for a particular page. The contents of the getServerSideProps() method are never sent to the client, but the one downside to this is that this method runs every time we call the page. Our data is pretty static and unlikely to change all that often. What if we pre-rendered this page and didn't have to call MongoDB on every refresh? We'll take a look at that next!
#Example 3: Next.js Static Generation with MongoDB
For our final example, we'll take a look at how static page generation can work with MongoDB. Let's create a new file in the pages directory and call it top.js. For this page, what we'll want to do is render the top 1000 movies from our MongoDB database.
Top 1000 movies? Are you out of your mind? That'll take a while, and the database round trip is not worth it. Well what if we only called this method once when we built the application, so that even if that call takes a few seconds, it'll only ever happen once and our users won't be affected. They'll get the top 1000 movies delivered as quickly or even faster than the 20 using serverSideProps(). The magic lies in the getStaticProps() method, and our implementation looks like this:
1 import { connectToDatabase } from "../util/mongodb"; 2 3 export default function Top({ movies }) { 4 return ( 5 <div>
<h1>Top 1000 Movies of All Time</h1>
<p>
<small>(According to Metacritic)</small>
</p>
<ul>
{movies.map((movie) => (
<li>
<h2>{movie.title}</h2>
<h3>{movie.metacritic}</h3>
<p>{movie.plot}</p>
</li>
))}
</ul>
</div> 6 ); 7 } 8 9 export async function getStaticProps() { 10 const { db } = await connectToDatabase(); 11 12 const movies = await db 13 .collection("movies") 14 .find({}) 15 .sort({ metacritic: -1 }) 16 .limit(1000) 17 .toArray(); 18 19 return { 20 props: { 21 movies: JSON.parse(JSON.stringify(movies)), 22 }, 23 }; 24 }
At a glance this looks very similar to the movies.js file we created earlier. The only significant changes we made were changing our limit from 20 to 1000 and our getServerSideProps() method to getStaticProps(). If we navigate to localhost:3000/top in our browser, we'll see a long list of movies.
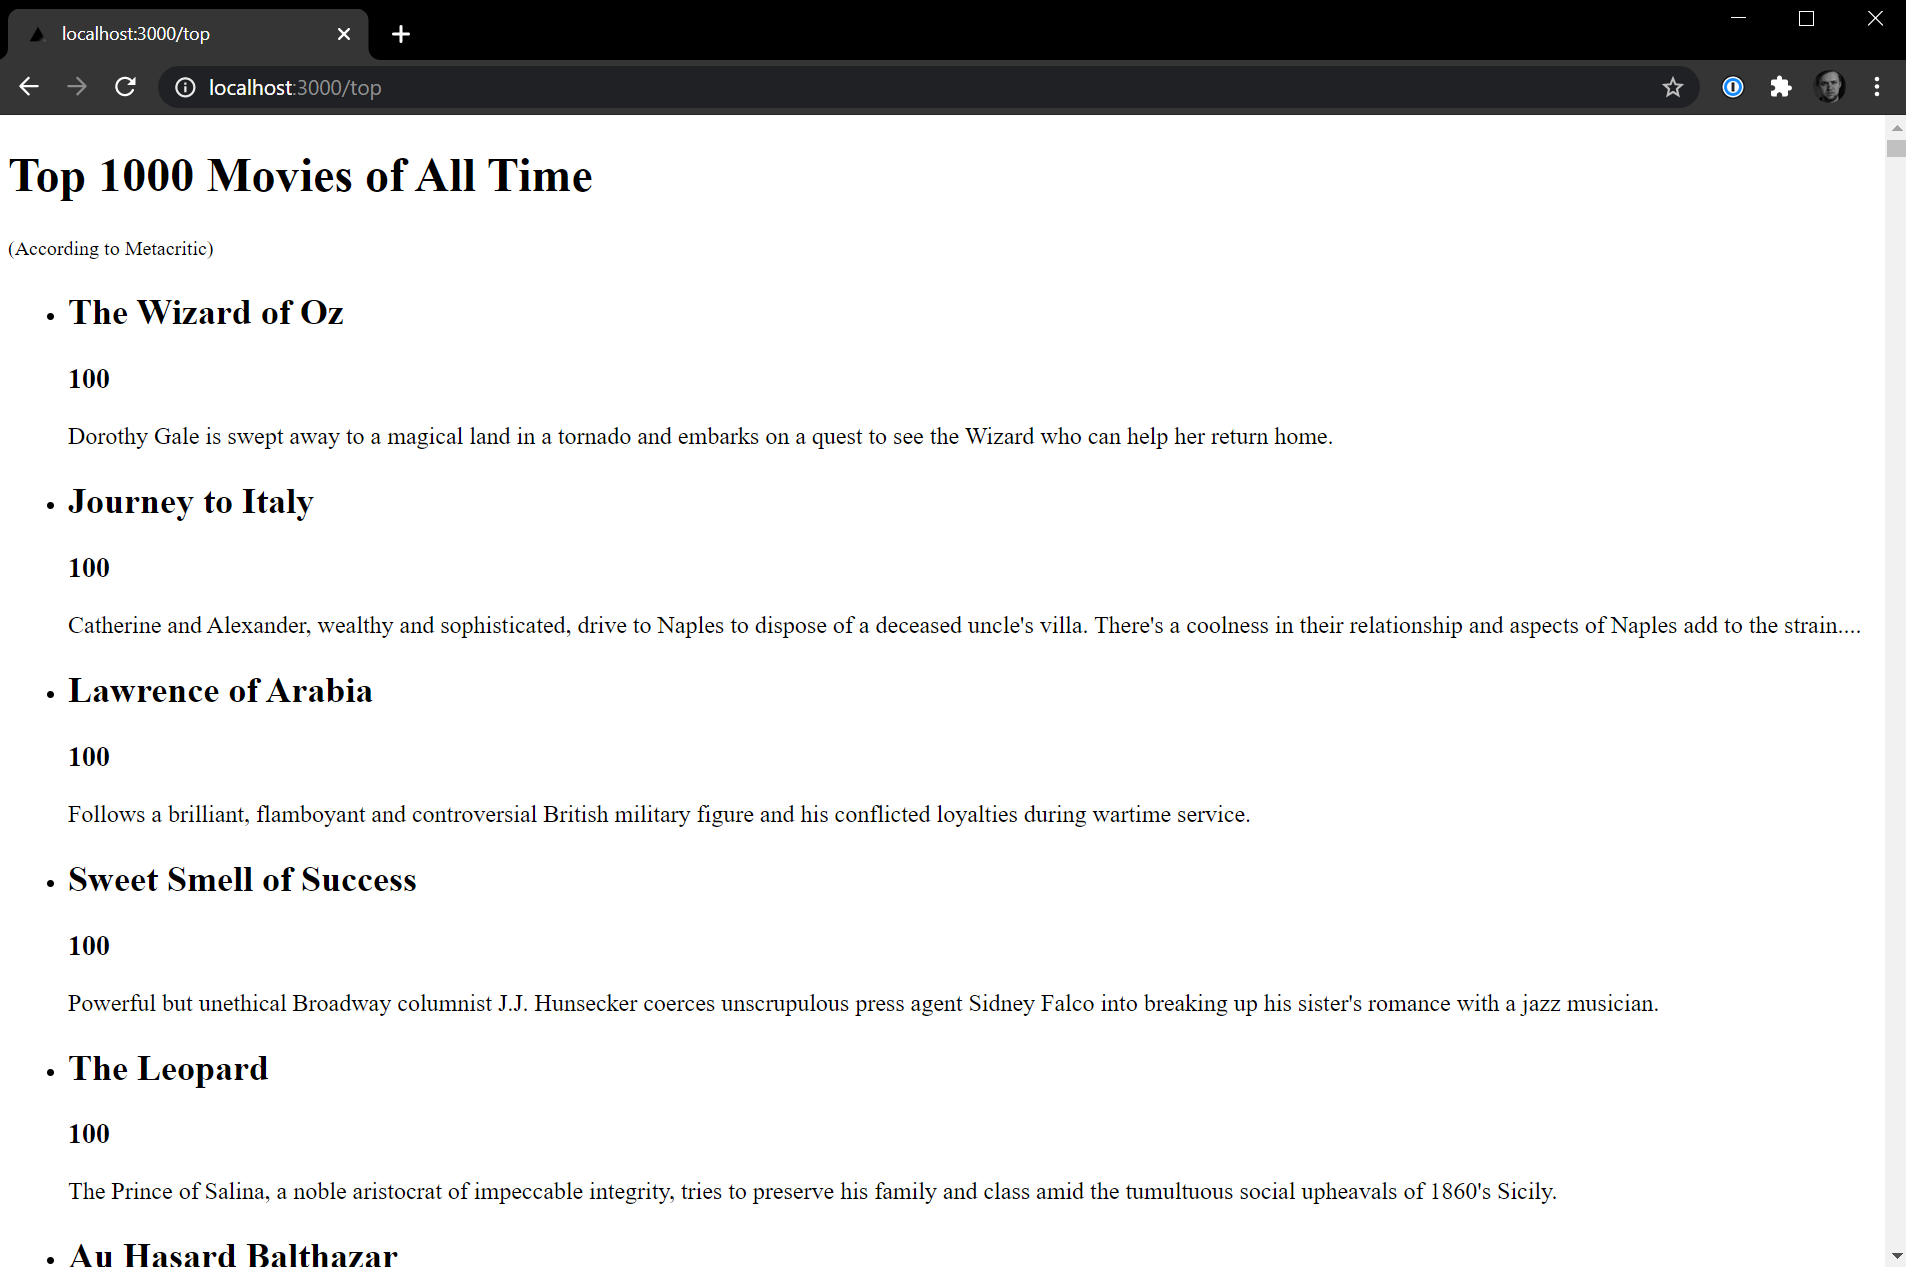
Look at how tiny that scrollbar is. Loading this page took about 3.5 seconds on my machine as opposed to sub-1 second response time for the /movies page. The reason it takes this long is because in development mode the getStaticProps() method is called every single time (just like the getServerSideProps() method). But if we switch from development mode to production mode, we'll see the opposite. The /top page will be pre-rendered and will load almost immediately, while the /movies and /api/movies routes will execute the server-side code each time.
Let's switch to production mode. In your terminal window stop the current app from running. To run our Next.js app in production mode we'll first need to build it, then we can run the start command which will serve our built application. In your terminal window execute the following commands:
1 npm run build 2 npm run start
When you run the npm run start command, your Next.js app is served in production mode. The getStaticProps() method will not be executed every time you hit the /top route as this page will now be served statically. We can even see the pre-rendered static page by navigating to the .next/server/pages/top.html file and seeing the 1,000 movies listed in plain HTML.
Next.js can even update this static content without requiring a rebuild with a feature called Incremental Static Regeneration, but that's outside of the scope of this tutorial. Next, we'll take a look at deploying our application on Vercel.
#Deploying Your Next.js App on Vercel
The final step in our tutorial today is deploying our application. We'll deploy our Next.js with MongoDB app to Vercel. I have created a GitHub repo that contains all of the code we have written today. Feel free to clone it, or create your own.
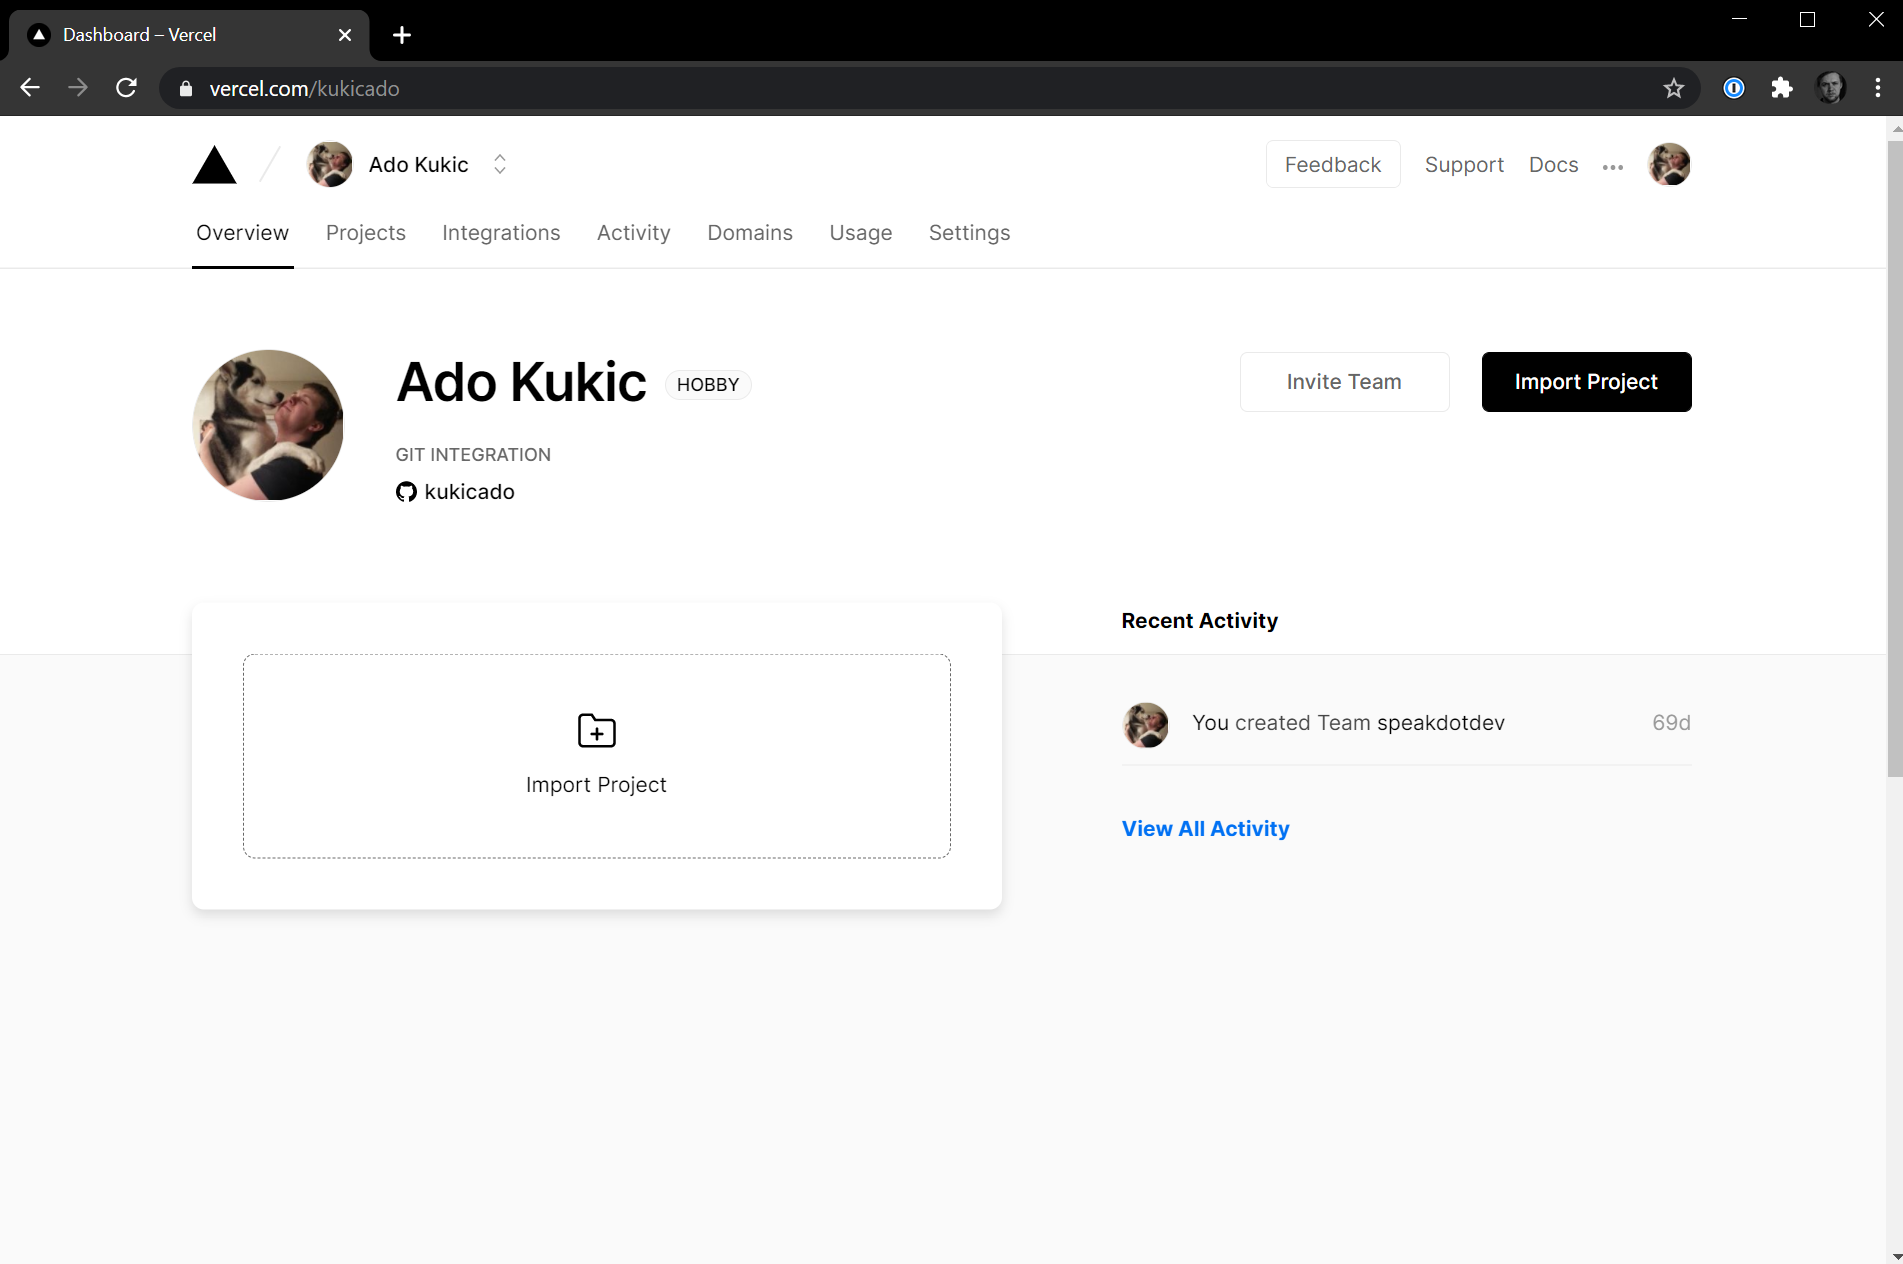
Navigate to Vercel and log in. Once you are on your dashboard, click the Import Project button, and then Import Git Repository.
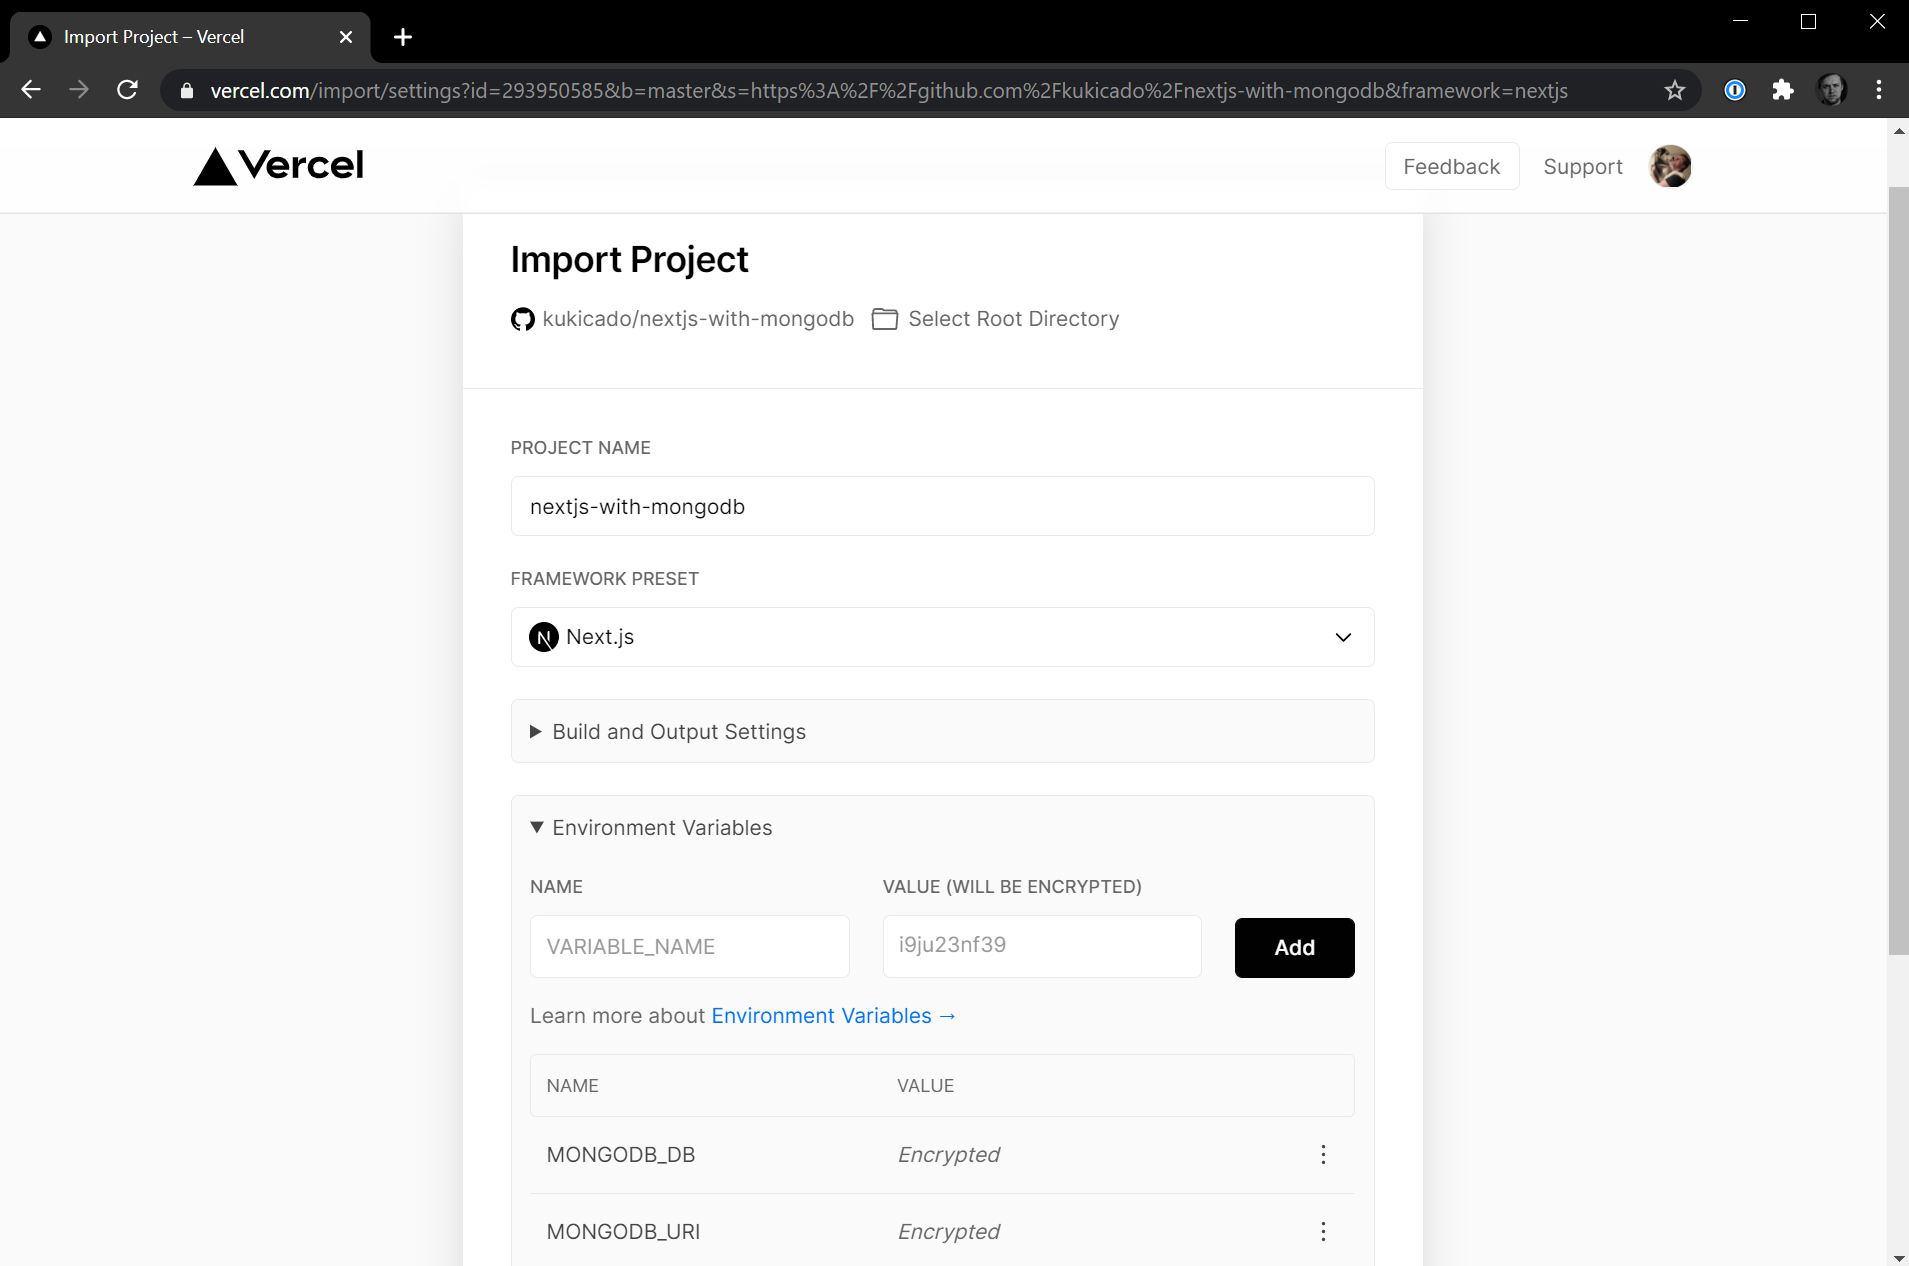
The URL I'll use is the one provided above that has the application we built today. For reference that URL is https://github.com/kukicado/nextjs-with-mongodb. Add your projects GitHub URL and hit Continue. On the next screen, you'll have the option to add Environment Variables and here we'll want to add the two variables from our env.local file. Those two variables will be MONGODB_URI and MongoDB_DB. Be sure to add both of these with their corresponding values before hitting Deploy.
After hitting the Deploy button your Next.js application will be automatically built and deployed. This process will take a few minutes, but once it's done, you will get a URL where you can access your Next.js application. In my case that URL is URL.
NOTE: Vercel uses dynamic IP addresses so you'll need to add an exception to access from any IP address in your MongoDB Atlas dashboard. To do this simplify navigate to the Network Access tab, hit the Add IP Address button, and then hit the Allow Access From Anywhere button or for the Access List Entry enter 0.0.0/0.
We are live! Let's make sure everything works by navigating to the https://nextjs-with-mongodb.vercel.app/movies, https://nextjs-with-mongodb.vercel.app/api/movies, and https://nextjs-with-mongodb.vercel.app/top routes.
#Next.js and MongoDB with One Click
Our app is now deployed and running in production. If you weren't following along with the tutorial and just want to quickly start your Next.js application with MongoDB, you can always use the with-mongodb starter found at https://github.com/vercel/next.js/tree/canary/examples/with-mongodb, but I got an even better one for you.
Click this link and you'll be off to the races in creating and deploying the official Next.js with the MongoDB integration and all you'll need to provide is your connection string.
#Putting It All Together
In this tutorial we walked through the official Next.js with MongoDB example. I showed you how to connect your MongoDB database to your Next.js application and execute queries multiple ways. Then we deployed our application using Vercel.
If you have any questions or feedback, reach out through the MongoDB Community forums and let me know what you build with Next.js and MongoDB.