
I've been a big fan of the Raspberry Pi since the first version was released in 2012. The newer generations are wonderful home-automation and IoT prototyping computers, with built in WiFi, and the most recent versions (the Pi 3 and Pi 4) are 64-bit. This means they can run the MongoDB server, mongod, locally! MongoDB even provides a pre-compiled version for the Raspberry Pi processor, so it's relatively straightforward to get it installed.
I'm currently building a home-automation service on a Raspberry Pi 4. Its job is to run background tasks, such as periodically requesting data from the internet, and then provide the data to a bunch of small devices around my house, such as some smart displays, and (ahem) my coffee grinder.
The service doesn't have super-complex data storage requirements, and I could have used an embedded database, such as SQLite. But I've become resistant to modelling tables and joins in a relational database and working with flat rows. The ability to store rich data structures in a single MongoDB database is a killer feature for me.
#Prerequisites
You will need:
- A Raspberry Pi 3 or 4
- A suitably sized Micro SD card (I used a 16 Gb card)
- A computer and SD card reader to write the SD card image. (This can be another Raspberry Pi, but I'm using my desktop PC)
- A text editor on the host computer. (I recommend VS Code)
#What This Tutorial Will Do
This tutorial will show you how to:
- Install the 64-bit version of Ubuntu Server on your Raspberry Pi.
- Configure it to connect to your WiFi.
- Correctly install MongoDB onto your Pi.
- Add a user account, so you can safely expose MongoDB on your home network.
When you're done, you'll have a secured MongoDB instance available on your home network.
Before we get too far into this, please bear in mind that you don't want to run a production, web-scale database on a Raspberry Pi. Despite the processor improvements on the Pi 4, it's still a relatively low-powered machine, with a relatively low amount of RAM for a database server. Still! For a local, offline MongoDB instance, with the ease of development that MongoDB offers, a Raspberry Pi is a great low-cost solution. If you do wish to serve your data to the Internet, you should definitely check out Atlas, MongoDB's cloud hosting solution. MongoDB will host your database for you, and the service has a generous (and permanent) free tier!
#Things Not To Do
Do not run apt install mongodb on your Raspberry Pi, or indeed any
Linux computer! The versions of MongoDB shipped with Linux distributions
are very out of date. They won't run as well, and some of them are so
old they're no longer supported.
MongoDB provide versions of the database, pre-packaged for many different operating systems, and Ubuntu Server on Raspberry Pi is one of them.
#Installing Ubuntu
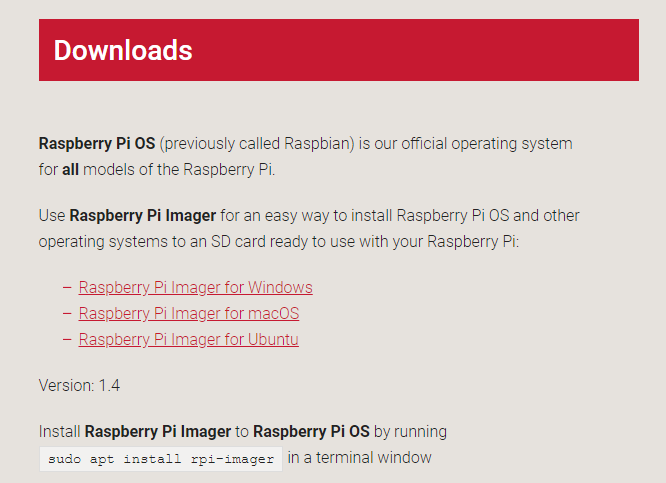
Download and install the Raspberry Pi Imager for your host computer.
Run the Raspberry Pi Imager, and select Ubuntu Server 20.04, 64-bit for Raspberry Pi 3/4.
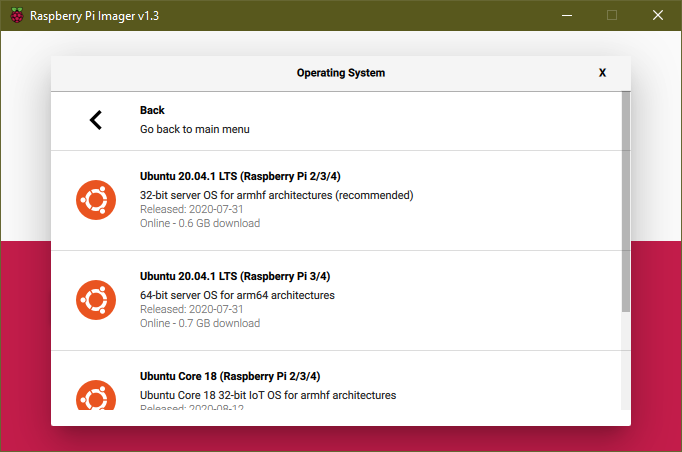
Make sure you don't accidentally select Ubuntu Core, or a 32-bit version.
Insert your Micro SD Card into your computer and select it in the Raspberry Pi Imager window.
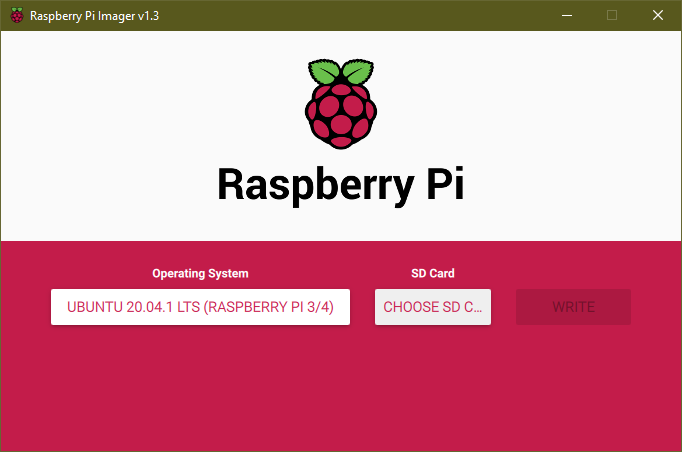
Click Write and wait for the image to be written to the SD Card. This may take some time! When it's finished, close the Raspberry Pi Imager. Then remove the Micro SD Card from your computer, and re-insert it.
The Ubuntu image for Raspberry Pi uses
cloud-init to configure the
system at boot time. This means that in your SD card system-boot
volume, there should be a YAML file, called network-config. Open
this file in VS Code (or your favourite text editor).
Edit it so that it looks like the following. The indentation is important, and it's the 'wifis' section that you're editing to match your wifi configuration. Replace 'YOUR-WIFI-SSD' with your WiFi's name, and 'YOUR-WIFI-PASSWORD' with your WiFi password.
1 version: 2 2 ethernets: 3 eth0: 4 dhcp4: true 5 optional: true 6 wifis: 7 wlan0: 8 dhcp4: true 9 optional: true 10 access-points: 11 "YOUR-WIFI-SSID": 12 password: "YOUR-WIFI-PASSWORD"
Now eject the SD card (safely!) from your computer, insert it into the
Pi, and power it up! It may take a few minutes to start up, at least the
first time. You'll need to monitor your network to wait for the Pi to
connect. When it does, ssh into the Pi with
ssh ubuntu@<raspberry-pi-ip-address>. The password is also
ubuntu.
You'll be prompted to change your password to something secret.
Once you've set your password update the operating system by running the following commands:
1 sudo apt update 2 sudo apt upgrade
#Install MongoDB
Now let's install MongoDB. This is done as follows:
1 # Install the MongoDB 4.4 GPG key: 2 wget -qO - https://www.mongodb.org/static/pgp/server-4.4.asc | sudo apt-key add - 3 4 # Add the source location for the MongoDB packages: 5 echo "deb [ arch=amd64,arm64 ] https://repo.mongodb.org/apt/ubuntu focal/mongodb-org/4.4 multiverse" | sudo tee /etc/apt/sources.list.d/mongodb-org-4.4.list 6 7 # Download the package details for the MongoDB packages: 8 sudo apt-get update 9 10 # Install MongoDB: 11 sudo apt-get install -y mongodb-org
The instructions above have mostly been taken from Install MongoDB Community Edition on Ubuntu
#Run MongoDB
Ubuntu 20.04 uses Systemd to run background services, so to set up mongod to run in the background, you need to enable and start the service:
1 # Ensure mongod config is picked up: 2 sudo systemctl daemon-reload 3 4 # Tell systemd to run mongod on reboot: 5 sudo systemctl enable mongod 6 7 # Start up mongod! 8 sudo systemctl start mongod
Now, you can check to see if the service is running correctly by executing the following command. You should see something like the output below it:
1 $ sudo systemctl status mongod 2 3 ● mongod.service - MongoDB Database Server 4 Loaded: loaded (/lib/systemd/system/mongod.service; enabled; vendor preset: enabled) 5 Active: active (running) since Tue 2020-08-09 08:09:07 UTC; 4s ago 6 Docs: https://docs.mongodb.org/manual 7 Main PID: 2366 (mongod) 8 CGroup: /system.slice/mongod.service 9 └─2366 /usr/bin/mongod --config /etc/mongod.conf
If your service is running correctly, you can run the MongoDB client,
mongo, from the command-line to connect:
1 # Connect to the local mongod, on the default port: 2 $ mongo 3 MongoDB shell version v4.4.0 4 connecting to: mongodb://127.0.0.1:27017/?compressors=disabled&gssapiServiceName=mongodb 5 Implicit session: session { "id" : UUID("576ec12b-6c1a-4382-8fae-8b6140e76d51") } 6 MongoDB server version: 4.4.0 7 --- 8 The server generated these startup warnings when booting: 9 2020-08-09T08:09:08.697+00:00: Using the XFS filesystem is strongly recommended with the WiredTiger storage engine. See http://dochub.mongodb.org/core/prodnotes-filesystem 10 2020-08-09T08:09:10.712+00:00: Access control is not enabled for the database. Read and write access to data and configuration is unrestricted 11 --- 12 --- 13 Enable MongoDB's free cloud-based monitoring service, which will then receive and display
metrics about your deployment (disk utilization, CPU, operation statistics, etc).
The monitoring data will be available on a MongoDB website with a unique URL accessible to you
and anyone you share the URL with. MongoDB may use this information to make product
improvements and to suggest MongoDB products and deployment options to you.
To enable free monitoring, run the following command: db.enableFreeMonitoring()
To permanently disable this reminder, run the following command: db.disableFreeMonitoring()
---
First, check the warnings. You can ignore the recommendation to run the
XFS filesystem, as this is just a small, local install. The warning
about access control not being enabled for the database is important
though! You'll fix that in the next section. At this point, if you feel
like it, you can enable the free
monitoring
that MongoDB provides, by running db.enableFreeMonitoring() inside
the mongo shell.
#Securing MongoDB
Here's the next, essential steps, that other tutorials miss out, for some reason. Recent versions of mongod won't connect to the network unless user authentication has been configured. Because of this, at the moment your database is only accessible from the Raspberry Pi itself. This may actually be fine, if like me, the services you're running with MongoDB are running on the same device. It's still a good idea to set a username and password on the database.
Here's how you do that, inside mongo (replace SUPERSECRETPASSWORD
with an actual secret password!):
1 use admin 2 db.createUser( { user: "admin", 3 pwd: "SUPERSECRETPASSWORD", 4 roles: [ "userAdminAnyDatabase", 5 "dbAdminAnyDatabase", 6 "readWriteAnyDatabase"] } ) 7 exit
The three roles listed give the admin user the ability to administer
all user accounts and data in MongoDB. Make sure your password is
secure. You can use a random password
generator to be
safe.
Now you need to reconfigure mongod to run with authentication enabled,
by adding a couple of lines to /etc/mongod.conf. If you're
comfortable with a terminal text editor, such as vi or emacs, use one of
those. I used nano, because it's a little simpler, with
sudo nano /etc/mongod.conf.
Add the following two lines somewhere in the file.
Like the network-config file you edited earlier,
it's a YAML file, so the indentation is important!
1 # These two lines must be uncommented and in the file together: 2 security: 3 authorization: enabled
And finally, restart mongod:
1 sudo systemctl restart mongod
Ensure that authentication is enforced by connecting mongo without
authentication:
1 $ mongo 2 MongoDB shell version v4.4.0 3 connecting to: mongodb://127.0.0.1:27017/?compressors=disabled&gssapiServiceName=mongodb 4 Implicit session: session { "id" : UUID("4002052b-1a39-4158-8a99-234cfd818e30") } 5 MongoDB server version: 4.4.0 6 > db.adminCommand({listDatabases: 1}) 7 { 8 "ok" : 0, 9 "errmsg" : "command listDatabases requires authentication", 10 "code" : 13, 11 "codeName" : "Unauthorized" 12 } 13 > exit
Ensure you've exited mongo and now test that you can connect and
authenticate with the user details you created:
1 $ mongo -u "admin" -p "SUPERSECRETPASSWORD" 2 MongoDB shell version v4.4.0 3 connecting to: mongodb://127.0.0.1:27017/?compressors=disabled&gssapiServiceName=mongodb 4 Implicit session: session { "id" : UUID("3dee8ec3-6e7f-4203-a6ad-976b55ea3020") } 5 MongoDB server version: 4.4.0 6 > db.adminCommand({listDatabases: 1}) 7 { 8 "databases" : [ 9 { 10 "name" : "admin", 11 "sizeOnDisk" : 151552, 12 "empty" : false 13 }, 14 { 15 "name" : "config", 16 "sizeOnDisk" : 36864, 17 "empty" : false 18 }, 19 { 20 "name" : "local", 21 "sizeOnDisk" : 73728, 22 "empty" : false 23 }, 24 { 25 "name" : "test", 26 "sizeOnDisk" : 8192, 27 "empty" : false 28 } 29 ], 30 "totalSize" : 270336, 31 "ok" : 1 32 } 33 > exit
#Make MongoDB Available to your Network
This step is optional! Now that you've configured authentication on your server, if you want your database to be available to other computers on your network, you need to:
- Bind MongoDb to the Raspberry Pi's public IP address
- Open up port
27017on the Raspberry Pi's firewall.
If you don't want to access your data from your network, don't follow these steps! It's always better to leave things more secure, if possible.
First, edit /etc/mongod.conf again, the same way as before. This
time, change the IP address to 0.0.0.0:
1 # Change the bindIp to '0.0.0.0': 2 net: 3 port: 27017 4 bindIp: 0.0.0.0
And restart mongod again:
1 sudo systemctl restart mongod
Open up port 27017 on your Raspberry Pi's firewall:
1 sudo ufw allow 27017/tcp
Now, on another computer on your network, with the MongoDB client
installed, run the following to ensure that mongod is available on
your network:
1 # Replace YOUR-RPI-IP-ADDRESS with your Raspberry Pi's actual IP address: 2 mongo --host 'YOUR-RPI-IP-ADDRESS'
If it connects, then you've successfully installed and configured MongoDB on your Raspberry Pi!
#Security Caveats
This short section is extremely important. Don't skip it.
- Never open up an instance of
mongodto the internet without authentication enabled. - Configure your firewall to limit the IP addresses which can connect to your MongoDB port. (Your Raspberry Pi has just been configured to allow connections from anywhere, with the assumption that your home network has a firewall blocking access from outside.)
- Ensure the database user password you created is secure!
- Set up different database users for each app that connects to your database server, with only the permissions required by each app.
MongoDB comes with sensible security defaults. It uses TLS, SCRAM-based password authentication, and won't bind to your network port without authentication being set up. It's still up to you to understand how to secure your Raspberry Pi and any data you store within it. Go and read the MongoDB Security Checklist for further information on keeping your data secure.
#Wrapping Up
As you can see, there are a few steps to properly installing and configuring MongoDB yourself. I hadn't done it for a while, and I'd forgotten how complicated it can be! For this reason, you should definitely consider using MongoDB Atlas where a lot of this is taken care of for you. Not only is the free-forever tier quite generous for small use-cases, there are also a bunch of extra services thrown in, such as serverless functions, charting, free-text search, and more!
You're done! Go write some code in your favourite programming language, and if you're proud of it (or even if you're just having some trouble and would like some help) let us know!. Check out all the cool blog posts on the MongoDB Developer Hub, and make sure to bookmark MongoDB Documentation