
Please note: This article discusses Stitch. Stitch is now MongoDB Realm. All the same features and functionality, now with a new name. Learn more here. We will be updating this article in due course.
We're pleased to announce that you can now interact with your MongoDB documents using the GraphQL standard in your JavaScript applications by leveraging Stitch integration in your MongoDB Atlas cluster!
So what does this mean, why is it important, and how exactly do you make this happen?
#What is GraphQL
If you've never heard of GraphQL before, you can think of it as a query language for APIs. Rather than making simple HTTP requests to an API endpoint and receiving the full payload of that resource as a response, you can use GraphQL to query for only the fields you want, similar to a MongoDB projection or a SQL query.
By specifying the fields you want returned, you're now decreasing the size of the response payload, boosting the performance of your application, and writing cleaner code.
#Why is GraphQL in MongoDB a Big Deal
Until now, being able to use GraphQL in your applications required a dedicated web service that contained schema information, resolve functions with database logic, and other middleware logic, such as authentication and authorization, to sit between the database and the client facing application.
Building a GraphQL backend, while not an incredibly complicated task, takes time, requires maintenance, and has certain fees associated to it in regards to hosting.
Removing the need for a GraphQL backend by leveraging Stitch for authentication and GraphQL queries and mutations is a huge win for MongoDB and developers on the platform. It is yet another way that MongoDB is working to make the data layer stunningly easy for developers to work with.
#Interacting with MongoDB Documents through the Stitch Dashboard
To use GraphQL for querying and mutating documents directly in the MongoDB platform, a few configurations must be made.
The following will give you an idea of what must be done:
- A database and at least one collection must be created in your MongoDB Atlas cluster.
- A MongoDB Stitch application must be created and linked to the cluster.
- User rules must be defined for the database and collection within Stitch.
- A Stitch schema must be defined.
It doesn't take more than a few minutes to accomplish each of the above items. I'm going to break it down for you to make it easy.
#Create a MongoDB Atlas Cluster with a Database and Collection
The first thing we want to do is make sure we have a cluster created and configured within MongoDB Atlas. If this is your first time being exposed to Atlas, it is a cloud hosted version of MongoDB, and it contains a forever free "M0" tier to get you started.
Want some premium credits applied to your MongoDB Atlas account? Use promotional code NICRABOY200 to receive credits towards building a more powerful cluster.
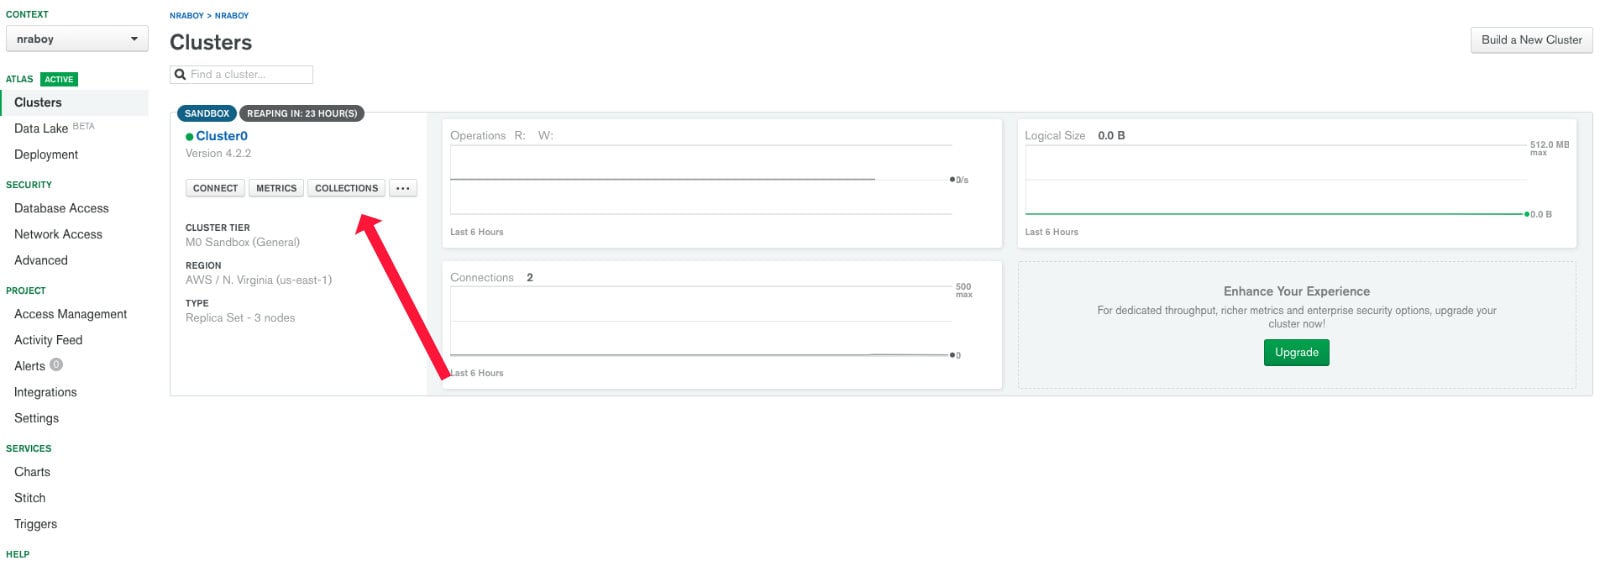
Within Atlas, click the COLLECTIONS button on your desired cluster.
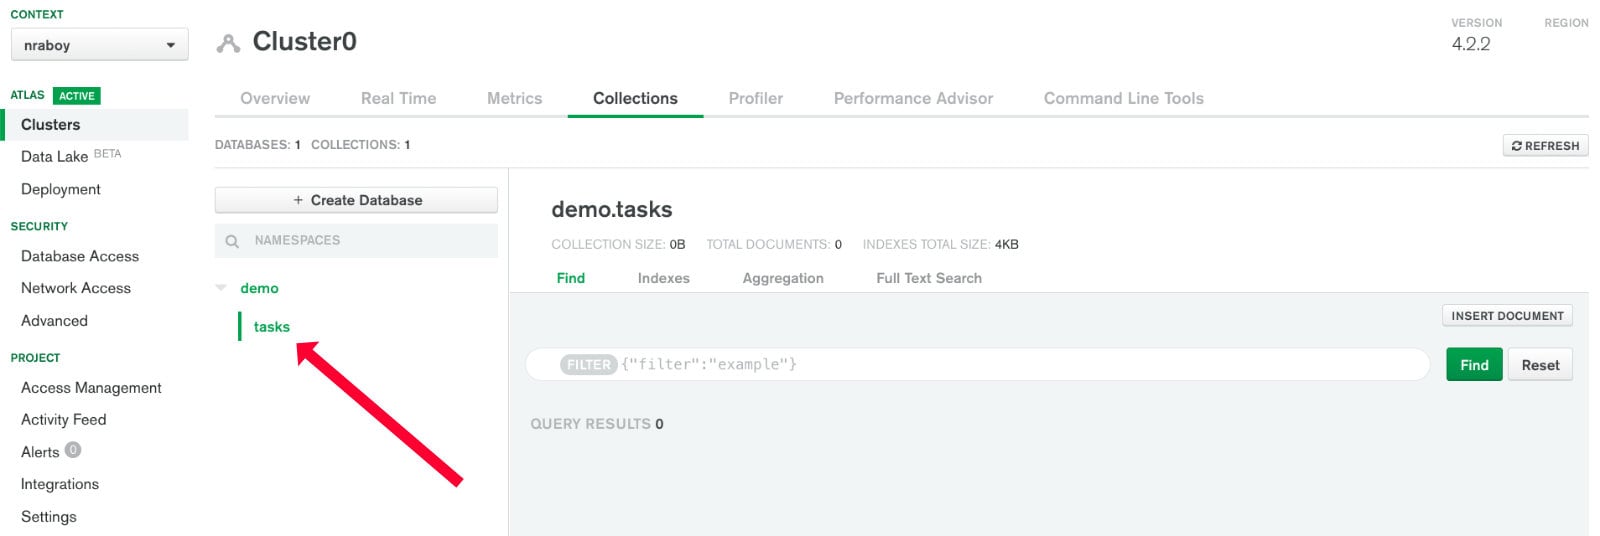
To get started, we're going to create a single database and collection for use with Stitch. If one doesn't already exist, choose Add my own data when prompted.

While out of the scope of this example, you could also play around with the sample data found in MongoDB Atlas.
After choosing to create the new database and collection, you should be brought into the data and schema explorer part of the MongoDB Atlas dashboard. If you're starting with a fresh database and schema, you won't have any data as of now.
At this point in time, MongoDB Atlas is configured enough to move onto the next step which involves creating a Stitch application and linking it to the database and collection.
#Configuring MongoDB Stitch to Integrate with the Atlas Cluster
To connect your cluster to Stitch, you need to create an application. This is not an application like one you'd develop, but more in the sense that Stitch is providing the backend components required to support your web or mobile application.
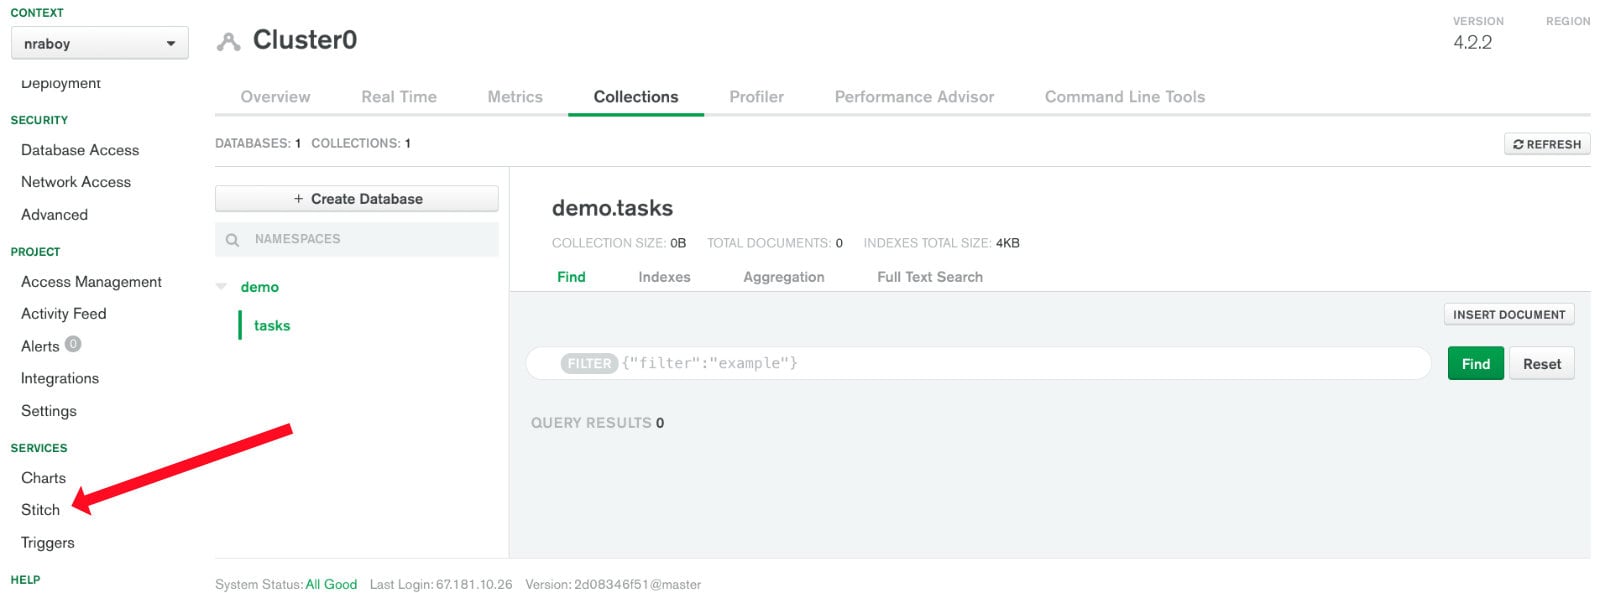
Almost anywhere within the MongoDB Atlas dashboard, click Stitch within the Services section of the navigation.
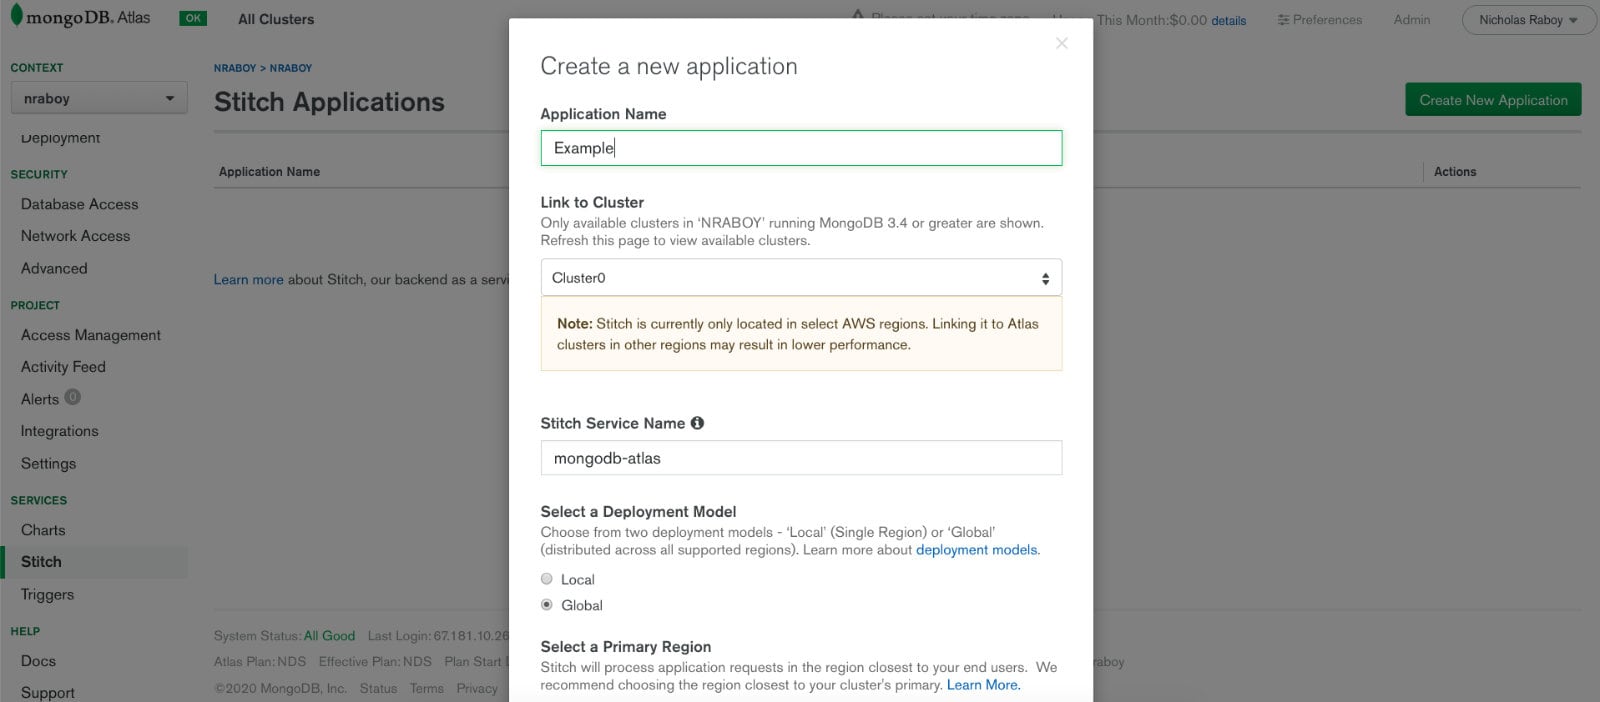
After navigating to the Stitch service, you'll be asked to create a new application if one doesn't already exist. This is where you'll define information like the application name, the cluster in question, and any other deployment information.
Once created, you'll be brought to the Stitch dashboard for your particular application. When you develop your application outside of Stitch, you'll probably want some form of authentication so that people can access only the documents that they own.
To get the most simple authentication going, choose to enable Anonymous Authentication Enabled, as it will be used for the example in this tutorial.
#Defining User Rules for Data Access within Stitch
With the Stitch application connected to the MongoDB Atlas cluster, we need to define access rules for our users.
In the navigation bar, choose Rules and select the collection that we wish to configure. In my example, I'm using demo as the database and tasks as the collection.
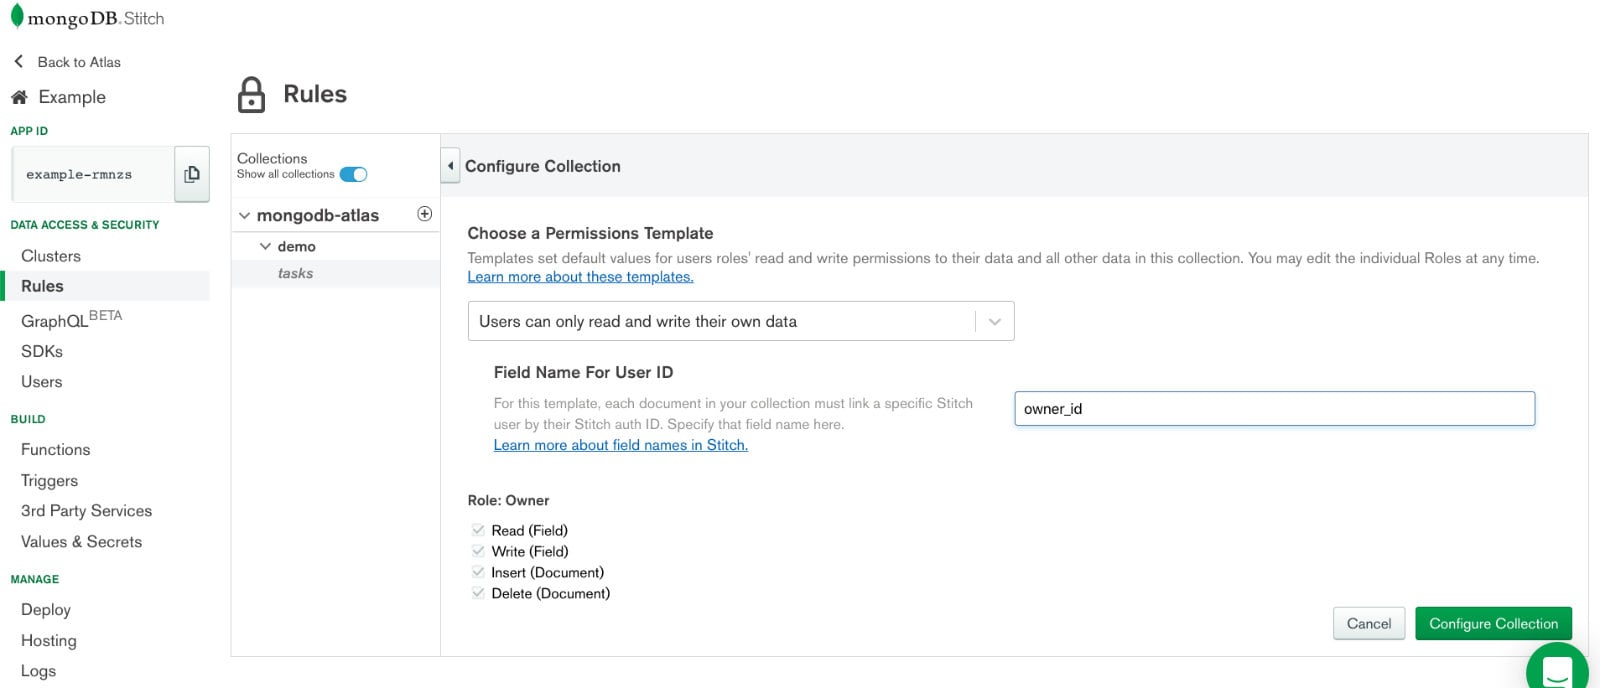
You'll want to choose a permissions template for the collection. In our example we want users to be only able to read their own data. For this template, we need to define which field in our MongoDB documents will contain the user id. The actual user id is created after the user authenticates, but for this example owner_id is going to represent it. This configuration rule will ensure that when an authenticated user makes a request, only documents where the owner_id field is equal to the id of the user will be returned.
#Creating a Schema within MongoDB Stitch
For Stitch to automatically generate possible queries and mutations, it needs to understand how the documents can be modeled. To do this, a schema needs to be defined within the Rules section of the Stitch dashboard.
You can either create your schema manually for any given collection, or you can choose to generate the schema automatically. Generating the schema automatically will result in a defined number of documents to be evaluated within the collection to get the result.
Here is an example of a possible schema for the particular collection:
1 { 2 "properties": { 3 "_id": { "bsonType": "objectId" }, 4 "name": { "bsonType": "string" }, 5 "description": { "bsonType": "string" }, 6 "tags": { 7 "bsonType": "array", 8 "uniqueItems": true, 9 "items": { 10 "bsonType": "string" 11 } 12 }, 13 "owner_id": { "bsonType": "string" }, 14 "createdAt": { "bsonType": "date" } 15 } 16 }
While a little more extravagant than we need, I just wanted to show that you can have complexity in your schema through the above example.
MongoDB doesn't have a schema by default, but GraphQL requires a strict type system. Using a JSON schema allows you to map your data in MongoDB and enables Stitch to automatically generate a full GraphQL schema. The schema you define in Stitch is only related to your application and it doesn't affect any other workloads on your MongoDB cluster. It simply ensures that the data passed to GraphQL doesn't create errors. If you're not sure whether the schema you've created matches your data, Stitch also includes validation that will flag inconsistencies between your schema and data.
When you've defined your schema, make sure you click the SAVE button.
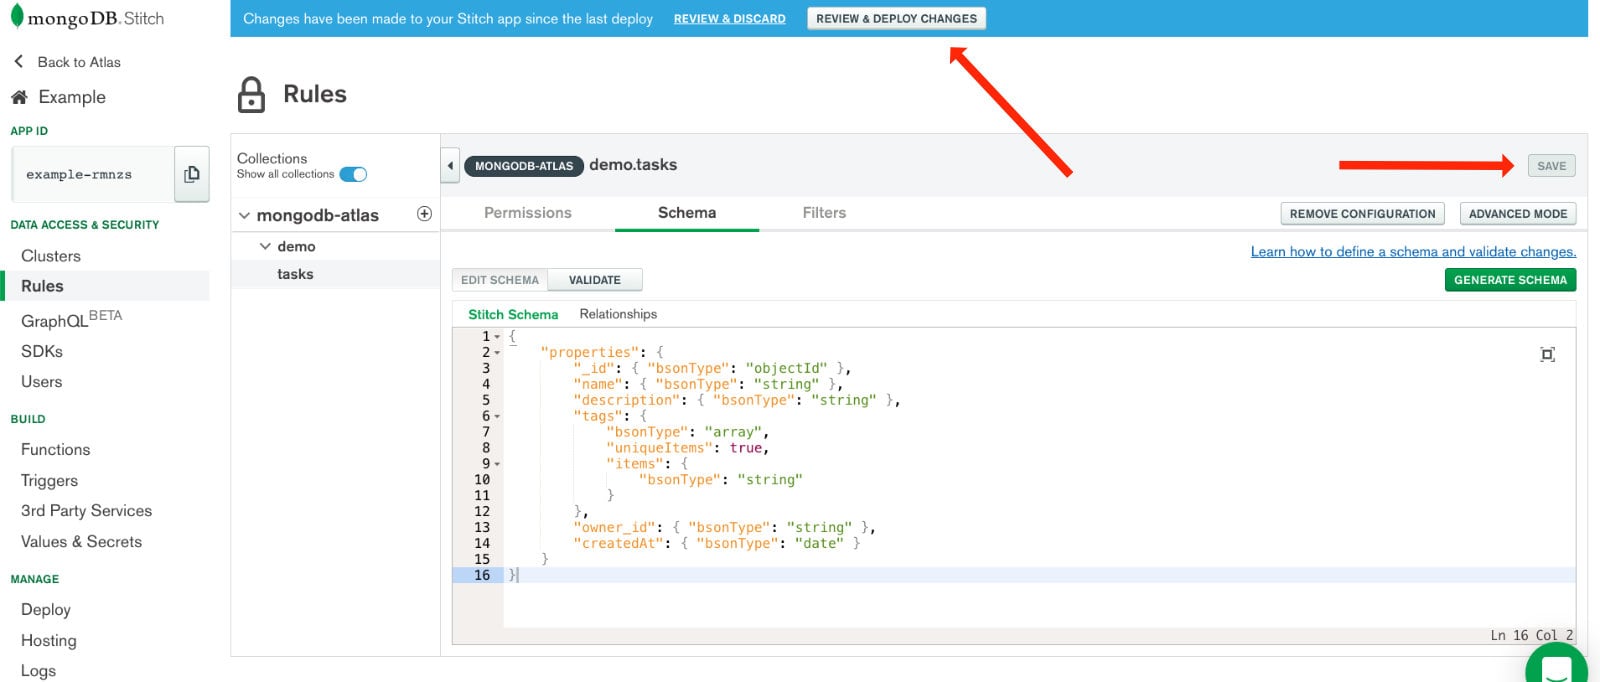
Don't forget to also review and deploy the changes you made so they are live and ready to be worked with.
#Interacting with GraphQL using the Integrated GraphiQL Interface
With the cluster linked to a Stitch application and the rules and schema information in place, we can proceed to the GraphQL side of things.
Within the Stitch dashboard, choose the GraphQL tab from the navigation.
If you've ever dabbled with GraphQL, the interface that Stitch offers might look familiar. It uses GraphiQL as a way to interact with and explore the collection using GraphQL queries and mutations.
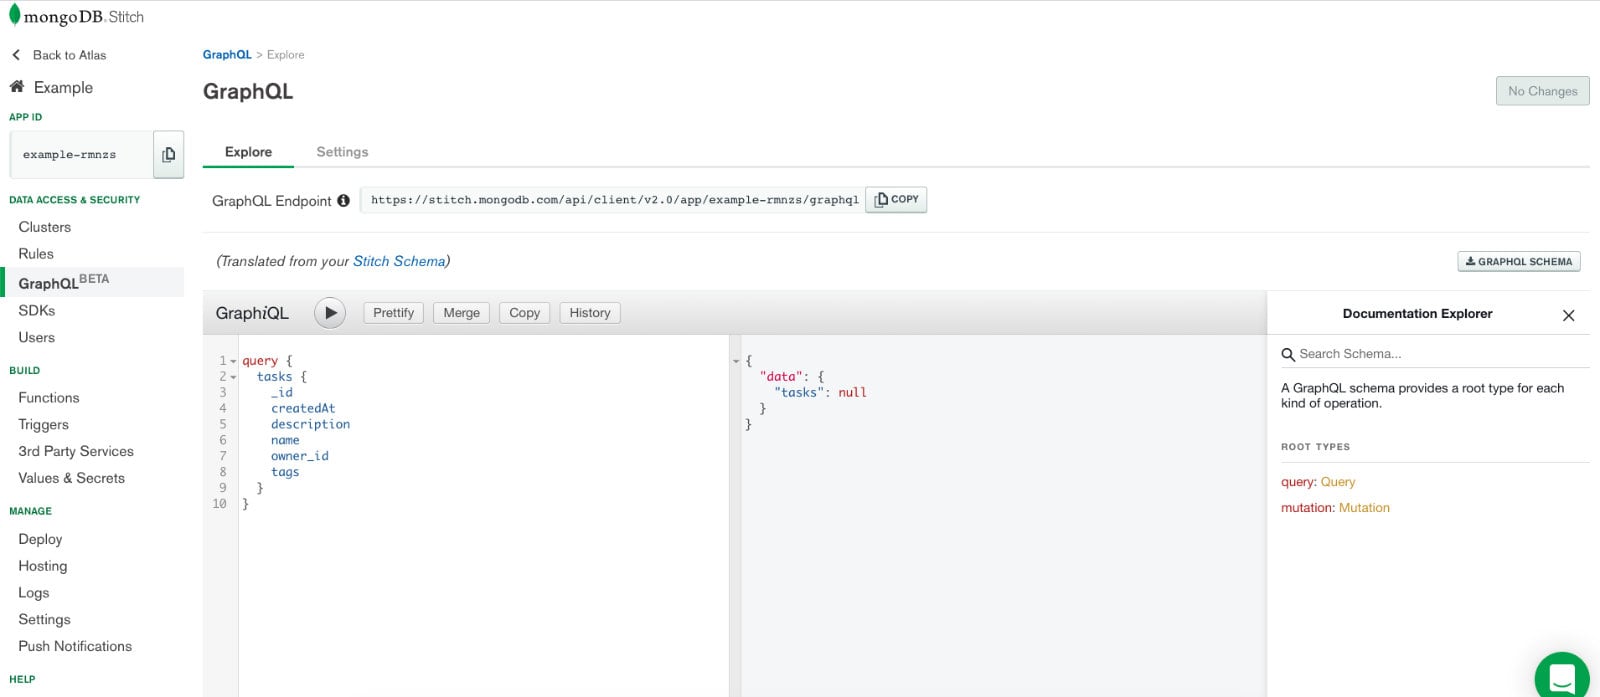
To get an idea of what queries and mutations are available, take a look at the Document Explorer within GraphiQL. If you click on Query or Mutation, you'll get a list of what's available for the particular application. This is based on what you had entered in your schema definition for Stitch.
At this point in time you have a fully capable GraphQL endpoint.
#Creating a Simple JavaScript Application with GraphQL Support
Interacting with MongoDB documents through GraphiQL and the Stitch dashboard is great, but in most circumstances you're going to want to do this from your own web or mobile applications.
The Stitch SDK, along with common JavaScript packages and frameworks, makes this an easy process. We're going to create a very basic application to get you started in the right direction.
For this example we're going to use the following:
- MongoDB Stitch SDK 4.6.0+
- Axios
The Stitch SDK will allow us to interact with Stitch specific features such as authentication while Axios will give us an easy set of commands for making HTTP requests to the GraphQL endpoint that we've configured for our collection. Axios is not a requirement, but it is my personal preference when making HTTP requests with JavaScript.
Create an index.html file on your computer with the following boilerplate code:
1 <html> 2 <head></head> 3 <body> 4 <script src="https://unpkg.com/axios/dist/axios.min.js"></script> 5 <script src="https://s3.amazonaws.com/stitch-sdks/js/bundles/4.6.0/stitch.js"></script> 6 <script>
// Logic here...
</script> 7 </body> 8 </html>
The thought process behind this very simple application is as follows:
- Configure the connection of Stitch to the JavaScript application
- Anonymously authenticate users
- Create a new document through a GraphQL mutation
- Find documents through a GraphQL query
To work through this, let's start adding some logic to the application
in the <script> tag.
Within the <script> tag, add the following:
1 const client = stitch.Stitch.initializeDefaultAppClient("example-auuce");
The initializeDefaultAppClient will take the application id for your
Stitch application to create a client.
The next step is authentication. This is an asynchronous event, so you should either be using promises or the more modern async and await approach. Take the following for example:
1 (async () => { 2 try { 3 const user = await client.auth.loginWithCredential(new stitch.AnonymousCredential()); 4 console.info(user); 5 // GraphQL Logic Here... 6 } catch (error) { 7 console.error(error); 8 } 9 })();
The above snippet will attempt anonymous authentication. If it is successful, the user information will be printed to the console. What's important in this response is the id, which is the owner id for our documents and the access token that we send with future requests to prove we are who we say we are.
At this point we have our owner information and we want to create new documents using a GraphQL mutation. We can do something like the following:
1 (async () => { 2 try { 3 const user = await client.auth.loginWithCredential(new stitch.AnonymousCredential()); 4 console.info(user); 5 6 const task = { 7 "name": "Test Name", 8 "description": "Test Description", 9 "owner_id": user.id 10 } 11 12 const resp = await axios({ 13 url: 'https://stitch.mongodb.com/api/client/v2.0/app/example-auuce/graphql', 14 method: 'post', 15 headers: { 16 'Authorization': `Bearer ${user.auth.activeUserAuthInfo.accessToken}` 17 }, 18 data: { 19 query: `
mutation($data:TasksInsertInput!){
insertOneTasks(data:$data){
_id,
description,
name
}
}
`, 20 variables: { 21 data: task 22 } 23 } 24 }); 25 console.log(resp); 26 } catch (error) { 27 console.error(error); 28 } 29 })();
In the above example we are creating a task object modeled the same
as our Stitch schema, minus a few fields. The owner_id is pulled
from the response of the anonymous authentication.
To make the GraphQL request from JavaScript, there are many ways to do this, but like I mentioned, Axios is my personal favorite. To make the request, you'll need the endpoint from the Stitch dashboard. You'll want to get it from the page where we played around with GraphiQL.
The authorization token can be obtained from the successful
authentication attempt. The payload of the request is a GraphQL mutation
and the appropriate variables that should be passed from the
application. In this case the variable is the task that was created
prior.
Because the insertOneTasks mutation lists _id, description,
and name, this is the data that will be returned and printed when
the request is successful.
You can look to see if this data truly exists in Atlas, by looking at the data explorer for the collection. We can also try to run another GraphQL query:
1 (async () => { 2 try { 3 const user = await client.auth.loginWithCredential(new stitch.AnonymousCredential()); 4 console.info(user); 5 const resp = await axios({ 6 url: 'https://stitch.mongodb.com/api/client/v2.0/app/example-auuce/graphql', 7 method: 'post', 8 headers: { 9 'Authorization': `Bearer ${user.auth.activeUserAuthInfo.accessToken}` 10 }, 11 data: { 12 query: `
{
taskss{
name,
description
}
}
` 13 } 14 }); 15 console.log(resp); 16 } catch (error) { 17 console.error(error); 18 } 19 })();
The request is more or less the same, just this time a different GraphQL query.
#More Examples and Help with MongoDB and GraphQL
To get more hands on experience with using GraphQL with MongoDB using Stitch, there are a few more projects you can look at to give you a bump in the right direction.
While both of the above examples leverage React, a popular web development framework, they demonstrate interacting with GraphQL using different client packages.
#Conclusion
GraphQL becoming integrated into MongoDB Stitch is a huge thing as GraphQL is a widely adopted query language for APIs. Not having to create a custom backend implementation of GraphQL can save your development teams a lot of time and resources.