GraphQL is rapidly growing in popularity as the new standard for working with APIs, and it's easy to see why! Performant and efficient, this groundbreaking API query language gives developers a single API endpoint to access exactly the data they need. Relationships and custom resolvers allow you to even further evolve your GraphQL API to access multiple data sources. With such extensibility, you can iterate even more quickly on front-end features your application users will love.
In this tutorial, we'll walk through a comprehensive example starting only with data and build out an entire site using GraphQL - showing why it's become so popular.
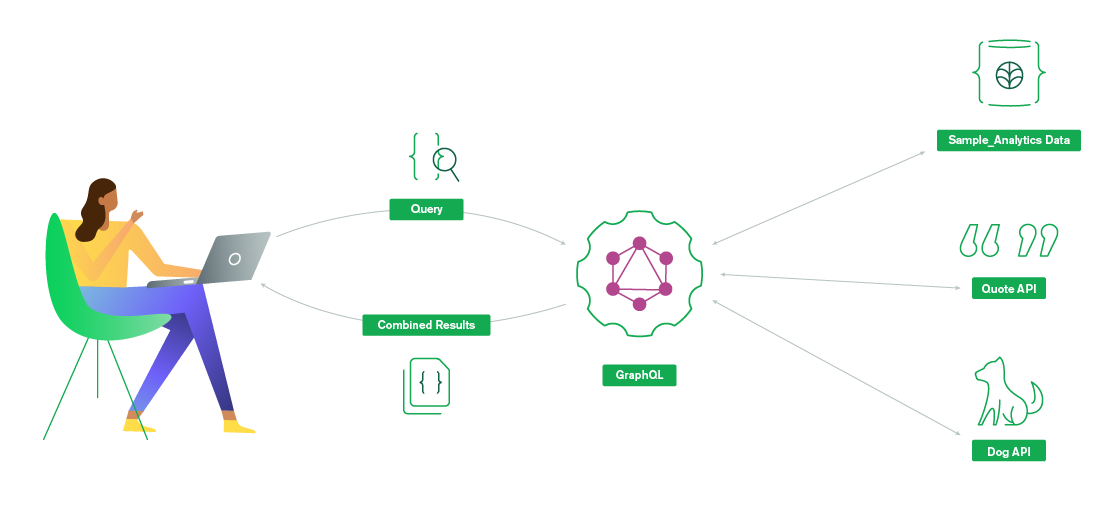
We'll start by setting up a hosted, serverless, and secure GraphQL API for our data in minutes. Then we will extend that API with relationships to other data collections and custom resolvers in order to bundle together different data sources and APIs together under the same schema. Finally, we will build out a web application using our GraphQL endpoint to demonstrate how GraphQL gives us exactly the data we want - nothing more, nothing less.
Along the way, we'll learn how to
- automatically generate JSON schema for your MongoDB collections.
- create types and resolvers for that data.
- define custom query resolvers to access other databases or 3rd party APIs.
- test your schema using the GraphiQL interface inside the Atlas UI.
Do you prefer to learn by video? To see us build out our GraphQL application in real time, check out this video tutorial.
#LET'S START WITH THE DATA
This tutorial assumes that you already have a MongoDB Atlas cluster with the Sample Dataset loaded. If not, it's totally free to create one. Our application will use the sample_analytics dataset. This database contains different collections for a typical financial services application:
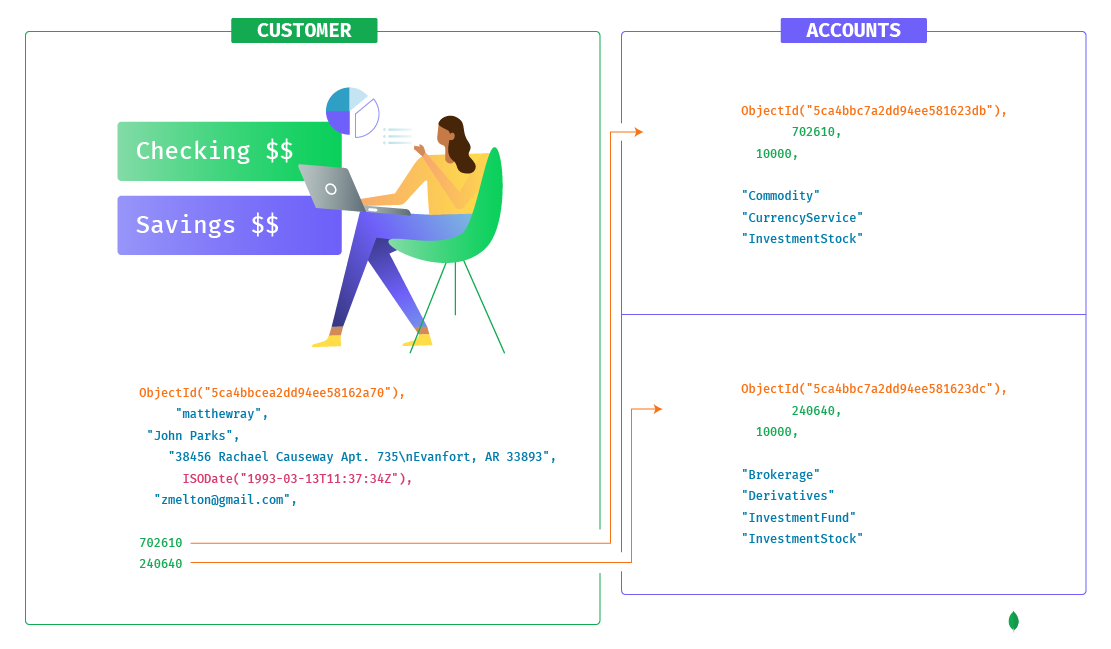
- The sample_analytics.customers collection contains customer details including account numbers.
- The sample_analytics.accounts collection contains the details of each of the customer's accounts. Each document contains an account_id and the products that a customer has purchased.
In the below image, notice how the value in the customer document's accounts array points to the account_id field in the account document.
Now let's expose our sample_analytics data from our cluster by leveraging MongoDB Realm to set up a hosted, serverless, and secure GraphQL API. This will only take a few clicks!
Step 1. Create the BankingDogs Realm Application
MongoDB Realm, simply stated, is a serverless application backend that streamlines your backend code so you can focus on front-end features. We'll use Realm in this tutorial to not only offload the GraphQL backend and middleware layers, but also to handle the authentication, schema creation, and GraphQL queries.
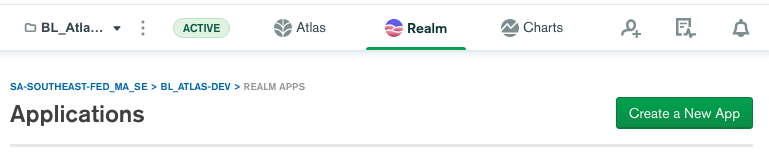
Inside your Atlas UI, select the Realm tab and Create a New App.
Name the application and link it to your Atlas cluster with the sample data loaded. I named my application BankingDogs. You'll see why very soon.
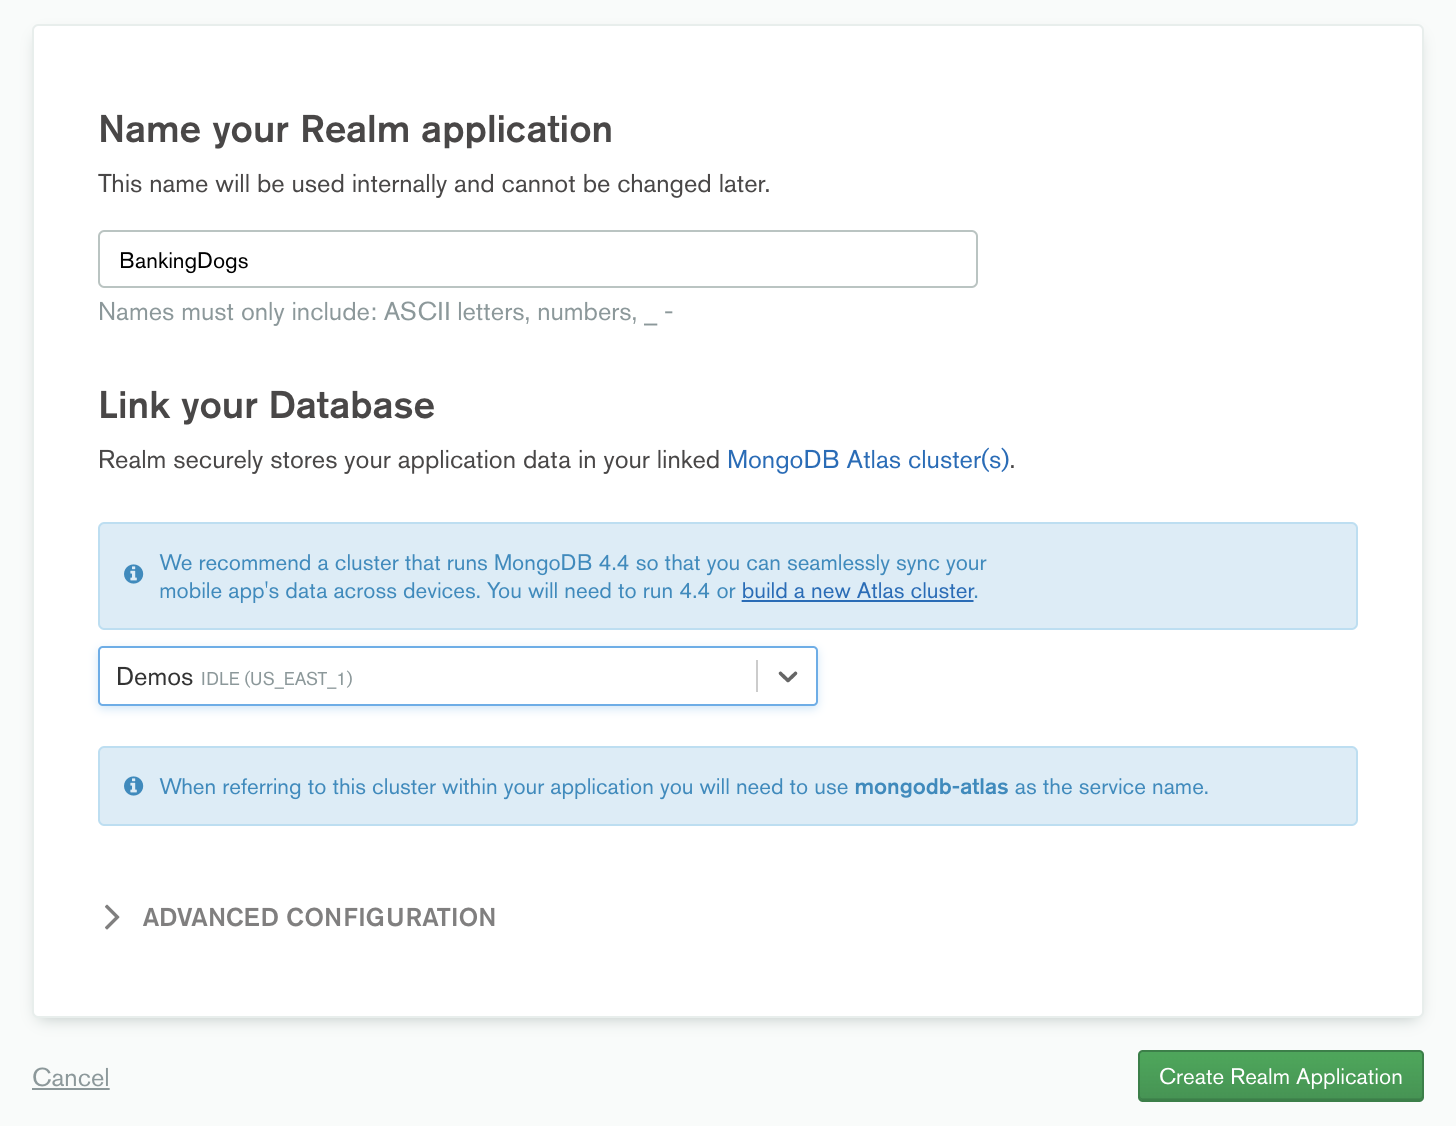
Then click Create Realm Application. Now we are well on our way!
Step 2: Define Data Access Rules for Your Collections
Realm enforces data collection rules for all incoming GraphQL requests. All GraphQL requests must include an authentication token to identify the logged-in Realm user making the request. Realm evaluates a role for every document included in a GraphQL operation and only returns fields and documents that the Realm user has permission to see.
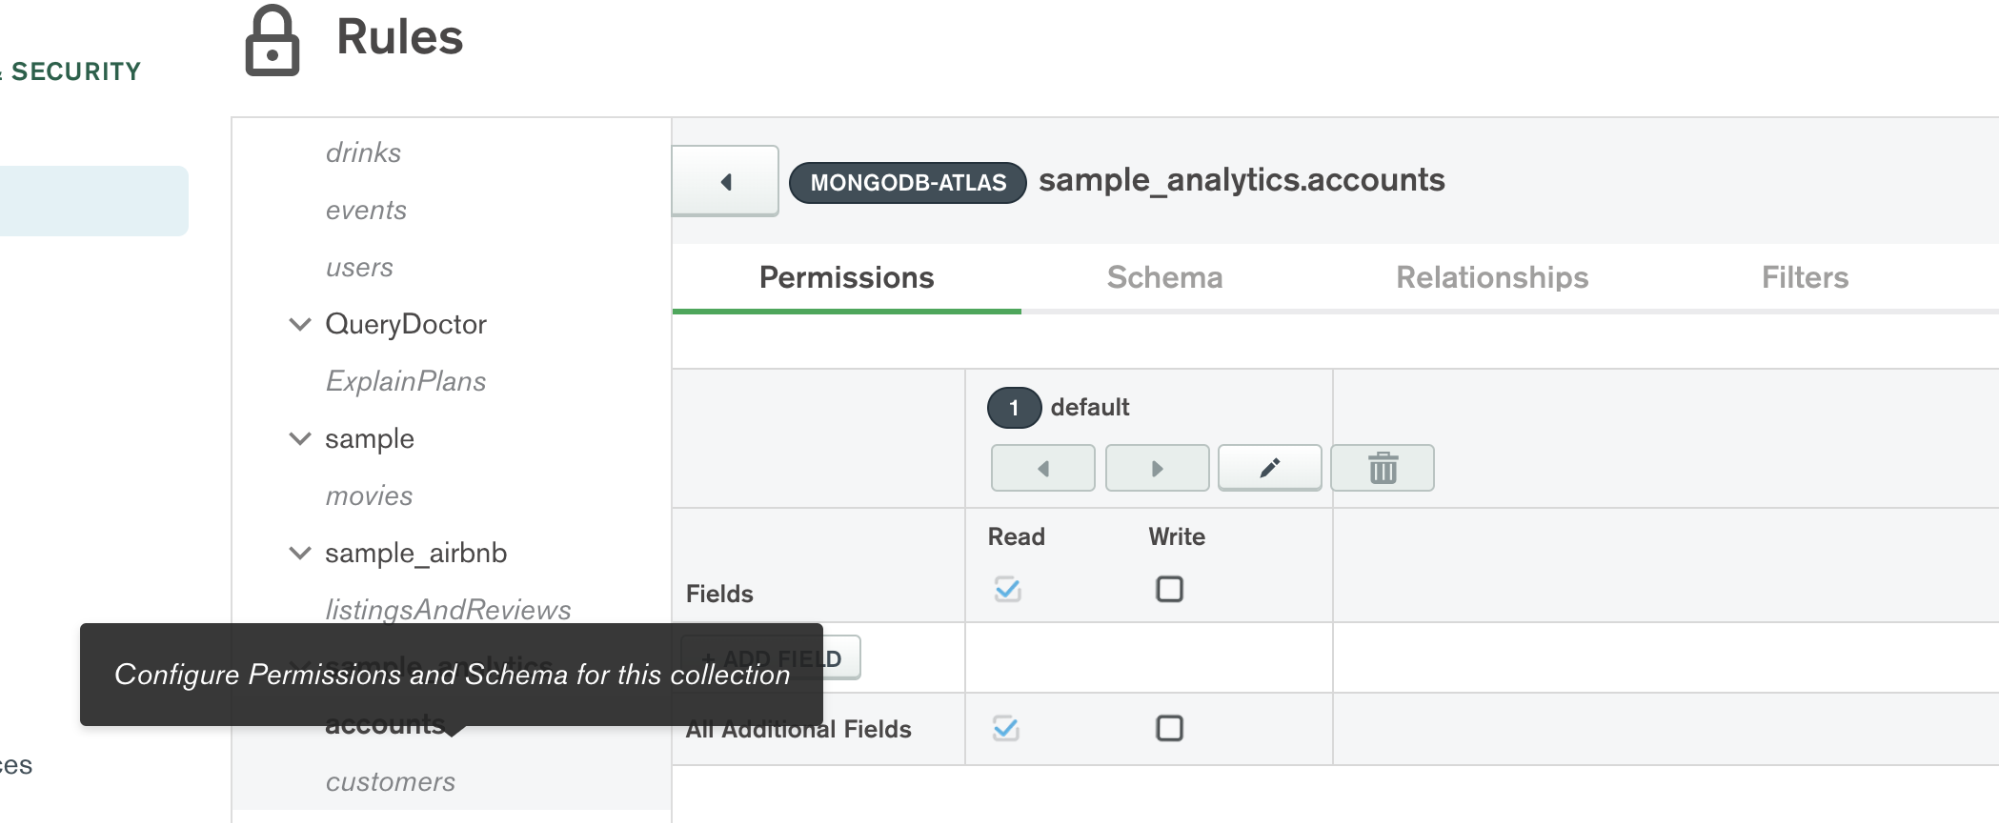
We'll examine this more in detail later, but for right now select the Rules menu under Data Access & Security on the left. Then click Add Collection to select database sample_analytics and accounts collection using no collection template. Select All Additional Fields for read permission. This Default Role will apply to every logged-in user and will allow all fields to be read.
#Schema
GraphQL is strongly typed. Every GraphQL API conforms to a "schema." This schema data model serves as a contract between the client and the server to define what fields are mapped to what types and what kinds of queries a client can make. As such, schemas need to be created for any fields we want to expose via the API. In the upcoming Steps 3-6, we will create the schema from our data, test the schema, and extend the schema through relationships to other data collections. Finally in Steps 7-8, we will extend our schema beyond simply our MongoDB data to include 3rd party data by creating custom resolvers.
Step 3: Create the Schema for Accounts Collection
Switch to the Schema tab and click Generate Schema. Once your schema is generated, to ensure it is valid, select the Validate tab to Run Validation. Save, then Review & Deploy the changes.
And that's it!! You just created your first GraphQL schema and endpoint. At this point, you have done all you need to do to surface your MongoDB Atlas data to client applications. Even if you do not have a front end, you can still test your endpoint and query for your data inside the Realm interface.
Pro Tip! To speed up development, you can bypass the Review & Deploy changes step by disabling drafts. You'll find the setting under Deploy > Configuration.
Step 4: Test New Schema and API in GraphiQL
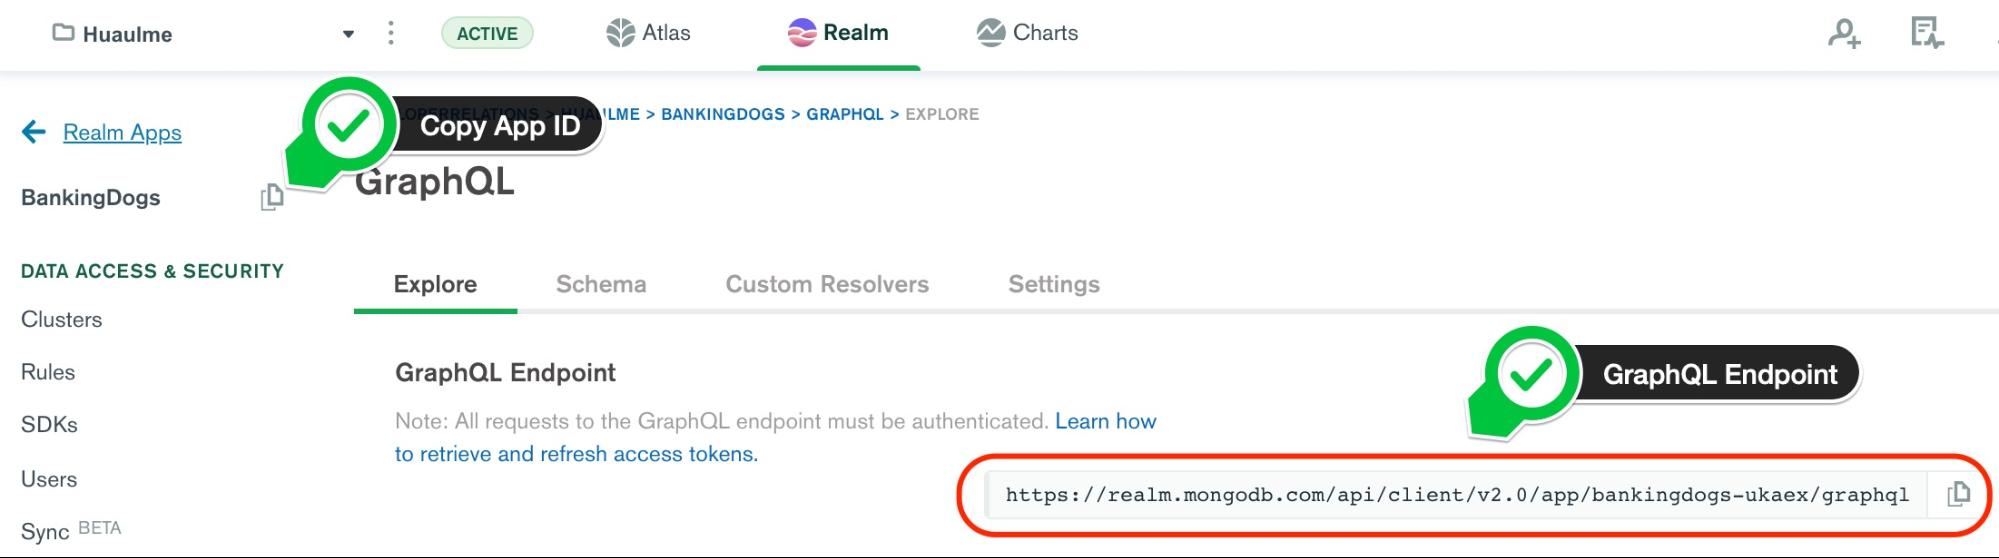
Navigate over to GraphQL in the left side menu. This will open the Explore tab with the GraphiQL GraphQL IDE interface.
There are several exciting things to note here:
- You have your GraphQL endpoint to use in your application.
- You have your GraphiQL interface where you can test out queries.
- You have automatically generated documentation in the Documentation Explorer.
#Documentation
A favorite aspect of GraphQL is that it's self documenting. You'll find the Documentation Explorer on the right side of the GraphiQL interface. Click into Query and you'll see the Query fields that are now available:
account and accounts were created for us when we generated this schema for that collection. Finally, click into account to see the fields that are returned: _id, account_id, limit, and products.
#BUILDING QUERIES
GraphiQL provides an invaluable tool which will help you structure your GraphQL queries correctly. Switch to the query window inside of GraphiQL and scroll to the bottom (or just delete the commented help text). You can see our first query to return an account document. Clicking RUN will execute this query and see the response on the right.
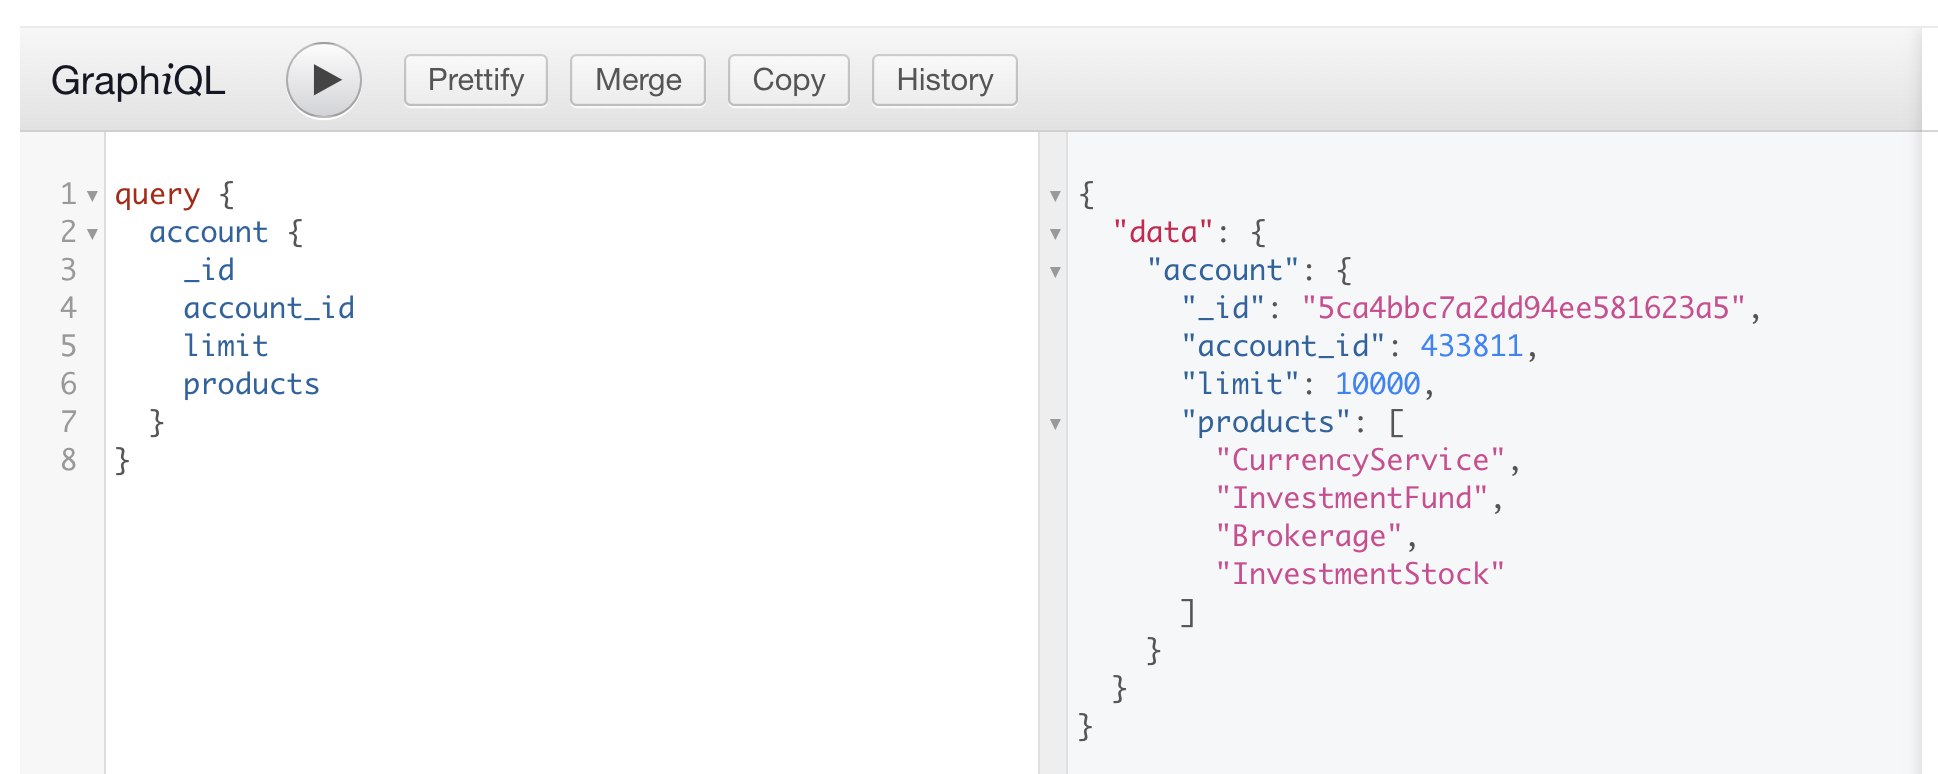
Feel free to peruse the Document Explorer and play around with your queries in GraphiQL.
Step 5: Create a Custom Schema for Customers Collection
Now that you have successfully created and tested a GraphQL API endpoint for your accounts data, let's repeat these same steps to create and validate a schema for the customers collection by clicking on the customers collection in the left side menu.
Remember to give all fields read permissions. Generate the schema and validate. After validating, you will see you get an error message when trying to save.


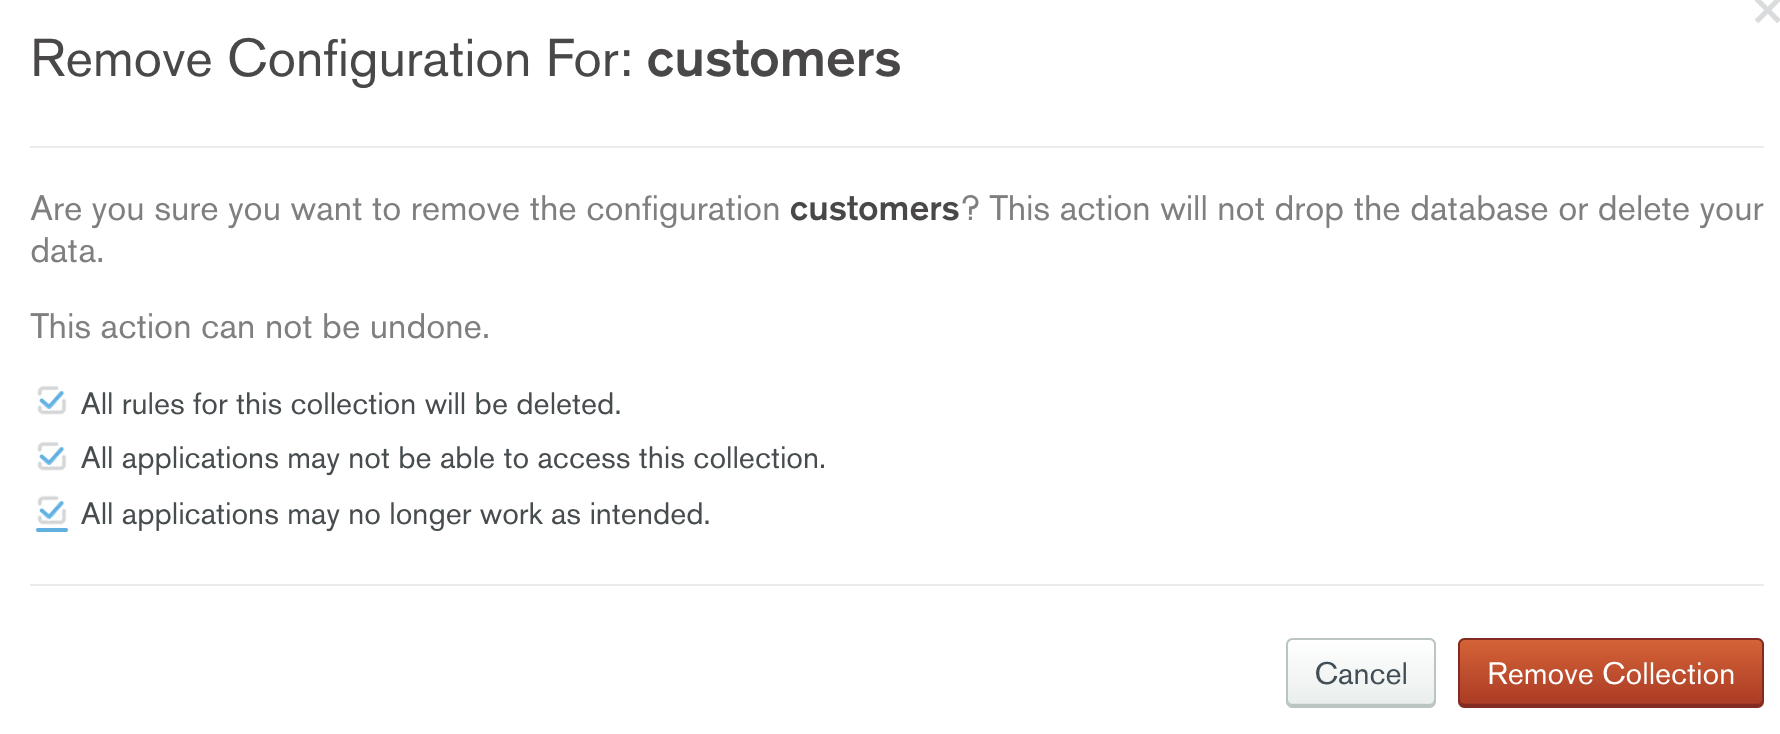
This is because of the tier_and_details field in the customer document. We can simply remove this field since we won't need it in the response payload anyway. In fact, if you have data fields that you don't want to surface to the client application, you can simply remove them from your schema. Click Remove Configuration.
Now go back to the Schema tab, and instead of generating a schema automatically, paste in the following schema object which simply removes the tier_and_details field:
1 { 2 "title": "customer", 3 "properties": { 4 "_id": { 5 "bsonType": "objectId" 6 }, 7 "accounts": { 8 "bsonType": "array", 9 "items": { 10 "bsonType": "int" 11 } 12 }, 13 "active": { 14 "bsonType": "bool" 15 }, 16 "address": { 17 "bsonType": "string" 18 }, 19 "birthdate": { 20 "bsonType": "date" 21 }, 22 "email": { 23 "bsonType": "string" 24 }, 25 "name": { 26 "bsonType": "string" 27 } 28 } 29 }
Now you can validate and save with no problems. Be sure to Review & Deploy the changes.
Going back to GraphiQL, you can start querying for the customer data right away:

Notice you have the EXACT SAME ENDPOINT as you used for the accounts collection! You can also combine calls to both collections, thereby avoiding multiple roundtrips to the server.
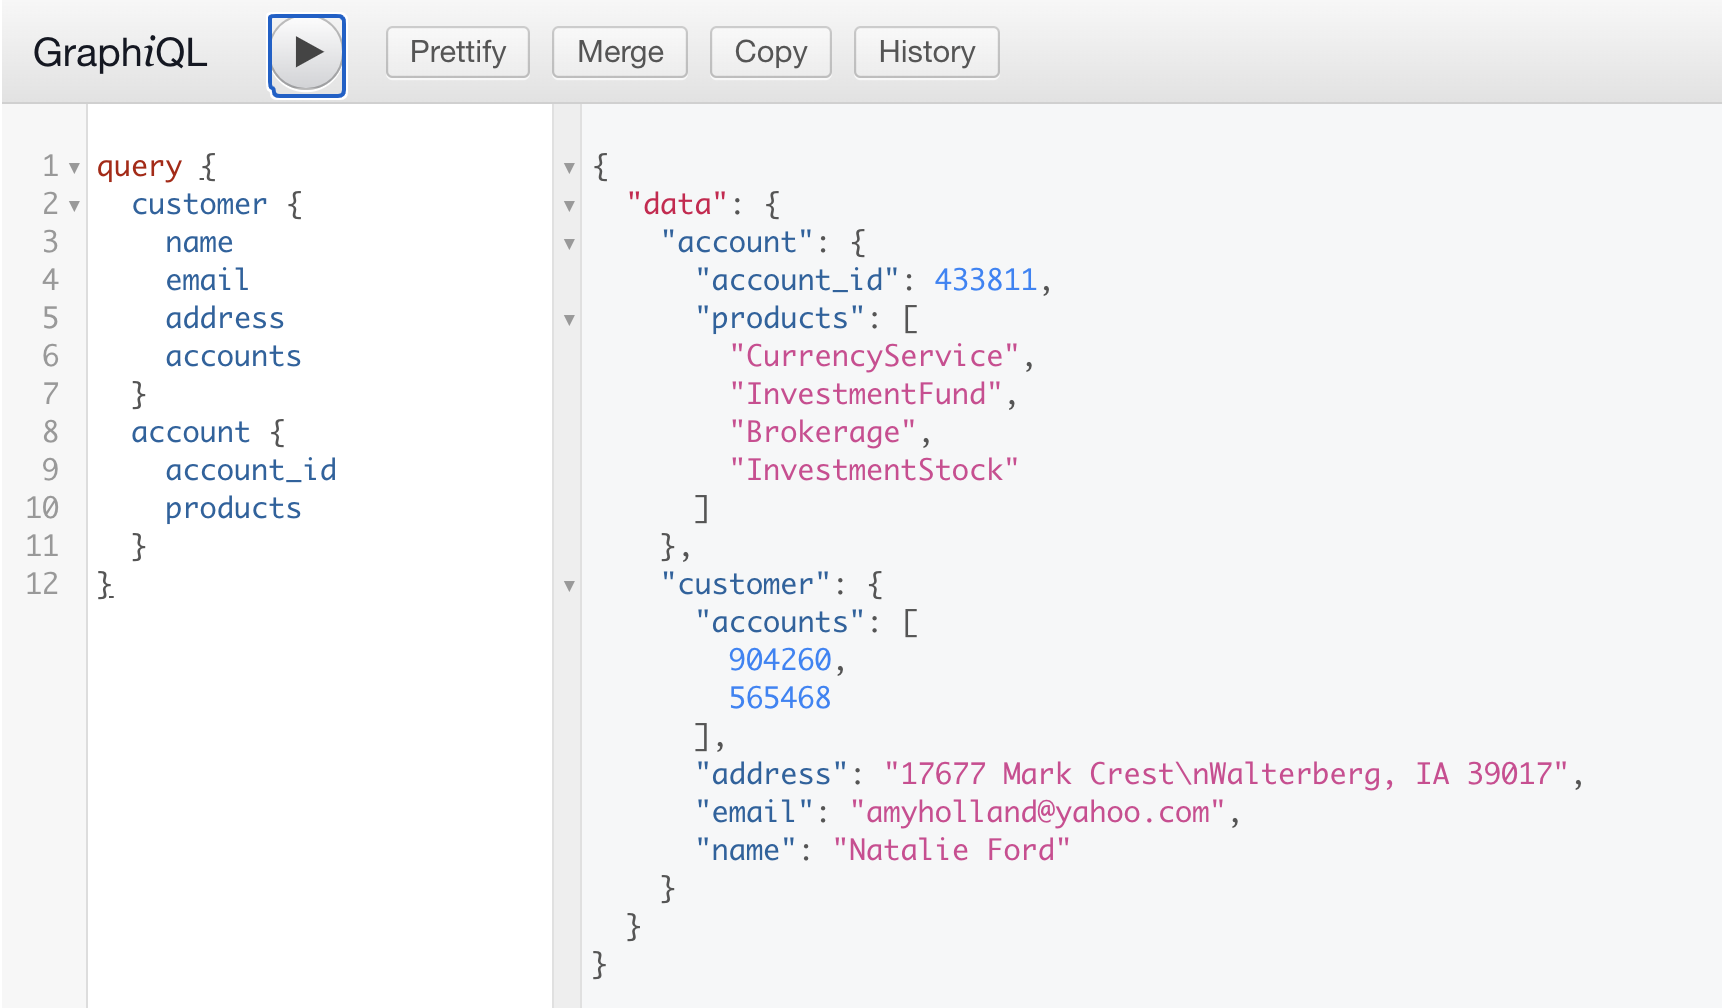
Request as many or as few fields as you wish to get exactly the data you want. This eliminates over-fetching, decreases the response payload, and avoids long page load times. In turn, you get better application performance and can write cleaner code.

#RELATIONSHIPS
We can use our schema to define relationships that connect each document in one local collection to one or more documents in a different, or foreign, collection on the linked MongoDB Atlas cluster. So let's connect our customers to their accounts. Creating a relationship between customers and accounts allows us to fluently query related documents in GraphQL read and write operations. In our case, this will enable us to query for a customer and not just get the customer information, but also the list of products for each of their accounts from the accounts collection in one call.
Step 6: Define a Relationship Between Customers and Accounts
To create a relationship, return to Rules for the customers collection, our local collection. Remember how our customers and accounts collections are related through the customers accounts array pointing to the account_id field in the accounts collection? Let's link them in the interface. Add Relationship in the Relationships tab:
This is our relationship defintion:
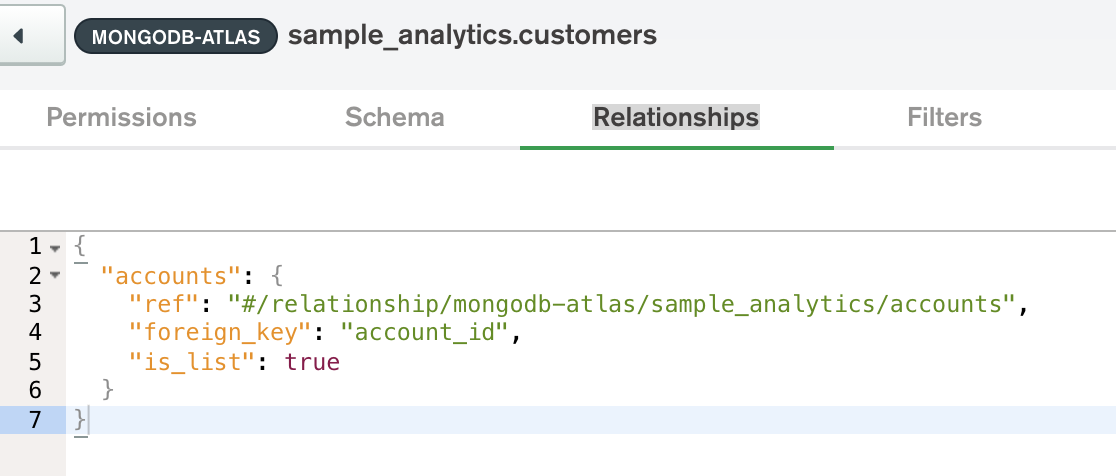
Realm evaluates which account documents are related to a given customer document based on a foreign key value. Our relationship defines the foreign_key field as account_id. Also note that is_list definition field is set to true. This indicates that the relationship from one customer is to multiple account documents because the local field accounts contains an array of values.
With this relationship now defined, Realm can fluidly return a customer and all of her accounts in the same GraphQL query. Returning to GraphiQL, note that we no longer query for simply the accounts field from customers. We must request fields from the corresponding accounts document as per the related account_id field in the accounts collection. In the example below, I am retrieving not only the customer information from the customers collection, but also all of her product information from her related accounts in one single trip to the server:
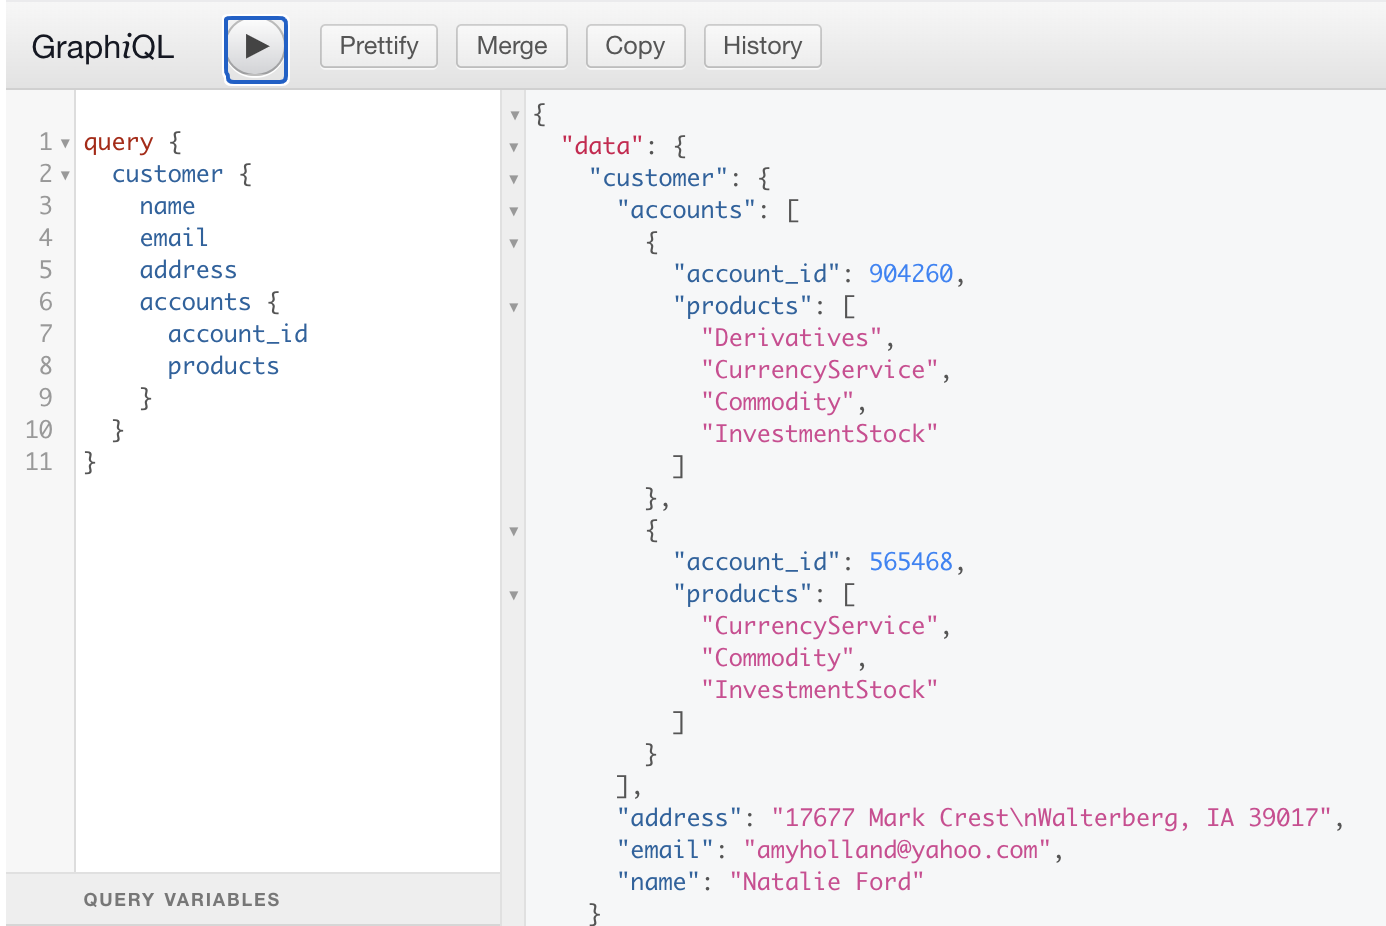
What would traditionally require 2 distinct API calls can now be accomplished with a single call!

#CUSTOM RESOLVERS
- One of the many powerful aspects of GraphQL is the ability to resolve a single query to multiple backend resources. From the GraphQL Documentation:
Each field on each type is backed by a function called the resolver which is provided by the GraphQL server developer. When a field is executed, the corresponding resolver is called to produce the next value.
Realm automatically generates resolvers for the collection fields defined in your schema. However, you may want to define a field that resolves to something outside of the MongoDB database. With custom resolvers , you can bundle together different data sources - whether from other databases or 3rd party APIs - all under the same schema. To extend our GraphQL API even further to suit our use case, let's create a custom resolver to retrieve a random dog image and quote. After all, right now the world needs more dogs and humor.

Step 7: Create the getDogAndQuote Function
Our custom resolver will point to this function for the logic in defining what gets translated into the actual GraphQL API. In our banking application, we not only want to get our customer's account information, but we also need a good laugh nowadays. For this step, we're going to employ the Computer Quote API from Storm Consultancy which provides a selection of quotes from the field of computer science - because computer science is hilarious!!!
Here is a typical payload requesting a random quote from http://quotes.stormconsultancy.co.uk/random.json :
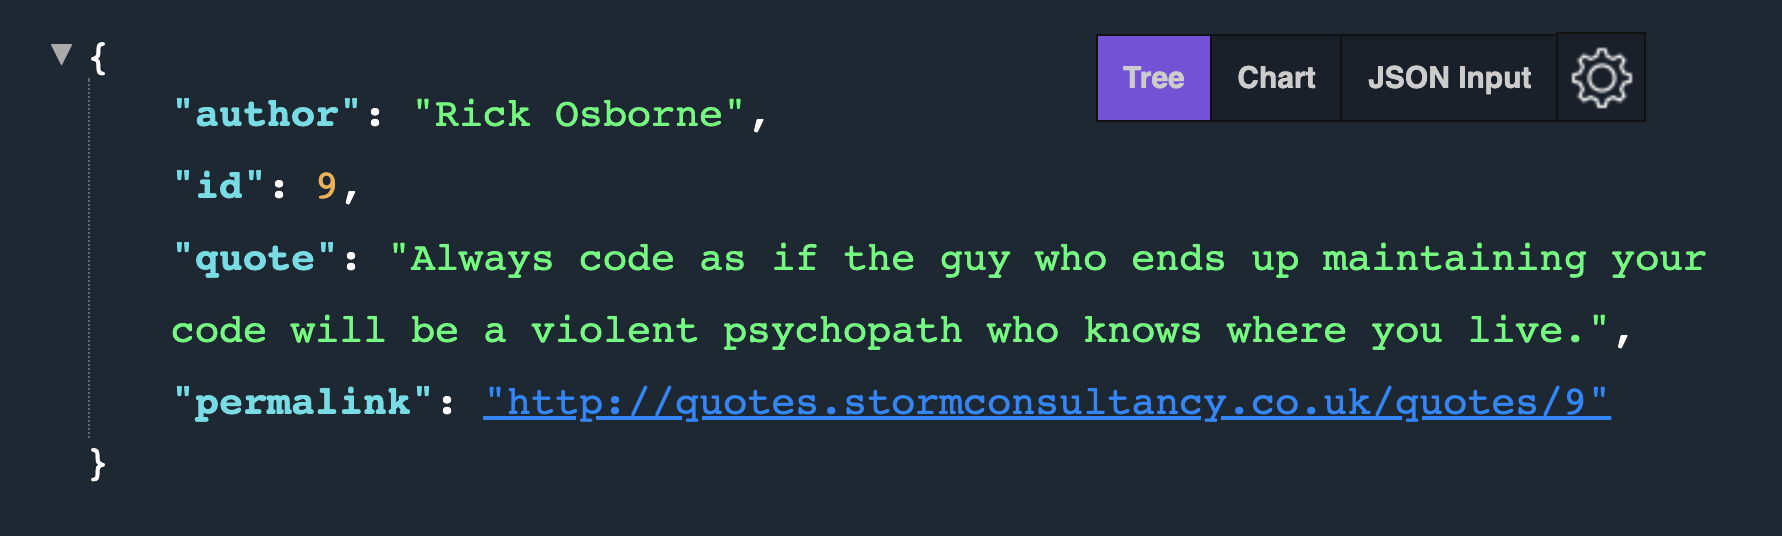
With this in mind, select the Functions menu on the left:
And Create a New Function.
Name the function getDogAndQuote.
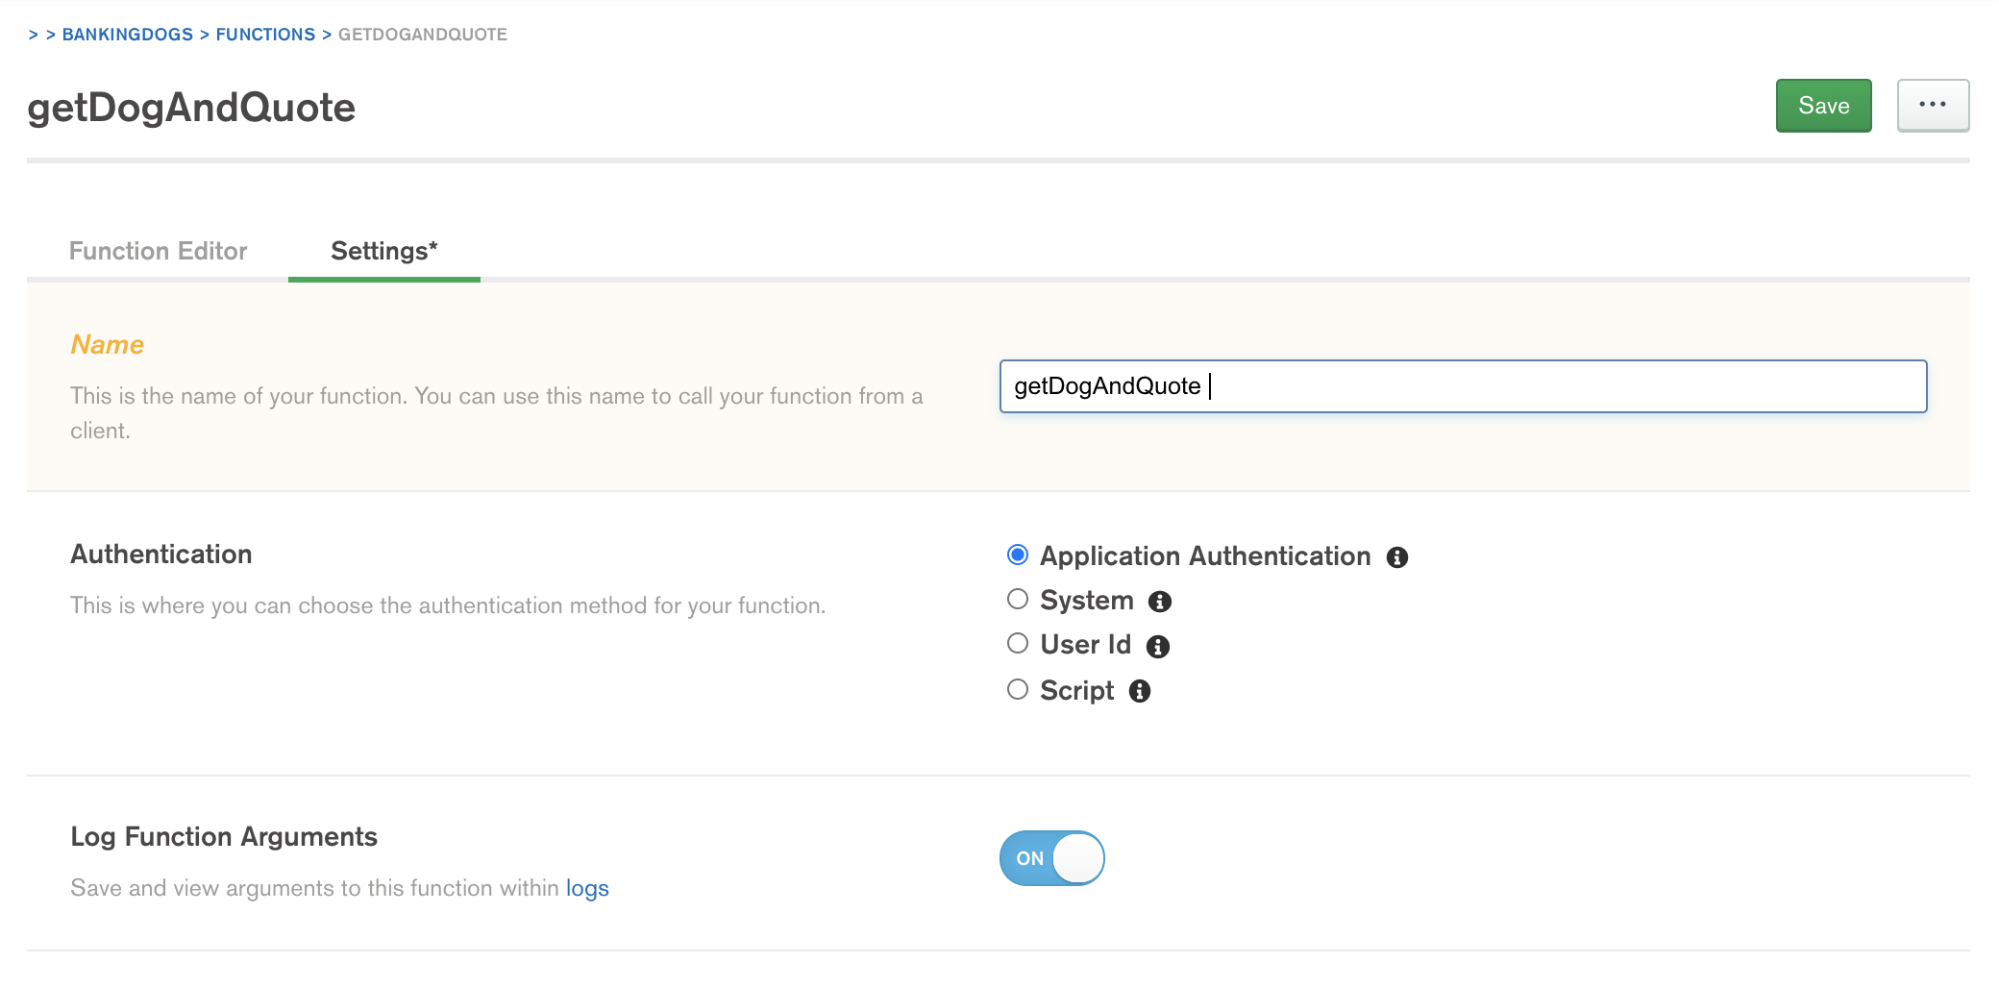
Then switch to the Function Editor and replace the sample code with the following:
1 exports = async function(){ 2 3 // Computer Quote API from Storm Consultancy: 4 const quoteUrl = "http://quotes.stormconsultancy.co.uk/random.json"; 5 6 const quoteResponse = await context.http.get({ url: quoteUrl}); 7 const quotePayload = EJSON.parse(quoteResponse.body.text()); 8 9 const quote = quotePayload.quote; 10 const author = quotePayload.author; 11 12 return { 13 quote:quote, 14 author:author 15 }; 16 }
Feel free to include error handling as you desire :-).
Use the Console at the bottom of the page to click Run to verify that you get a quote and author back successfully from the API:
Even though our customers collection doesn't have the customer's photo, I like to imagine who we are working with, so let's use the Dog API to retrieve a random dog photo. Add the following lines of code to your Realm function and change the return object to include your dog image.
1 const dogUrl = "https://dog.ceo/api/breeds/image/random"; 2 const dogResponse = await context.http.get({ url: dogUrl}); 3 const dogPayload = EJSON.parse(dogResponse.body.text()); 4 const dogImage = dogPayload.message; 5 6 return { 7 quote:quote, 8 author:author, 9 dogImage: dogImage 10 };
Save then Review & Deploy the function.
Step 8: Create the Custom Resolver
Finally, to create the custom resolver, select the GraphQL menu on the left and then the Custom Resolvers tab:
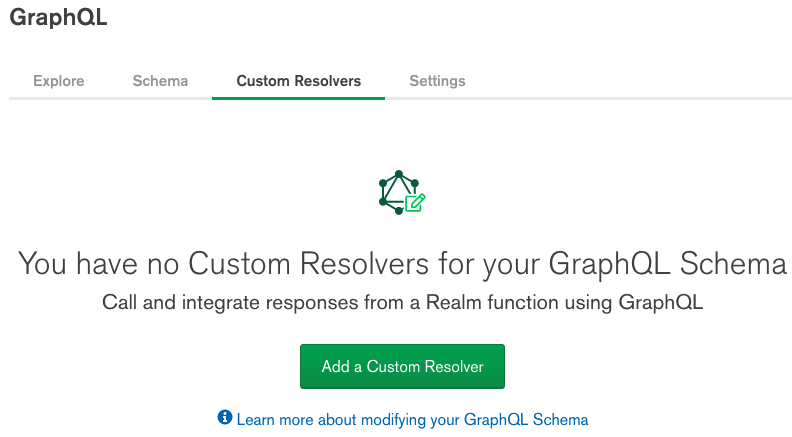
Click Add a Custom Resolver.
We want to allow our clients to insert a new field into their GraphQL query which will return the dog image and quote. The GraphQL Field Name is the name of the field that calls the custom resolver and the Parent Type determines if the resolver is a query or a mutation. Set the GraphQL Field Name to DogAndQuote, the Parent Type to Query and the Function to the getDogAndQuote function you just created.
Set the InputType to None, as our resolver doesn't require one. Set the Payload Type to Custom Type with the following:
1 { 2 "type": "object", 3 "title": "DogAndQuote", 4 "properties": { 5 "quote": { 6 "type": "string" 7 }, 8 "author": { 9 "type": "string" 10 }, 11 "dogImage": { 12 "type": "string" 13 } 14 } 15 }
The title "DogAndQuote" will be used to describe the payload in the GraphQL documentation. In summary, when the Realm GraphQL resolver sees the field "DogAndQuote", it will call the function "getDogAndQuote" to get the result.
Save then Review & Deploy the custom resolver.
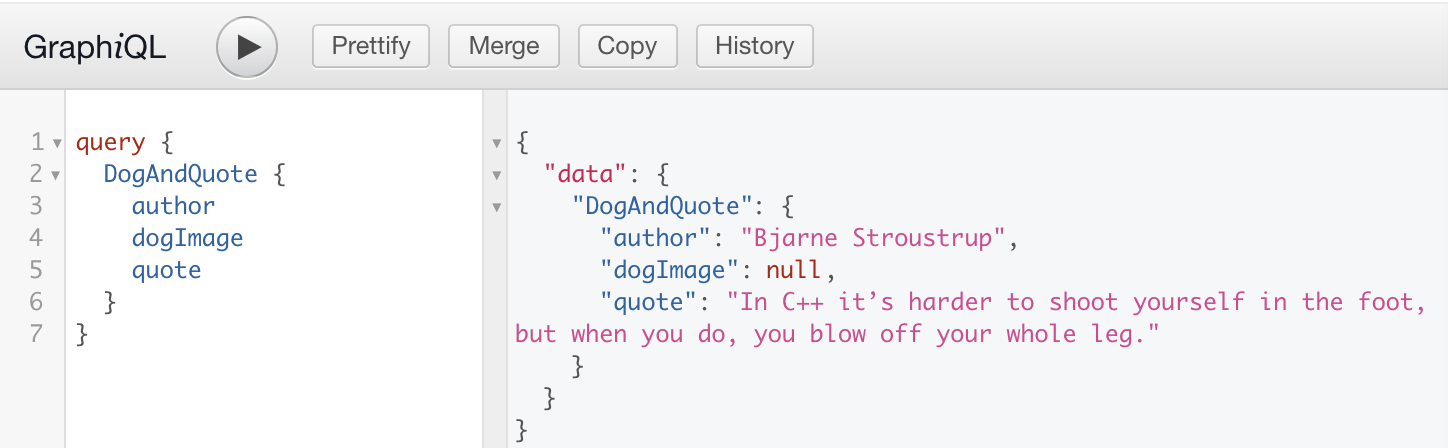
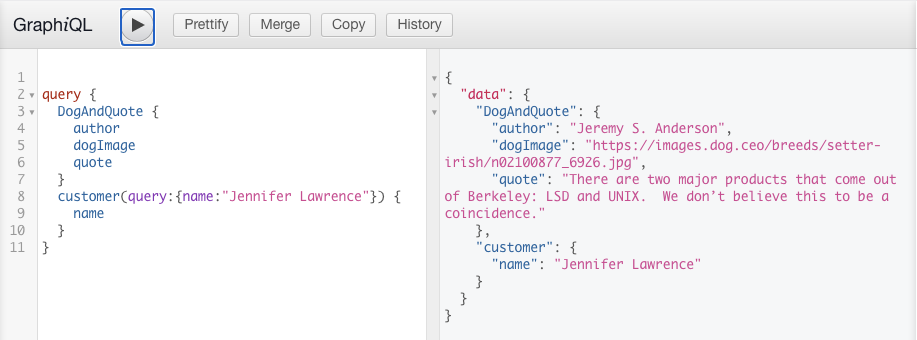
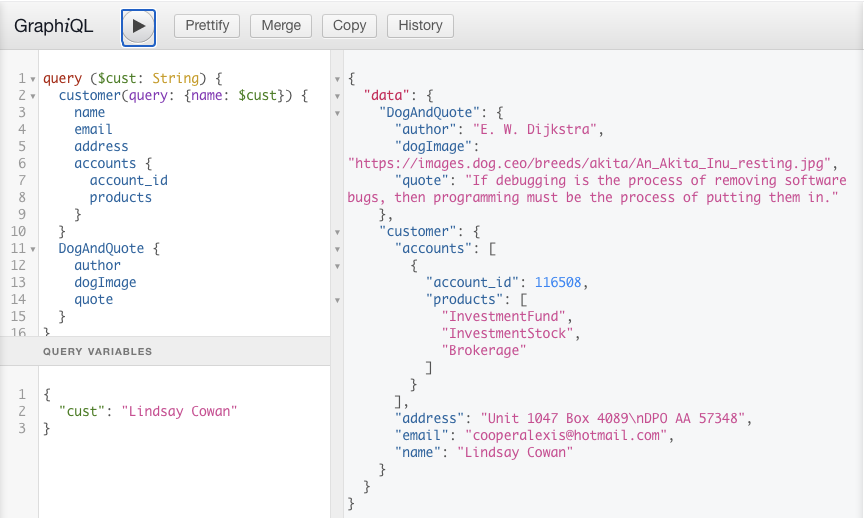
Switch to the Explore tab to see the result from the DogAndQuote query:
For good measure, let's add some simple customer data to the query:
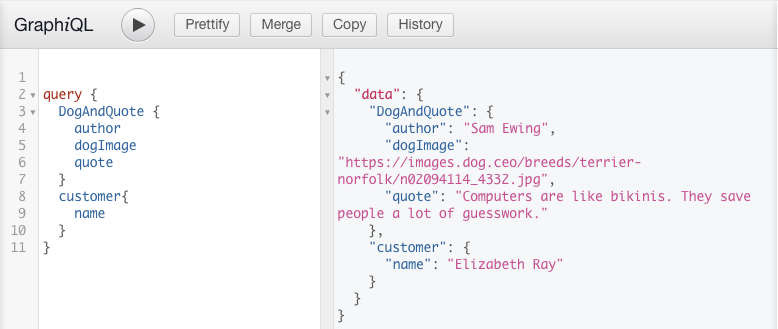
On the backend, data from multiple sources (MongoDB, QuoteAPI and Dog API) was retrieved with a single query - thanks to Realm's support for Custom Resolvers! Now our client can query GraphQL and get exactly the data they want - nothing more, nothing less.
Query Filters and Variables
Our current GraphQL query is just returning a single customer record. We can apply a filter to the query to get a specific customer. For example:
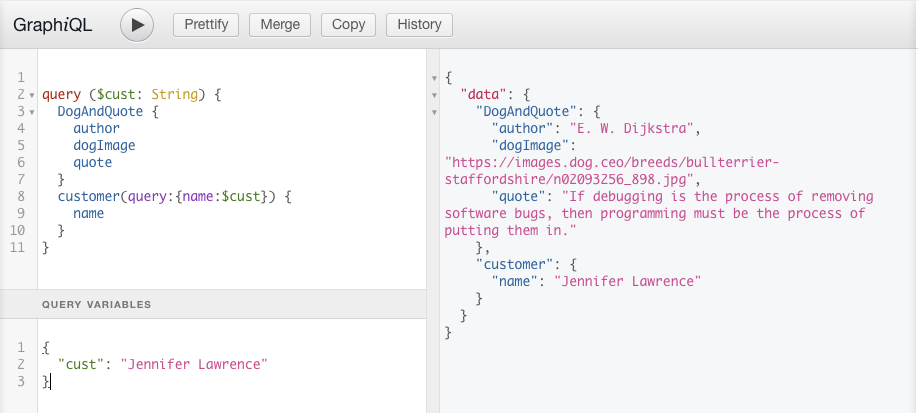
We can then further abstract this query by pulling the name into a variable:
#LET'S FINISH WITH THE FRONT-END
Now that we have our entire GraphQL backend built out, let's use it in an application. At https://github.com/mongodb-developer/BankingDogs you will find 4 files which comprise our BankingDogs web application. Go ahead and download them into an application folder. Open them and let's familiarize ourselves with the code.
On the user interface (BankingDogs.html), there is a form input for a customer name. Upon hitting enter, the application will execute the userAction function in the BankingDogsScript.js file. In the BankingDogsScript.js file, you will see that we have only two points of integration to our Realm application:
- Line 2: Realm App ID
- Line 21: GraphQL endpoint
You will also notice on line 5 that we will need login credentials for Realm GraphQL. As mentioned in Step 2, all GraphQL requests must include an authentication token to identify the logged-in Realm user making the request. Realm built-in authentication support makes your app's authentication implementation quick and painless!
Step 9: Enable Anonymous Authentication
In your Realm interface, navigate over to Users in the left side menu. In the Providers tab, toggle Allow users to log in anonymously to on:
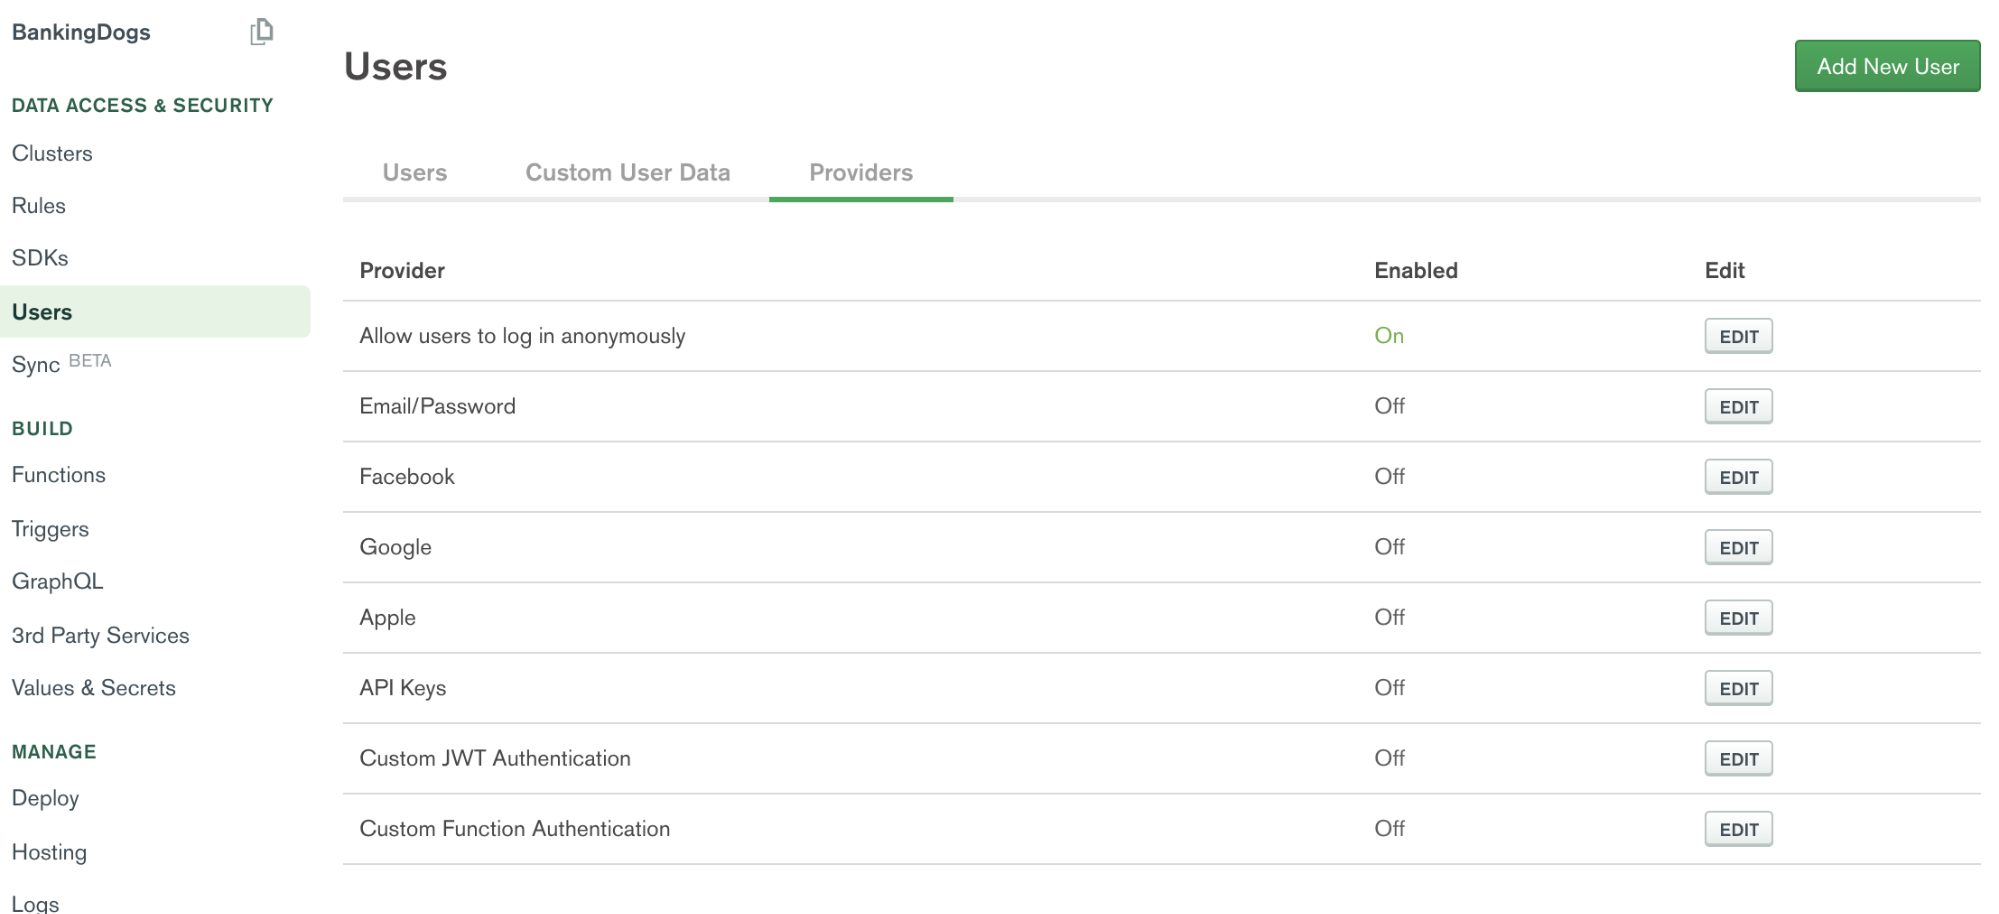
The Anonymous authentication provider allows users to log in to your application without providing credentials.
Since our application is quite basic, anonymous authentication is plenty. However, Realm provides a wide variety of built-in authentication options, such as email/password, Google, Facebook, and even custom authentication. To learn more, check out this brief video tutorial: Intro to MongoDB Stitch: Using Stitch Authentication Providers
Step 10: Link BankingDogs Front-End to Realm Application
As noted earlier, lines 2 and 21 are the sole points of integration for your Realm application to the front end. Currently these are using the endpoints of my BankingDogs application, but go ahead and replace them with your own Realm App ID and GraphQL API endpoint. Navigate back to GraphQL in the left menu to retrieve these.
Step 11: Insert GraphQL Queries
Notice on lines 29-44 in our BankingDogs.js file that we have the query which can be simply cut and pasted directly from our GraphiQL interface.
You can see in the application we are also using a QueryInput to filter for a specific user:
1 const resp = await axios({ 2 url: 'https://realm.mongodb.com/api/client/v2.0/app/bankingdogs-ukaex/graphql', 3 method: 'post', 4 headers: { 5 'Authorization': `Bearer ${user.auth.activeUserAuthInfo.accessToken}` 6 }, 7 data: { 8 variables: {cust}, 9 query :`
query ($cust: String) {
customer(query:{name:$cust}) {
name
email
address
accounts{
account_id
products
}
}
DogAndQuote {
author
dogImage
quote
}
}
` 10 } 11 });
Opening the console in the developer tools, will also show you the entire response payload. Go ahead and play around with your queries in GraphiQL and in the application.

#WRAPPING UP!
Working through our BankingDogs application tutorial, we see how our secure GraphQL server exposes a single endpoint to respond with exactly the data our client application requested - nothing more, nothing less. This simplicity and flexibility leads to cleaner code, reduced payloads, optimized performance, and increased developer productivity. It's easy to see how MongoDB Realm's GraphQL support has made data even more stunningly easy to work with.
To learn more, ask questions, leave feedback or simply connect with other MongoDB developers, visit our community forums. Come to learn. Stay to connect.
For our BankingDogs application, we have only queried data with one role. If you would like to do a more. sophisticated application and employ mutations and varied roles, check out Drew DiPalma's talk from MongoDB .live 2020: Creating Sophisticated GraphQL APIs in Minutes.