
With MongoDB Realm's AWS integration, it has always been as simple as possible to use MongoDB as a Kinesis data stream. Now with the launch of 3rd party data destinations in Kinesis, you can also use MongoDB Realm and MongoDB Atlas as a AWS Kinesis Data Firehose destination.
Keep in mind that this is just an example. You do not need to use Atlas as both the source and destination for your Kinesis streams. I am only doing so in this example to demonstrate how you can use MongoDB Atlas as both an AWS Kinesis Data and Delivery Stream. But, in actuality, you can use any source for your data that AWS Kinesis supports, and still use MongoDB Atlas as the destination.
#Prerequisites
Before we get started, you will need the following:
- A MongoDB Atlas account with a deployed cluster; a free M0 cluster is perfectly adequate for this example
- A MongoDB Realm App. You can learn more about creating a Realm App and linking it to your Atlas cluster in our "Create a Realm App" guide
- An AWS account and the AWS CLI. Check out "What Is the AWS Command Line Interface?" for a guide to installing and configuring the AWS CLI
#Setting up our Kinesis Data Stream

In this example, the source of my data is a Raspberry Pi with a Sense HAT. The output from the Sense HAT is read by a Python script running on the Pi. This script then stores the sensor data such as temperature, humidity, and pressure in MongoDB Atlas.
1 import platform 2 import time 3 from datetime import datetime 4 from pymongo import MongoClient 5 from sense_hat import SenseHat 6 7 # Setup the Sense HAT module and connection to MongoDB Atlas 8 sense = SenseHat() 9 client = MongoClient(process.env.MONGODB_CONNECTION_STRING) 10 db = client.monitors 11 12 sense.load_image("img/realm-sensehat.png") 13 14 # If the acceleration breaches 1G we assume the device is being moved 15 def is_moving(x, y, z): 16 for acceleration in [x, y, z]: 17 if acceleration < -1 or acceleration > 1: 18 return True 19 20 return False 21 22 while True: 23 24 # prepare the object to save as a document in Atlas 25 log = { 26 "nodeName": platform.node(), 27 "humidity": sense.get_humidity(), 28 "temperature": sense.get_temperature(), 29 "pressure": sense.get_pressure(), 30 "isMoving": is_moving(**sense.get_accelerometer_raw()), 31 "acceleration": sense.get_accelerometer_raw(), 32 "recordedAt": datetime.now(), 33 } 34 35 # Write the report object to MongoDB Atlas 36 report = db.reports.insert_one(log) 37 38 # Pause for 0.5 seconds before capturing next round of sensor data 39 time.sleep(0.5)
I then use a Realm Database Trigger to transform this data into a Kinesis Data Stream.
Realm functions are useful if you need to transform or do some other computation with the data before putting the record into Kinesis. However, if you do not need to do any additional computation, it is even easier with the AWS Eventbridge. MongoDB offers an AWS Eventbridge partner event source that lets you send Realm Trigger events to an event bus instead of calling a Realm Function. You can configure any Realm Trigger to send events to EventBridge. You can find out more in the documentation: "Send Trigger Events to AWS EventBridge"
1 // Function is triggered anytime a document is inserted/updated in our collection 2 exports = function (event) { 3 4 // Access the AWS service in Realm 5 const awsService = context.services.get("AWSKinesis") 6 7 try { 8 awsService 9 .kinesis() 10 .PutRecord({ 11 /* this trigger function will receive the full document that triggered the event
put this document into Kinesis
*/ 12 Data: JSON.stringify(event.fullDocument), 13 StreamName: "realm", 14 PartitionKey: "1", 15 }) 16 .then(function (response) { 17 return response 18 }) 19 } catch (error) { 20 console.log(JSON.parse(error)) 21 } 22 }
You can find out more details on how to do this in our blog post "Integrating MongoDB and Amazon Kinesis for Intelligent, Durable Streams."
#Amazon Kinesis Data Firehose Payloads
AWS Kinesis HTTP(s) Endpoint Delivery Requests are sent via POST with a single JSON document as the request body. Delivery destination URLs must be HTTPS.
#Delivery Stream Request Headers
Each Delivery Stream Request contains essential information in the HTTP headers, some of which we'll use in our Realm WebHook in a moment.
X-Amz-Firehose-Protocol-Version: This header indicates the version of the request/response formats. Currently, the only version is 1.0, but new ones may be added in the futureX-Amz-Firehose-Request-Id: This value of this header is an opaque GUID used for debugging purposes. Endpoint implementations should log the value of this header if possible, for both successful and unsuccessful requests. The request ID is kept the same between multiple attempts of the same requestX-Amz-Firehose-Source-Arn: The ARN of the Firehose Delivery Stream represented in ASCII string format. The ARN encodes region, AWS account id, and the stream nameX-Amz-Firehose-Access-Key: This header carries an API key or other credentials. This value is set when we create or update the delivery stream. We'll discuss it in more detail later
#Delivery Stream Request Body
The body carries a single JSON document, you can configure the max body size, but it has an upper limit of 64 MiB, before compression. The JSON document has the following properties:
requestId: Same as the value in the X-Amz-Firehose-Request-Id header, duplicated here for conveniencetimestamp: The timestamp (milliseconds since epoch) at which the Firehose server generated this requestrecords: The actual records of the Delivery Stream, carrying your data. This is an array of objects, each with a single property of data. This property is a base64 encoded string of your data. Each request can contain a minimum of 1 record and a maximum of 10,000. It's worth noting that a record can be empty
#Response Format
When responding to a Delivery Stream Request, there are a few things you should be aware of
#Status Codes
The HTTP status code must be in the 2xx, 4xx, 5xx range; they will not follow redirects, so nothing in the 3xx range. Only a status of 200 is considered a successful delivery of the records; all other statuses are regarded as a retriable error, except 413.
413 (size exceeded) is considered a permanent failure, and will not be retried. In all other error cases, they will reattempt delivery of the same batch of records using an exponential back-off algorithm.
The retries are backed off using an initial back-off time of 1 second with a jitter factor of 15% . Each subsequent retry is backed off using the formula initial-backoff-time * (multiplier(2) ^ retry_count) with added jitter. The back-off time is capped by a maximum interval of 2 minutes. For example on the 'n'-th retry the back-off time is = MAX(120sec, (1 * (2^n)) * random(0.85, 1.15).
These parameters are subject to change. Please refer to the AWS Firehose documentation for exact initial back-off time, max back-off time, multiplier, and jitter percentages.
#Other Response Headers
As well as the HTTP status code your response should include the following headers:
Content-Type: The only acceptable content type is application/jsonContent-Length: The Content-Length header must be present if the response has a body
Do not send a Content-Encoding header, the body must be uncompressed.
#Response Body
Just like the Request, the Response body is JSON, but it has a max filesize of 1MiB. This JSON body has two required properties:
requestId: This must match the requestId in the Delivery Stream Requesttimestamp: The timestamp (milliseconds since epoch) at which the server processed this request
If there was a problem processing the request, you could optionally include an errorMessage property. If a request fails after exhausting all retries, the last Instance of this error message is copied to the error output S3 bucket, if one has been configured for the Delivery Stream.
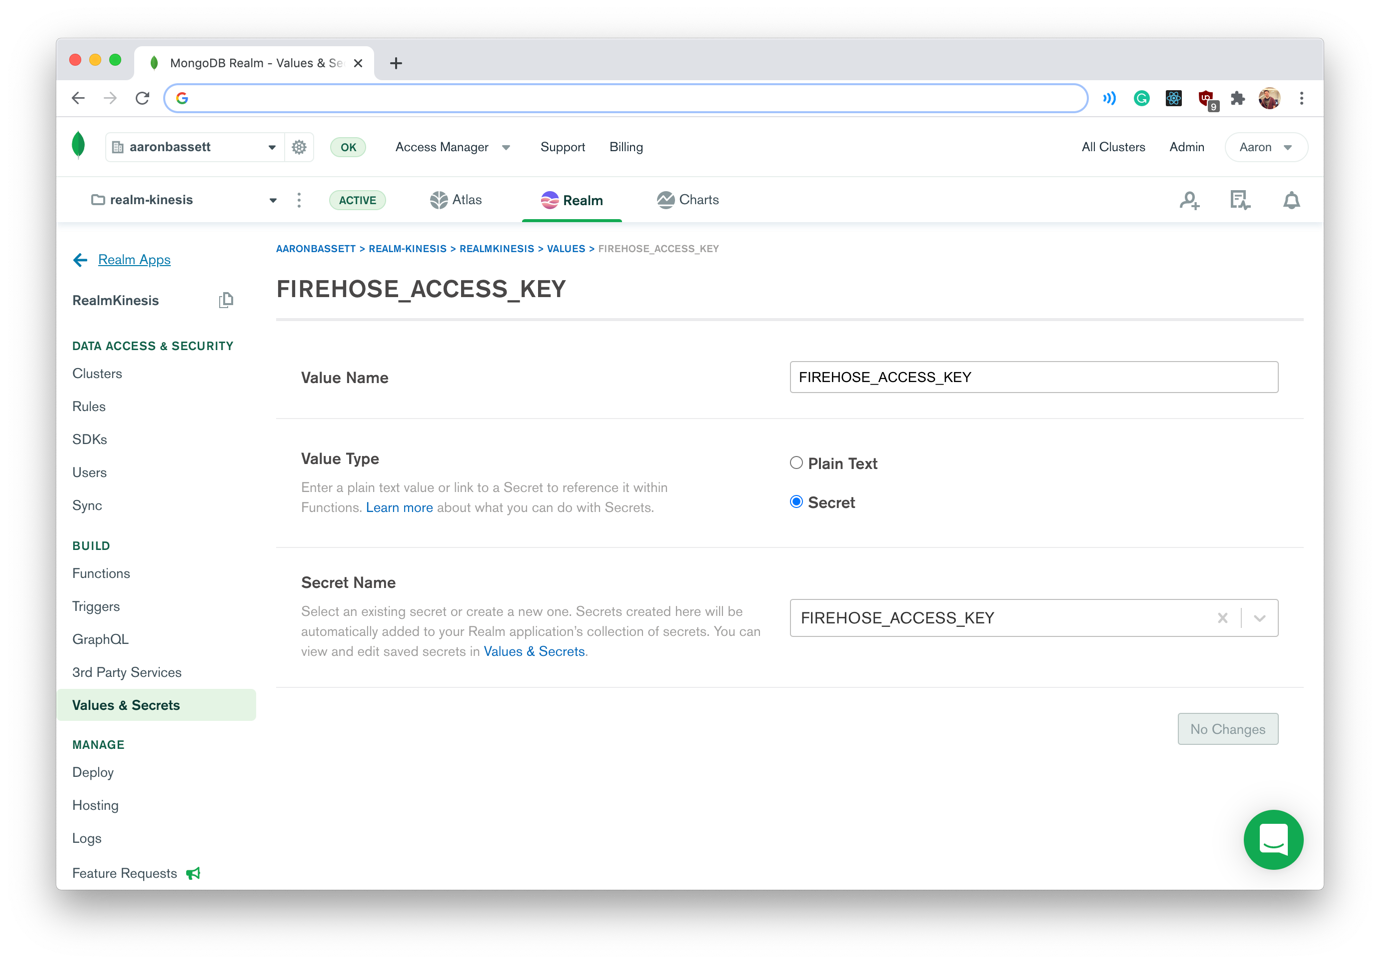
#Storing Shared Secrets
When we configure our Kinesis Delivery Stream, we will have the opportunity to set an AccessKey value. This is the same value which is sent with each request as the X-Amz-Firehose-Access-Key header. We will use this shared secret to validate the source of the request.
We shouldn't hard-code this access key in our Realm function; instead, we will create a new secret named FIREHOSE_ACCESS_KEY. It can be any value, but keep a note of it as you'll need to reference it later when we configure the Kinesis Delivery Stream.
#Creating our Realm WebHook
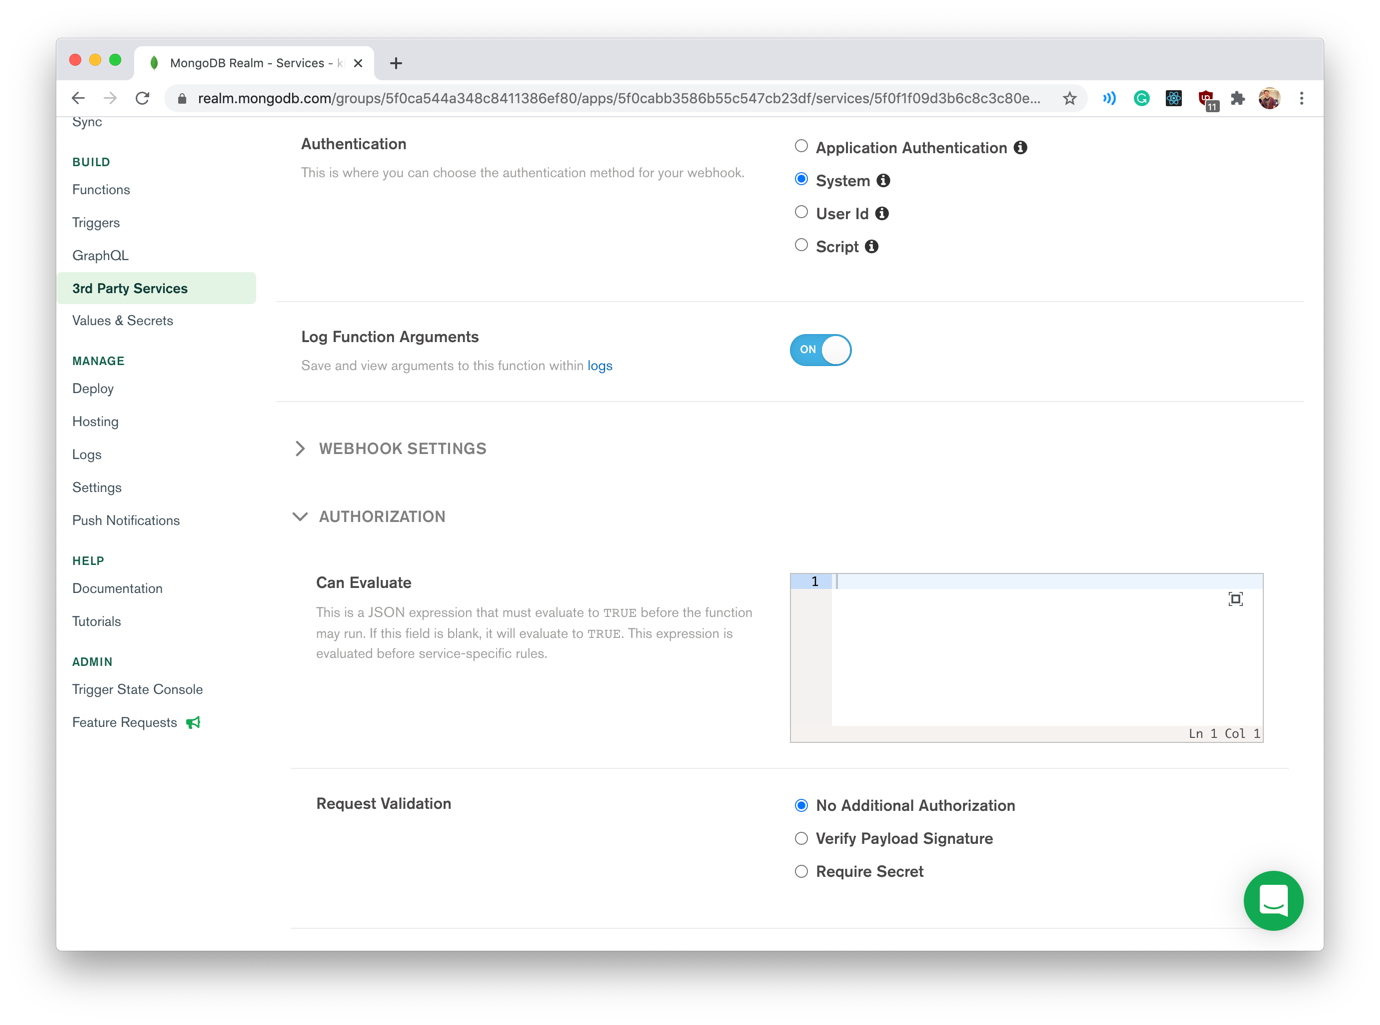
Before we can write the code for our WebHook, we first need to configure it. The "Configure Service WebHooks guide in the Realm documentation goes into more detail, but you will need to configure the following options:
- Authentication type must be set to system
- The HTTP method is POST
- "Respond with result" is disabled
- Request validation must be set to "No Additional Authorisation"; we need to handle authenticating Requests ourselves using the X-Amz-Firehose-Access-Key header
#The Realm Function
For our WebHook we need to write a function which:
- Receives a POST request from Kinesis
- Ensures that the
X-Amz-Firehose-Access-Keyheader value matches theFIREHOSE_ACCESS_KEYsecret - Parses the JSON body from the request
- Iterates over the reports array and base64 decodes the data in each
- Parses the base64 decoded JSON string into a JavaScript object
- Writes the object to MongoDB Atlas as a new document
- Returns the correct status code and JSON body to Kinesis in the response
1 exports = function(payload, response) { 2 3 /* Using Buffer in Realm causes a severe performance hit
this function is ~6 times faster
*/ 4 const decodeBase64 = (s) => { 5 var e={},i,b=0,c,x,l=0,a,r='',w=String.fromCharCode,L=s.length 6 var A="ABCDEFGHIJKLMNOPQRSTUVWXYZabcdefghijklmnopqrstuvwxyz0123456789+/" 7 for(i=0;i<64;i++){e[A.charAt(i)]=i} 8 for(x=0;x<L;x++){ 9 c=e[s.charAt(x)];b=(b<<6)+c;l+=6 10 while(l>=8){((a=(b>>>(l-=8))&0xff)||(x<(L-2)))&&(r+=w(a))} 11 } 12 return r 13 } 14 15 // Get AccessKey from Request Headers 16 const firehoseAccessKey = payload.headers["X-Amz-Firehose-Access-Key"] 17 18 // Check shared secret is the same to validate Request source 19 if(firehoseAccessKey == context.values.get("FIREHOSE_ACCESS_KEY")) { 20 21 // Payload body is a JSON string, convert into a JavaScript Object 22 const data = JSON.parse(payload.body.text()) 23 24 // Each record is a Base64 encoded JSON string 25 const documents = data.records.map((record) => { 26 const document = JSON.parse(decodeBase64(record.data)) 27 return { 28 ...document, 29 _id: new BSON.ObjectId(document._id) 30 } 31 }) 32 33 // Perform operations as a bulk 34 const bulkOp = context.services.get("mongodb-atlas").db("monitors").collection("firehose").initializeOrderedBulkOp() 35 documents.forEach((document) => { 36 bulkOp.find({ _id:document._id }).upsert().updateOne(document) 37 }) 38 39 response.addHeader( 40 "Content-Type", 41 "application/json" 42 ) 43 44 bulkOp.execute().then(() => { 45 // All operations completed successfully 46 response.setStatusCode(200) 47 response.setBody(JSON.stringify({ 48 requestId: payload.headers['X-Amz-Firehose-Request-Id'][0], 49 timestamp: (new Date()).getTime() 50 })) 51 return 52 }).catch((error) => { 53 // Catch any error with execution and return a 500 54 response.setStatusCode(500) 55 response.setBody(JSON.stringify({ 56 requestId: payload.headers['X-Amz-Firehose-Request-Id'][0], 57 timestamp: (new Date()).getTime(), 58 errorMessage: error 59 })) 60 return 61 }) 62 } else { 63 // Validation error with Access Key 64 response.setStatusCode(401) 65 response.setBody(JSON.stringify({ 66 requestId: payload.headers['X-Amz-Firehose-Request-Id'][0], 67 timestamp: (new Date()).getTime(), 68 errorMessage: "Invalid X-Amz-Firehose-Access-Key" 69 })) 70 return 71 } 72 }
As you can see, Realm functions are mostly just vanilla JavaScript. We export a function which takes the request and response as arguments and returns the modified response.
One extra we do have within Realm functions is the global context object. This provides access to other Realm functions, values, and services; you may have noticed in the trigger function at the start of this article that we use the context object to access our AWS service. Whereas in the code above we're using the context object to access the mongodb-atlas service and to retrieve our secret value. You can read more about what's available in the Realm context in our documentation.
#Decoding and Parsing the Payload Body
1 // Payload body is a JSON string, convert into a JavaScript Object 2 const data = JSON.parse(payload.body.text()) 3 4 // Each record is a Base64 encoded JSON string 5 const documents = data.records.map((record) => { 6 const document = JSON.parse(decodeBase64(record.data)) 7 return { 8 ...document, 9 _id: new BSON.ObjectId(document._id) 10 } 11 })
When we receive the POST request, we first have to convert the body—which is a JSON string—into a JavaScript object. Then we can iterate over each of the records.
The data in each of these records is Base64 encoded, so we have to decode it first.
Using
Buffer()within Realm functions may currently cause a degradation in performance. Currently we do not recommend using Buffer to decode Base64 strings, but instead to use a function such asdecodeBase64()in the example above.
This data could be anything, whatever you've supplied in your Delivery Stream, but in this example, it is the MongoDB document sent from our Realm trigger. This document is also a JSON string, so we'll need to parse it back into a JavaScript object.
#Writing the Reports to MongoDB Atlas
Once the parsing and decoding are complete, we're left with an array of between 1 and 10,000 objects, depending on the size of the batch. It's tempting to pass this array to insertMany(), but there is the possibility that some records might already exist as documents in our collection.
Remember if Kinesis does not receive an HTTP status of 200 in response to a request it will, in the majority of cases, retry the batch. We have to take into account that there could be an issue after the documents have been written that prevents Kinesis from receiving the 200 OK status. If this occurs and we try to insert the document again, MongoDB will raise a Duplicate key error exception.
To prevent this we perform a find() and updateOne(), with upsert().
When updating/inserting a single document, you can use updateOne() with the upsert option.
1 context.services.get("mongodb-atlas").db("monitors").collection("firehose").updateOne( 2 {_id: document._id}, 3 document, 4 {upsert: true} 5 )
But we could potentially have to update/insert 10,000 records, so instead, we perform a bulk write.
1 // Perform operations as a bulk 2 const bulkOp = context.services.get("mongodb-atlas").db("monitors").collection("firehose").initializeOrderedBulkOp() 3 documents.forEach((document) => { 4 bulkOp.find({ _id:document._id }).upsert().updateOne(document) 5 })
#Sending the Response
1 bulkOp.execute().then(() => { 2 // All operations completed successfully 3 response.setStatusCode(200) 4 response.setBody(JSON.stringify({ 5 requestId: payload.headers['X-Amz-Firehose-Request-Id'][0], 6 timestamp: (new Date()).getTime() 7 })) 8 return 9 })
If our write operations have completed successfully, we return an HTTP 200 status code with our response. Otherwise, we return a 500 and include the error message from the exception in the response body.
1 ).catch((error) => { 2 // Catch any error with execution and return a 500 3 response.setStatusCode(500) 4 response.setBody(JSON.stringify({ 5 requestId: payload.headers['X-Amz-Firehose-Request-Id'][0], 6 timestamp: (new Date()).getTime(), 7 errorMessage: error 8 })) 9 return 10 })
#Our WebHook URL
Now we've finished writing our Realm Function, save and deploy it. Then on the settings tab copy the WebHook URL, we'll need it in just a moment.
#Creating an AWS Kinesis Delivery Stream
To create our Kinesis Delivery Stream we're going to use the AWS CLI, and you'll need the following information:
- Your Kinesis Data Stream ARN
- The ARN of your respective IAM roles, also ensure that service-principal firehose.amazonaws.com is allowed to assume these roles
- Bucket and Role ARNs for the S3 bucket to be used for errors/backups
- MongoDB Realm WebHook URL
- The value of the
FIREHOSE_ACCESS_KEY
Your final AWS CLI command will look something like this:
1 aws firehose --endpoint-url "https://firehose.us-east-1.amazonaws.com" \ 2 create-delivery-stream --delivery-stream-name RealmDeliveryStream \ 3 --delivery-stream-type KinesisStreamAsSource \ 4 --kinesis-stream-source-configuration \ 5 "KinesisStreamARN=arn:aws:kinesis:us-east-1:78023564309:stream/realm,RoleARN=arn:aws:iam::78023564309:role/KinesisRealmRole" \ 6 --http-endpoint-destination-configuration \ 7 "RoleARN=arn:aws:iam::78023564309:role/KinesisFirehoseFullAccess,\
S3Configuration={RoleARN=arn:aws:iam::78023564309:role/KinesisRealmRole, BucketARN=arn:aws:s3:::realm-kinesis},\
EndpointConfiguration={\
Url=https://webhooks.mongodb-stitch.com/api/client/v2.0/app/realmkinesis-aac/service/kinesis/incoming_webhook/kinesisDestination,\
Name=RealmCloud,AccessKey=sdhfjkdbf347fb3icb34i243orn34fn234r23c}"
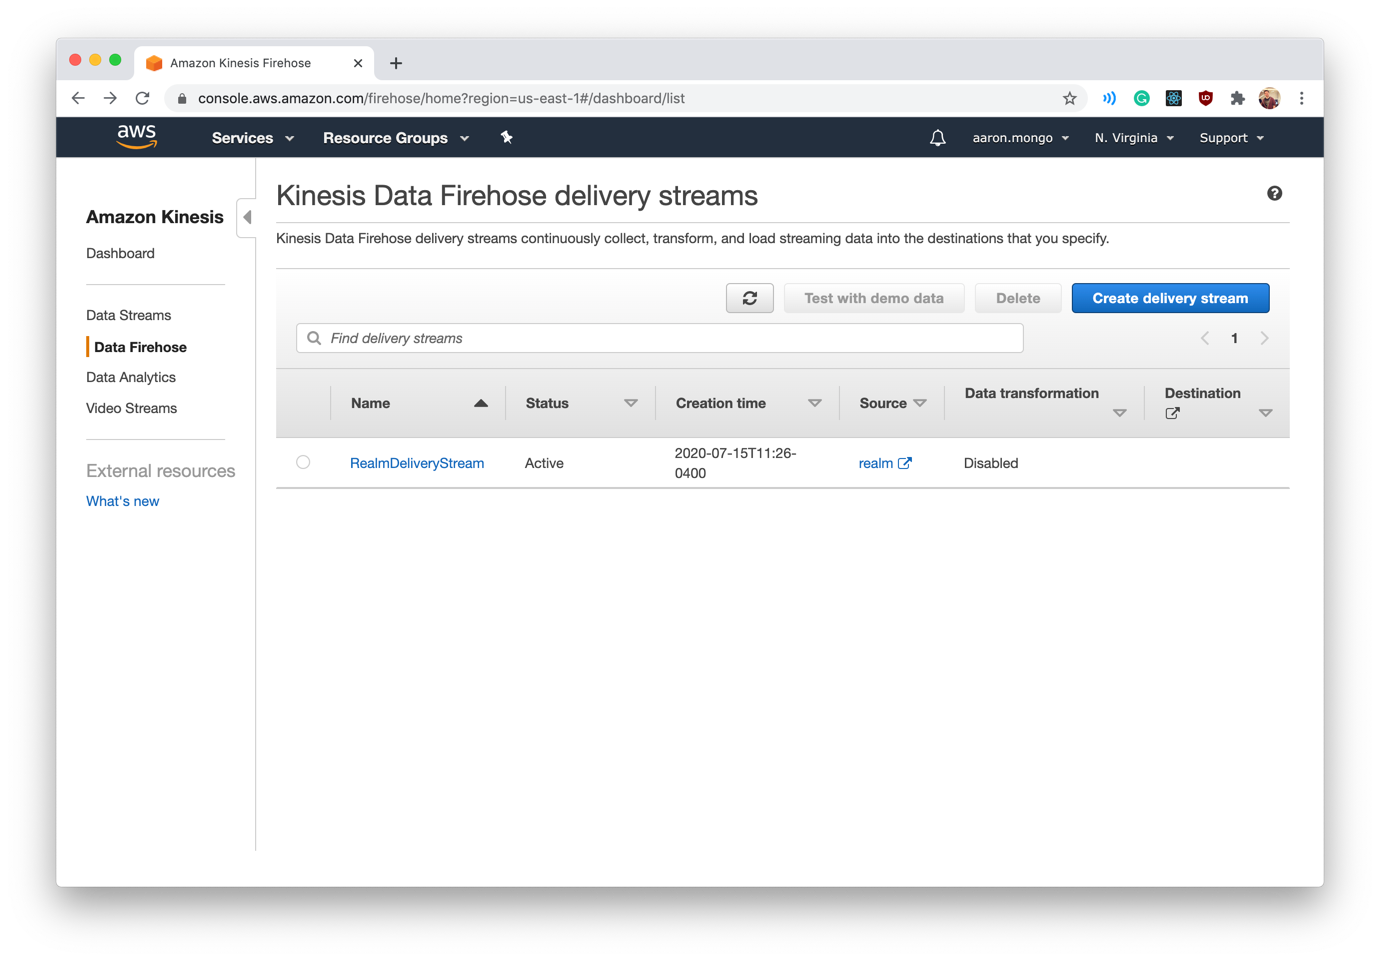
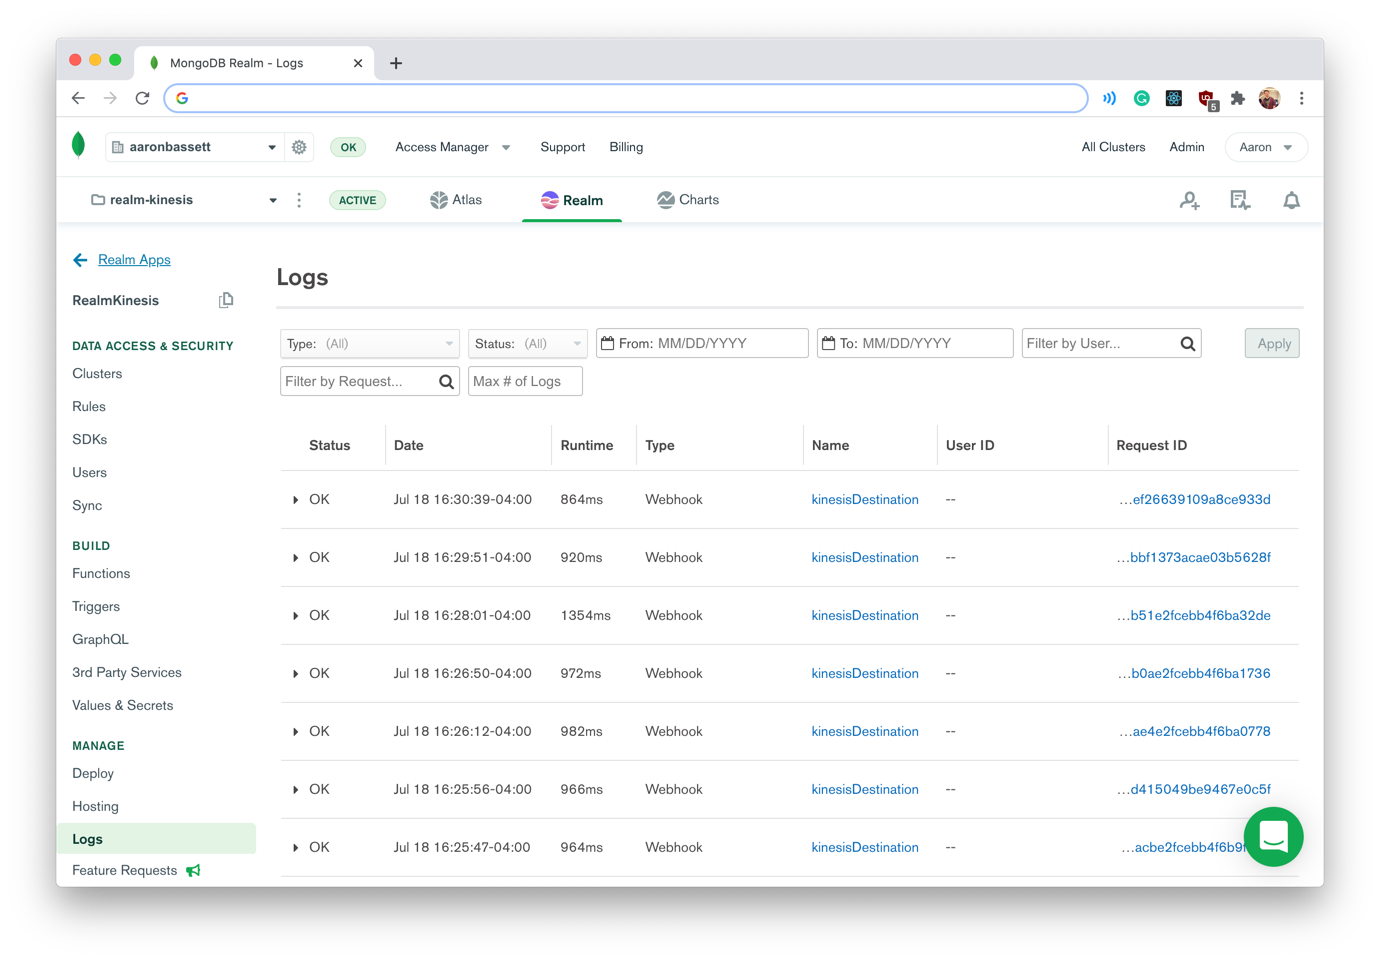
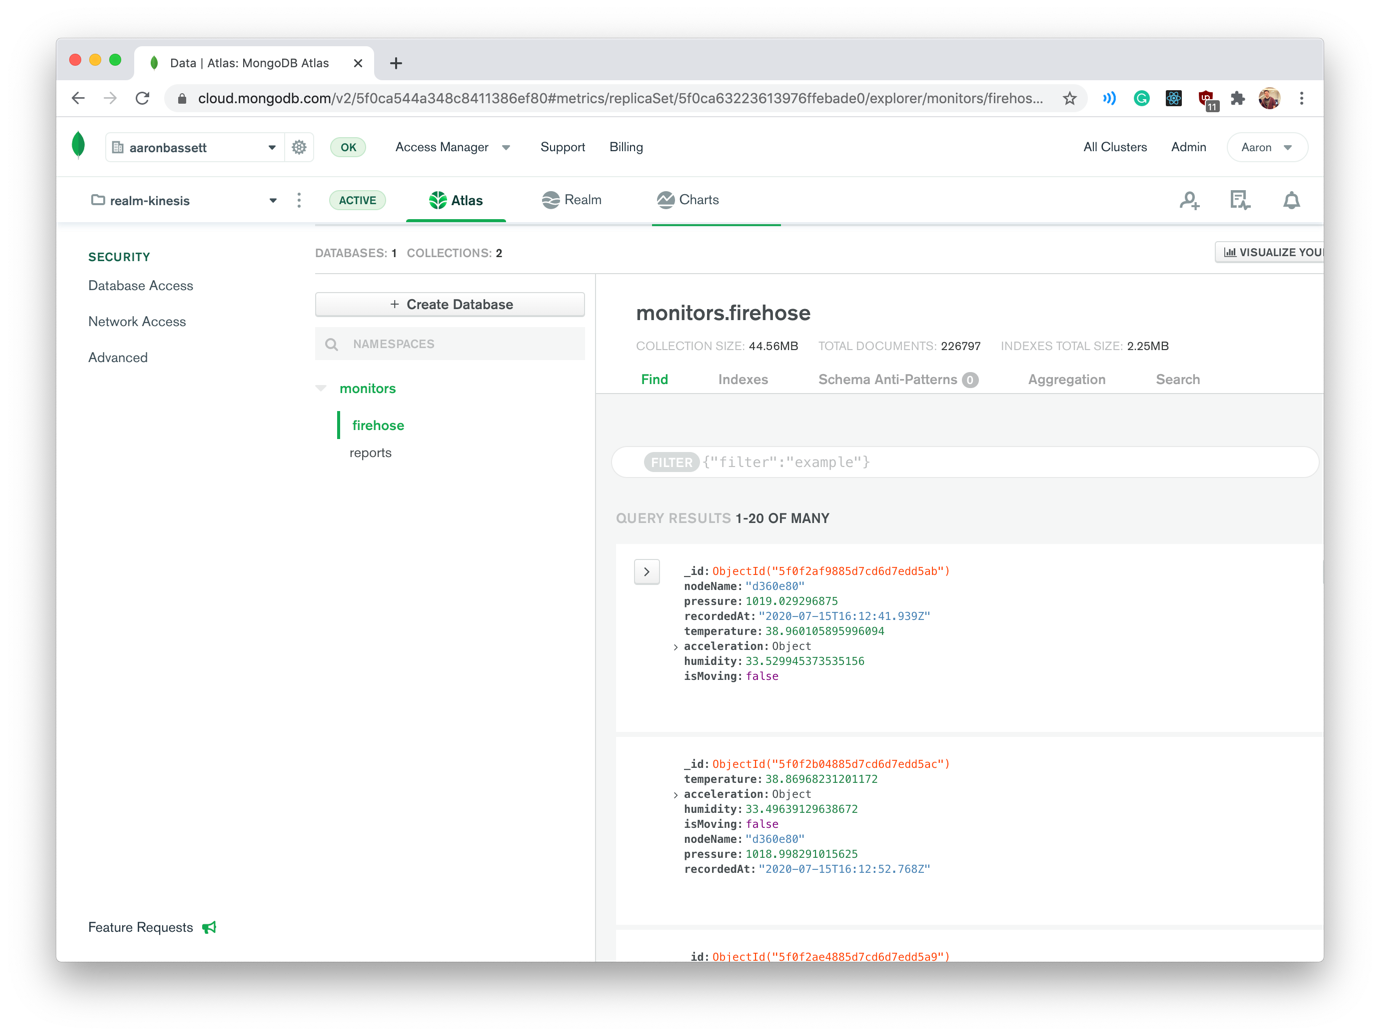
If everything executes correctly, you should see your new Delivery Stream appear in your Kinesis Dashboard. Also, after a few moments, the WebHook event will appear in your Realm logs and documents will begin to populate your collection!
#Next Steps
With the Kinesis data now in MongoDB Atlas, we have a wealth of possibilities. We can transform it with aggregation pipelines, visualise it with Charts, turn it into a GraphQL API, or even trigger more Realm functions or services.
#Further reading
Now you've seen how you can use MongoDB Realm as an AWS Kinesis HTTP Endpoint you might find our other articles on using MongoDB with Kinesis useful:
If you haven't yet set up your free cluster on MongoDB Atlas, now is a great time to do so. You have all the instructions in this blog post.